
Are you tired of your lawn looking a bit unruly? Metal lawn edging might just be the solution you’ve been searching for.
It’s a simple yet effective way to give your garden a neat, defined appearance. Plus, it’s durable and stylish, adding a touch of elegance to your outdoor space. Installing metal lawn edging is easier than you might think, and you don’t need to be a gardening expert to get it right.
In this guide, you’ll discover step-by-step instructions that make the process a breeze. Imagine the satisfaction of seeing your lawn with crisp lines and tidy borders. Ready to transform your garden into a masterpiece? Let’s dive in and explore how you can achieve a polished look with metal lawn edging.
Choosing The Right Metal Edging
Metal lawn edging gives a clean look to your yard. It helps keep grass and mulch separate. Choosing the right metal edging is important for durability and style.
Different metals and shapes fit different needs. Think about your yard size and design before buying.
Types Of Metal Edging
There are several types of metal edging. Each has its own benefits and uses. Pick one that suits your yard and budget.
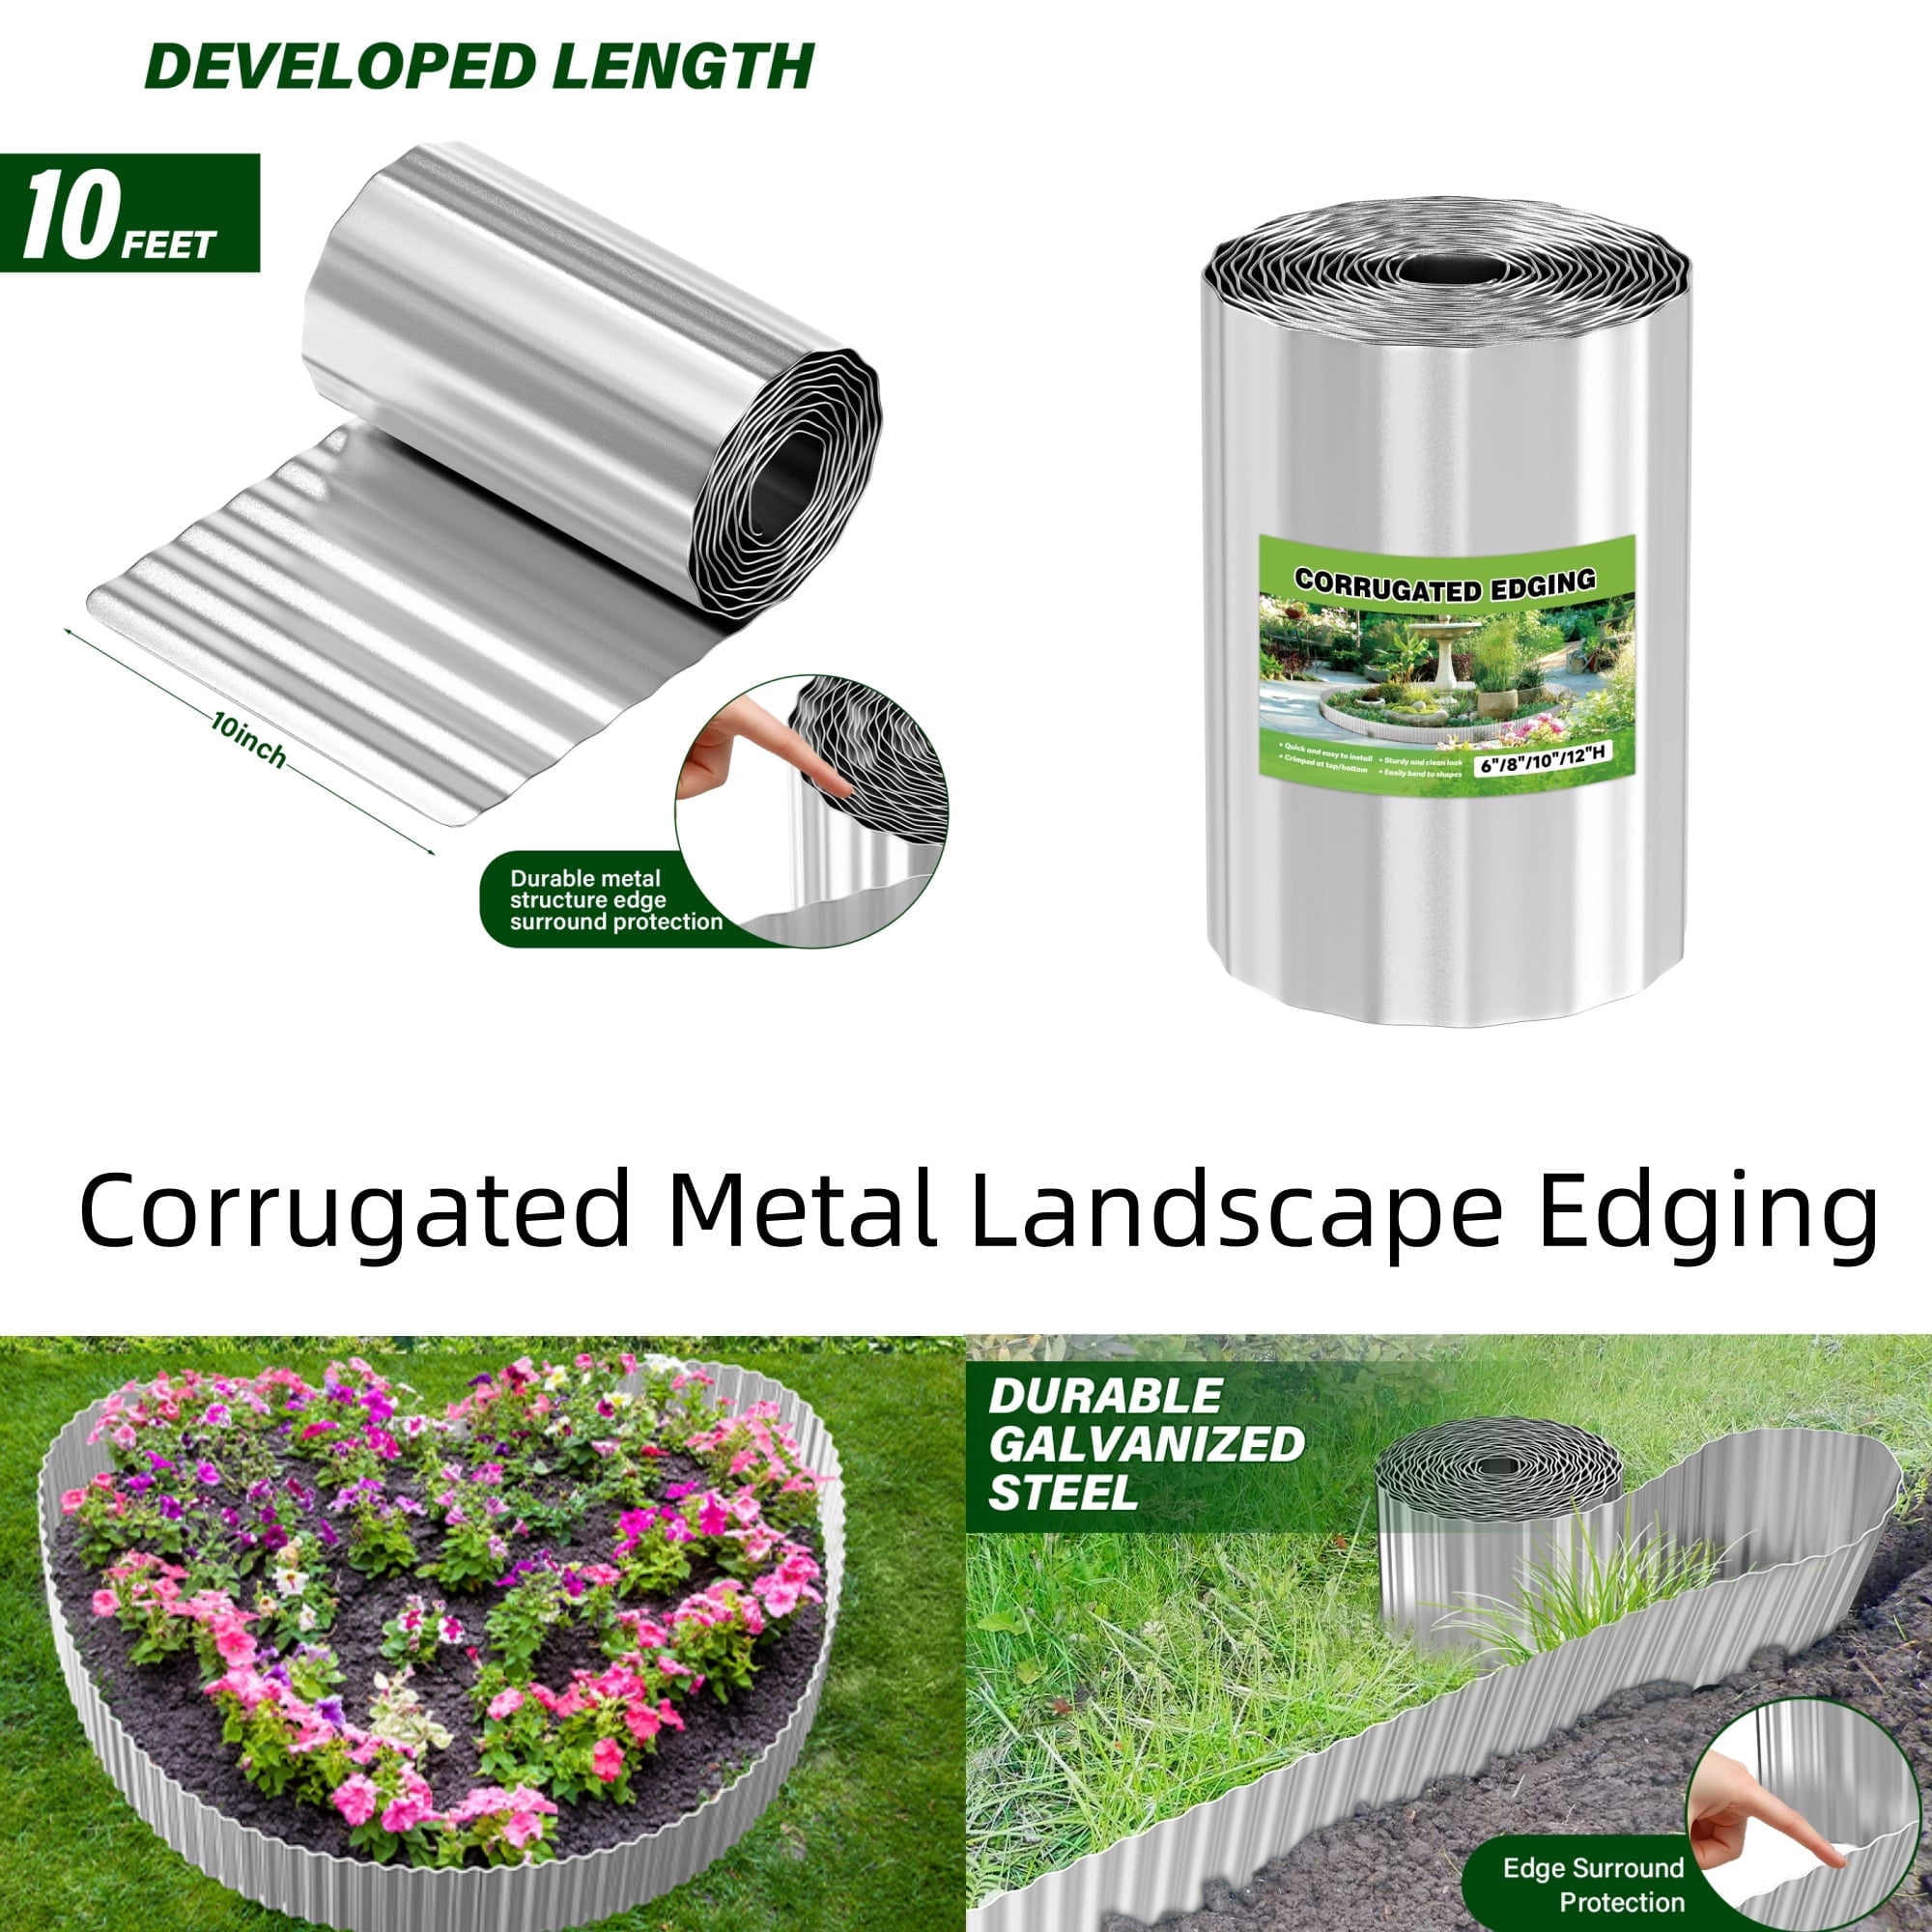
- Steel Edging:Strong and lasts long. It can be coated to resist rust.
- Aluminum Edging:Lightweight and rust-proof. Easy to install but less strong.
- Corten Steel:Rusts naturally to form a protective layer. Offers a rustic look.
- Galvanized Steel:Steel coated with zinc. More resistant to rust and weather.
Measuring Your Yard
Measure the parts of your yard where you want to add edging. Accurate measurements help you buy the right amount of material.
Use a tape measure and mark the edges clearly. Add a few extra feet to your total to allow for cutting mistakes.
- Measure the length of each edge
- Add all lengths together
- Include extra for corners and overlaps
- Write down the total length needed
Tools And Materials Needed
Prepare the right tools before starting the installation. Having everything ready makes the job easier and faster.
- Metal lawn edging pieces
- Measuring tape
- Rubber mallet or hammer
- Garden gloves
- Shovel or spade
- Metal stakes or spikes
- Wire cutters or tin snips (for cutting metal)
- Level (optional, for straight edges)

Credit: www.amazon.ca
Preparing The Installation Area
Installing metal lawn edging starts with a clean and prepared area. This helps the edging fit well and last longer.
Follow these steps to prepare your yard before placing the metal edging.
Clearing The Yard
Remove all debris, rocks, and plants from the area where you want to place the edging. This makes the ground smooth and easy to work with.
- Pull out weeds and grass along the edge line
- Pick up stones and sticks
- Move garden decorations or furniture away
- Trim any overhanging branches
Marking The Edging Line
Use a tool to mark where the metal edging will go. This helps keep the line straight and neat.
- Choose the shape and path for your edging
- Stretch a string tightly along this path
- Use spray paint or chalk to mark the ground along the string
- Double-check the line for smooth curves and straight parts
Digging The Trench
Dig a trench along the marked line to hold the metal edging. The trench depth and width must fit the edging size.
| Trench Dimension | Recommended Size |
| Depth | 4 to 6 inches (10 to 15 cm) |
| Width | 2 to 4 inches (5 to 10 cm) |
Use a spade or trenching tool to dig carefully. Remove all loose soil and level the bottom.
Installing The Metal Edging
Installing metal lawn edging helps create clean borders in your garden. It keeps grass and plants neat.
This guide shows how to position, secure, and connect metal edging sections correctly.
Positioning The Edging
First, decide where you want your lawn edging. Mark the line using a rope or spray paint.
Make sure the line is smooth and straight or follows the curve you want in the lawn.
Securing With Stakes
Use metal stakes to hold the edging in place. Push stakes into the ground along the edging.
Place stakes every 1 to 2 feet to keep the edging stable and prevent it from moving.
- Drive stakes at a slight angle toward the edging
- Make sure stakes are flush with the top edge
- Use a hammer or mallet for firm placement
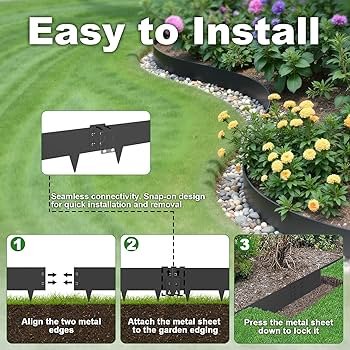
Connecting Edging Sections
Metal edging comes in sections that you need to join together. Use connectors or overlap ends.
Align the ends carefully to keep a smooth line and avoid gaps between sections.
- Slide connectors inside the edging ends
- Tighten connectors if they have screws or clips
- Overlap ends by a few inches if no connectors exist
Credit: www.walmart.com
Finishing Touches
After installing metal lawn edging, finishing touches help secure and improve its look. These steps make your lawn neat and long-lasting.
Proper finishing ensures the edging stays in place and keeps your garden tidy. Focus on backfilling, checking alignment, and regular maintenance.
Backfilling The Trench
Backfilling means filling the trench around the metal edging with soil. This holds the edging steady and hides the edges.
Use soil or sand to fill the trench. Pack it down firmly to stop the edging from moving.
- Fill the trench evenly on both sides
- Press soil down with your foot or a tamper
- Make sure no gaps remain between soil and edging
Checking Alignment And Stability
Check the metal edging line to keep it straight and stable. A crooked edge can spoil your lawn’s look.
Walk along the edging and look for any wobbles or shifts. Fix these by adjusting the soil or repositioning the edging.
- Use a level or string line for straightness
- Push loose parts back into the soil
- Hammer stakes deeper if edging moves
Maintaining Your Metal Edging
Keep your metal edging clean and checked to last many years. Regular care prevents damage and keeps it looking good.
Remove dirt and grass buildup near the edging. Look for rust or bends and fix problems early.
- Clear debris from edges every few months
- Touch up paint to stop rust spots
- Replace or straighten bent sections as needed
:max_bytes(150000):strip_icc()/spr-easyflex-no-dig-landscape-edging-kit-laura-hard-04-b601fc0708bc4522930427eca7d4168c.jpeg)
Credit: www.thespruce.com
Frequently Asked Questions
What Tools Are Needed To Install Metal Lawn Edging?
You need a rubber mallet, garden gloves, a tape measure, a shovel, and metal stakes. These tools help you measure, dig, and secure the edging properly.
How Deep Should Metal Lawn Edging Be Installed?
Install metal edging at least 4 to 6 inches deep. This depth ensures stability and prevents grass or soil from crossing the border.
Can Metal Lawn Edging Be Curved Or Shaped?
Yes, metal lawn edging is flexible and can be bent to create curves. Use gentle pressure or a bending tool for smooth shapes.
How Do I Maintain Metal Lawn Edging?
Clean the edging regularly and check for rust spots. Apply rust-resistant paint or sealant to extend its lifespan and maintain appearance.
Conclusion
Installing metal lawn edging can improve your garden’s look and keep it tidy. Follow each step carefully for best results. Take your time to measure and place the edging straight. Use the right tools to secure it firmly in the ground.
Regular checks help keep the edging in good shape over time. Enjoy a neat garden border that lasts through all seasons. Simple efforts bring lasting beauty to your outdoor space.

