
Are you ready to unlock the true potential of your garden or farm? Knowing exactly what’s in your soil can make all the difference between a healthy, thriving crop and one that struggles to grow.
But how do you find out what your soil really needs? That’s where soil testing comes in. This simple step-by-step guide will show you exactly how to test your soil, so you can give your plants the perfect care they deserve.
Keep reading, and you’ll soon have the confidence to improve your soil and boost your harvest like a pro.
Why Soil Testing Matters
Soil testing helps farmers and gardeners know what is in their soil. It shows the nutrients and pH level of the soil.
This information helps to grow healthy plants and use fertilizers properly. Testing soil saves time and money.
Impact On Plant Health
Soil testing shows what nutrients plants need to grow well. It helps avoid nutrient shortages or toxic levels.
Healthy soil means plants have strong roots and resist diseases better. Good soil supports better plant growth.
Enhancing Crop Yield
Knowing soil health helps farmers apply the right fertilizers. This leads to bigger and better harvests.
It also helps save money by using only the needed nutrients. Testing soil can increase the amount of food grown.
Environmental Benefits
Soil testing reduces the chance of overusing fertilizers. This stops harmful chemicals from reaching water sources.
It helps keep soil healthy for future use. Testing soil protects the environment and supports sustainable farming.
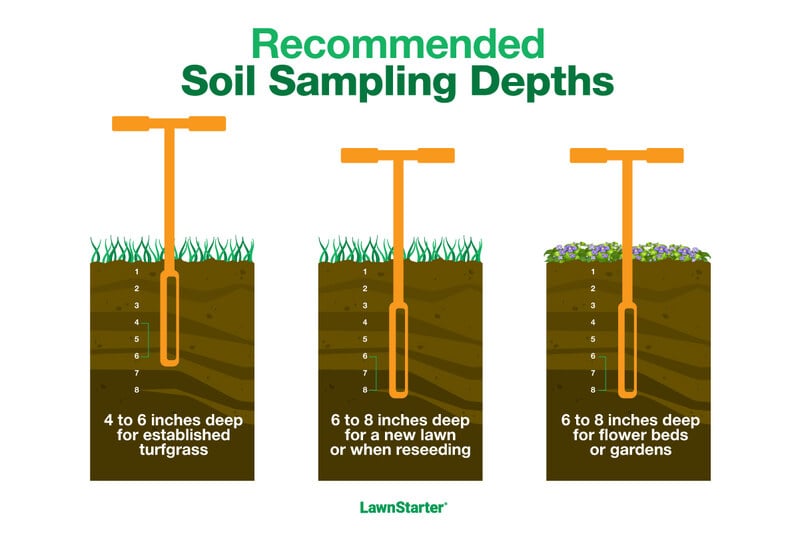
Credit: www.lawnstarter.com
Types Of Soil Tests
Soil testing helps understand the condition of soil. It guides farmers and gardeners to improve plant growth.
Different soil tests measure various factors like acidity, nutrients, and harmful substances.
Ph Testing
pH testing shows if soil is acidic, neutral, or alkaline. This affects how well plants absorb nutrients. The pH scale ranges from 0 to 14. A pH of 7 is neutral. Below 7 is acidic, and above 7 is alkaline.
Knowing the pH helps decide which plants will grow best. It also guides lime or sulfur use to adjust soil pH.
Nutrient Analysis
Nutrient analysis measures key elements in the soil. These include nitrogen, phosphorus, and potassium. These nutrients are vital for plant health.
- Nitrogen helps leaves grow green and strong.
- Phosphorus supports root and flower development.
- Potassium improves overall plant strength and disease resistance.
Other nutrients tested can be calcium, magnesium, and sulfur. Testing shows if fertilizer is needed and which type to use.
Contaminant Screening
Contaminant screening checks soil for harmful chemicals and metals. These can come from pollution, waste, or past land use.
| Contaminant | Source | Impact on Soil |
| Lead | Old paint, industrial waste | Poisonous to plants and animals |
| Arsenic | Pesticides, mining | Can stunt plant growth |
| Cadmium | Fertilizers, industrial pollution | Toxic to plants and humans |
Tools And Materials Needed
Soil testing helps you understand your soil’s health. It shows what nutrients your soil has or lacks.
Before testing, gather the right tools and materials. This makes the process easy and accurate.
Soil Test Kits
Soil test kits are popular for quick checks. They include all items to test soil at home.
These kits measure pH, nitrogen, phosphorus, and potassium. They show if your soil needs fertilizer.
- Test tubes or containers
- Color charts for comparison
- Reagents or chemicals
- Instructions for use
Sampling Tools
Good samples give accurate test results. Use proper tools to collect soil samples.
Common tools include trowels, spades, and soil probes. Clean tools prevent contamination.
- Soil probe or auger for deep samples
- Trowel or small shovel for shallow soil
- Clean plastic bucket to mix samples
- Plastic bags or containers to store soil
Lab Services
Lab services provide detailed soil analysis. They test many nutrients and soil properties.
Send soil samples in clean bags or containers. Labs often provide instructions and forms.
- Clean sample containers or bags
- Labels for sample identification
- Forms to fill with sample details
- Shipping materials if mailing samples
Preparing For Soil Sampling
Soil testing helps understand the soil’s health and nutrients. Proper sampling is important for accurate results.
Preparing well before collecting soil samples saves time and gives better information about your land.
Choosing The Right Time
Pick a good time to take soil samples to get true soil conditions. Avoid very wet or frozen soil.
Test soil before planting or after harvest for best results. Spring or fall are often good seasons.
- Sample when soil is dry but not cracked
- Avoid sampling after heavy rain
- Do not sample frozen soil
- Test before planting or after crop removal
Selecting Sampling Locations
Choose spots that represent the whole field or garden. Avoid unusual areas like old manure piles or near roads.
Divide large fields into smaller sections for sampling. Each section should be similar in soil and crop history.
- Pick 10 to 15 spots in each area
- Avoid spots with fertilizer spills or animal waste
- Mark areas with different soil or crops separately
- Mix samples from each area for one test
Gathering Samples Properly
Use clean tools to collect soil from the selected spots. Take samples from the top 6 inches of soil.
Mix the soil well before sending it for testing. Label the samples clearly with date and location.
- Use a soil probe or clean spade
- Take 1 cup of soil from each spot
- Remove roots and stones from samples
- Combine all samples in a clean container
- Label container with sample details
Conducting Soil Tests At Home
Testing soil at home helps you learn what your soil needs. It shows nutrients and pH levels in the soil.
You can do simple tests with kits from stores. These tests guide you to better grow plants and crops.
Using Diy Test Kits
DIY soil test kits come with tools and instructions. They usually test pH, nitrogen, phosphorus, and potassium.
Collect soil from different spots in your garden. Mix the soil well before testing for better results.
- Remove debris like stones and leaves
- Use clean containers for samples
- Follow kit instructions carefully
- Test samples within a day of collection
Interpreting Results
Read the color changes or digital readings from the test kit. Compare them to the chart provided in the kit.
High or low nutrient levels tell you what to add or avoid. Adjust soil by adding fertilizers or organic matter.
| Test Item | Low Level | Optimal Level | High Level |
|---|---|---|---|
| Soil pH | Below 6.0 (acidic) | 6.0 to 7.5 | Above 7.5 (alkaline) |
| Nitrogen (N) | Less than 10 ppm | 10-50 ppm | More than 50 ppm |
| Phosphorus (P) | Less than 15 ppm | 15-40 ppm | More than 40 ppm |
| Potassium (K) | Less than 50 ppm | 50-150 ppm | More than 150 ppm |
Common Mistakes To Avoid
Do not collect soil from only one spot. Soil varies in different areas of your garden.
Do not use dirty tools or containers. This can change test results.
- Not mixing soil samples well
- Ignoring instructions in the kit
- Testing soil after rain or watering
- Waiting too long to test after soil collection
Sending Samples To A Laboratory
Sending soil samples to a laboratory helps you learn about your soil’s health. Proper handling keeps the samples accurate for testing.
Follow these steps to package and send your soil samples correctly. Then, understand the lab reports and plan your next steps.
Packaging And Shipping Tips
Use clean containers to avoid contamination. Label each sample clearly with location and date.
- Fill containers with dry soil, not wet
- Seal containers tightly to prevent spills
- Place samples in a sturdy box for shipping
- Include a sample submission form with your contact details
- Ship samples quickly to the lab to keep them fresh
Understanding Lab Reports
Lab reports show your soil’s nutrient levels and pH. They also suggest if you need to add fertilizers or lime.
| Test | What It Shows | Why It Matters |
| pH Level | Acidity or alkalinity | Affects nutrient availability |
| Nitrogen (N) | Plant growth nutrient | Needed for leaves and stems |
| Phosphorus (P) | Root development | Supports flowering and fruiting |
| Potassium (K) | Overall plant health | Helps resist disease |
Next Steps After Receiving Results
Use the lab report to plan soil treatment. Make changes based on test recommendations.
- Review nutrient deficiencies listed in the report
- Buy soil amendments like fertilizer or lime
- Apply amendments as per lab instructions
- Retest soil after a few months to check progress
Improving Soil Based On Test Results
Soil testing shows what your soil needs to grow healthy plants. Using the test results helps you fix soil problems.
Follow these steps to improve your soil and get better crop or garden results.
Adjusting Ph Levels
Soil pH affects how plants absorb nutrients. If the pH is too low or high, plants may not grow well.
Use soil test results to know your soil’s pH. Then, add materials to raise or lower it.
- To raise pH (make soil less acidic), add lime (calcium carbonate)
- To lower pH (make soil more acidic), add sulfur or aluminum sulfate
- Test soil pH again after a few months to check changes
Adding Nutrients
Soil tests show which nutrients are missing or low. Common nutrients are nitrogen, phosphorus, and potassium.
Apply fertilizers or supplements based on your soil’s needs. Use the right amount to avoid damage.
| Nutrient | Use | Common Sources |
|---|---|---|
| Nitrogen (N) | Helps leaves grow green and strong | Blood meal, urea, compost |
| Phosphorus (P) | Supports root and flower growth | Bone meal, rock phosphate |
| Potassium (K) | Improves overall plant health | Potash, wood ash |
Organic Amendments
Organic amendments improve soil structure and add nutrients slowly. They help soil hold water and air.
Use compost, manure, or mulch based on your soil test and plant needs.
- Compost adds nutrients and improves soil texture
- Manure provides nitrogen and organic matter
- Mulch protects soil and keeps moisture
Credit: libsys.library.msu.ac.zw
Maintaining Soil Health Over Time
Soil health is vital for growing strong plants and good crops. Testing soil regularly helps keep it balanced and rich in nutrients.
Healthy soil supports plant growth, reduces pests, and protects the environment. This guide explains how to maintain soil health over time.
Regular Testing Schedule
Test your soil at least once every year. This helps track changes in nutrient levels and pH balance. Some soils need more frequent tests.
- Collect soil samples from different parts of your field or garden.
- Send samples to a lab or use a home testing kit.
- Record the results and compare them each year.
- Adjust fertilizing and watering based on the results.
Crop Rotation Benefits
Changing crops each season helps keep soil healthy. Different plants use different nutrients and reduce pests.
| Crop Type | Soil Benefit |
| Legumes (beans, peas) | Add nitrogen to soil |
| Root Crops (carrots, beets) | Loosen soil and improve aeration |
| Leafy Greens (lettuce, spinach) | Use different nutrients than roots |
| Fruits (tomatoes, peppers) | Help break pest cycles |
Rotate crops in a planned order. This keeps soil fertile and avoids nutrient depletion.
Soil Conservation Techniques
Protect soil from erosion and damage with simple methods. These keep soil healthy and in place.
- Use mulch to keep soil moist and prevent weeds.
- Plant cover crops to protect soil during off seasons.
- Build terraces on slopes to reduce water runoff.
- Practice no-till farming to keep soil structure intact.
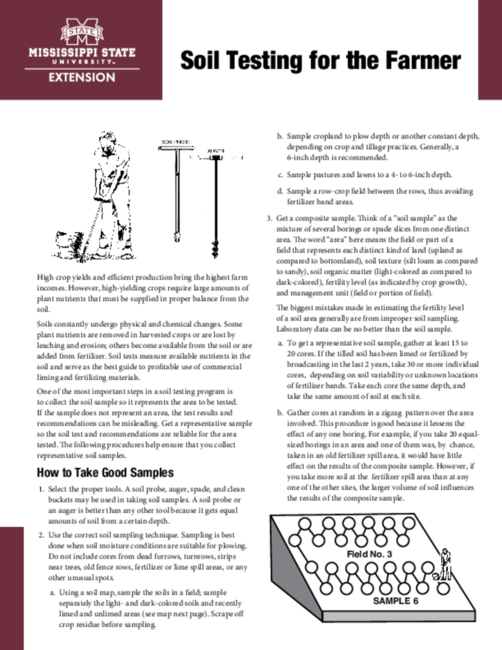
Credit: extension.msstate.edu
Frequently Asked Questions
What Is The Importance Of Soil Testing?
Soil testing helps determine nutrient levels and pH balance. It guides proper fertilizer use and improves crop yields. Testing prevents overuse of chemicals, saving money and protecting the environment.
How Do I Collect Soil Samples Correctly?
Collect soil from multiple spots in your area. Use a clean tool to dig 6-8 inches deep. Mix samples in a clean container for a representative test.
When Is The Best Time For Soil Testing?
The best time is before planting or during early spring. Testing then allows for timely soil amendments. Avoid wet or frozen soil for accurate results.
What Nutrients Does Soil Testing Measure?
Soil tests typically measure nitrogen, phosphorus, potassium, pH, and organic matter. Some tests include micronutrients like iron and zinc. Knowing nutrient levels helps tailor fertilizer application.
Conclusion
Soil testing is essential for healthy plants. It guides your fertilization decisions. Testing helps understand soil nutrients and pH levels. These factors affect plant growth. Use this guide to test your soil step by step. Make informed choices for your garden.
Save money by using the right amount of fertilizer. Prevent over-fertilization, which harms the environment. Your plants will thrive with the right nutrients. Healthy soil leads to a bountiful harvest. Regular testing keeps your garden in top shape. Follow this guide for the best results.
Enjoy a flourishing garden with happy plants!

