
Is your lawn edging looking worn out or broken? Damaged lawn edging can make your beautiful garden look messy and unfinished.
But don’t worry—you don’t have to replace it all or spend a fortune on professional help. You’ll discover simple, effective ways to fix your lawn edging quickly and easily. By the time you’re done reading, you’ll have the confidence and know-how to restore your lawn’s clean, sharp look.
Let’s get started and bring your garden back to life!
Identify Lawn Edging Damage
Checking your lawn edging regularly helps keep your garden neat. Early damage detection stops bigger problems.
Look closely at the edges around your lawn. Find any signs of wear or breaks that need fixing.
Common Types Of Damage
Lawn edging can suffer from many problems. Knowing these helps you spot trouble fast.
- Cracks or breaks in plastic or metal edging
- Bent or warped edges from lawnmowers or foot traffic
- Discoloration or fading due to sun exposure
- Loose or shifted edging pieces that leave gaps
- Rust on metal edging parts
- Root growth pushing the edging out of place
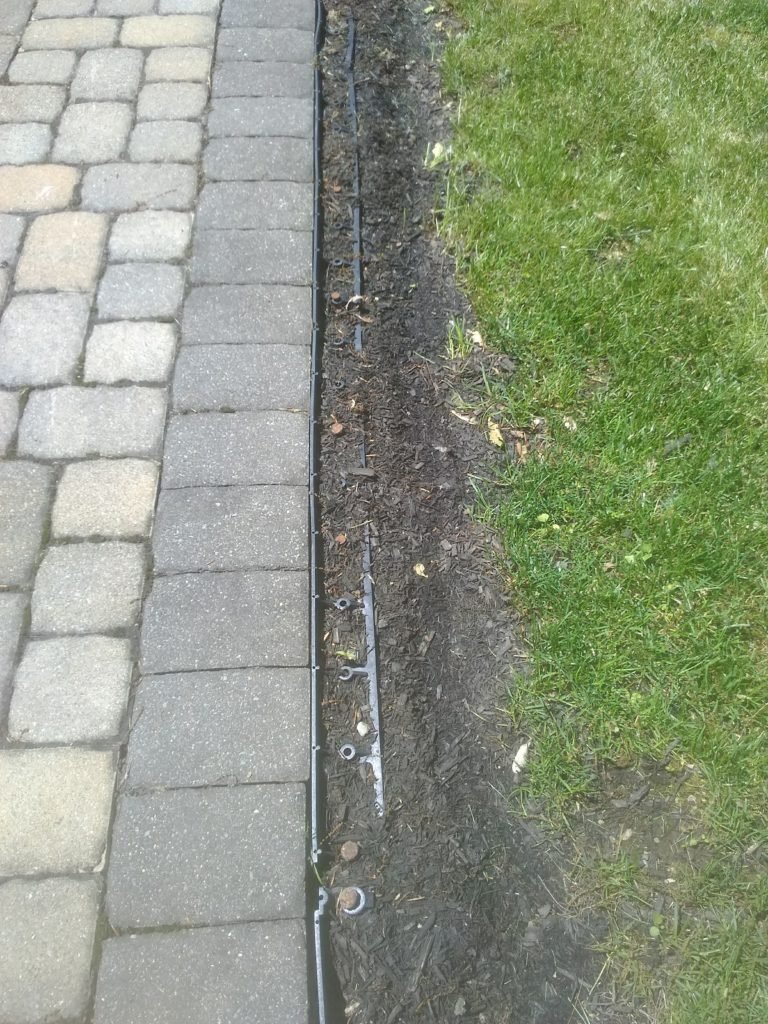
Tools Needed For Inspection
Use the right tools to check your lawn edging well. They help you find hidden or small damage.
| Tool | Purpose |
| Flashlight | See cracks and gaps in shaded areas |
| Gloves | Protect hands while checking edges |
| Measuring Tape | Measure gaps or shifts in edging |
| Garden Trowel | Dig around edges to check for root damage |
| Wire Brush | Clean rust off metal edging |
| Camera or Phone | Take photos to track damage over time |

Credit: perfectpaverco.com
Remove Damaged Sections
Fixing damaged lawn edging starts with removing broken parts. This step keeps your lawn neat and ready for new edging.
Careful removal prevents harm to your lawn and makes repair easier. Follow safe methods for best results.
Safe Removal Techniques
Use hand tools like pliers or a flat shovel to lift edging gently. Avoid sharp tools that can damage soil or plants.
Work slowly along the edging line. Pull out small sections at a time to reduce soil disturbance.
- Loosen soil around the edging first
- Pull edging straight out to avoid bending
- Wear gloves to protect your hands
- Keep tools clean and sharp for easier work
- Check for buried staples or spikes before pulling
Disposing Old Edging Materials
Sort old edging by material type before disposal. Some materials recycle better than others.
Plastic edging can go to recycling centers that accept plastic lawn products. Metal edging often recycles as scrap metal.
- Separate plastic, metal, and wood pieces
- Remove any attached nails or staples
- Check local recycling rules for lawn edging
- Dispose non-recyclables in yard waste or trash bins
Prepare The Area
Fixing damaged lawn edging starts with getting the area ready. A clean and level base helps the edging stay strong.
Take time to clear debris and level the ground before installing or repairing the edging.
Clearing Debris And Weeds
Remove all leaves, sticks, and stones from the edging area. These can block the edging and cause damage.
Pull out any weeds or grass growing near the edging line. Weeds can push the edging out of place over time.
- Use a rake or broom to clear loose debris
- Pull weeds by hand or use a small hoe
- Dispose of all debris away from the lawn
Leveling The Ground
Check the ground where the edging will sit. It should be flat and even to prevent gaps.
Use a shovel to dig or fill areas as needed. Firm the soil with your foot or a tamper.
- Remove bumps and fill low spots
- Compact the soil to make it firm
- Ensure the surface slopes slightly away from the lawn
Credit: www.homeserve.com
Choose Replacement Materials
Fixing damaged lawn edging starts with picking the right material. The choice affects how long your edging lasts.
Different materials suit different garden styles and budgets. Choose one that fits your needs and looks good.
Plastic Vs Metal Edging
Plastic edging is lightweight and easy to install. It resists rust and is usually less expensive than metal.
Metal edging is strong and long-lasting. It holds its shape well and can give a clean, modern look.
- Plastic is flexible and good for curves.
- Metal lasts longer but can rust without treatment.
- Plastic may fade in sunlight over time.
- Metal works well for straight lines and sharp corners.
Natural Edging Options
Natural edging uses materials like stone, wood, or bricks. It blends well with garden plants and soil.
These materials add charm but may need more care. Wood can rot, and stone or brick can shift.
- Stone edges look natural and last a long time.
- Wood gives a rustic feel but can decay.
- Bricks create neat lines and are easy to find.
- Natural options may cost more and take more work.
Install New Edging
Replacing damaged lawn edging keeps your garden neat. Installing new edging creates clear borders.
Good edging stops grass and plants from spreading out. It also improves the lawn’s look.
Step-by-step Installation
Start by removing old or broken edging carefully. Clear the area of dirt and debris for a smooth base.
Measure the border length to cut the new edging correctly. Place the edging along the edge before fixing it down.
- Remove old edging and clean the area
- Measure and cut new edging to fit
- Place edging along the lawn border
- Check alignment before securing
Securing Edging Properly
Use stakes or spikes to hold edging firmly in place. Push them deep enough to prevent movement.
Check that the edging is straight and level. Secure edges tightly to stop soil or grass from pushing it out.
- Insert stakes every few feet
- Ensure edging sits flush with the ground
- Tamp soil around edging for support
- Double-check stability after installation
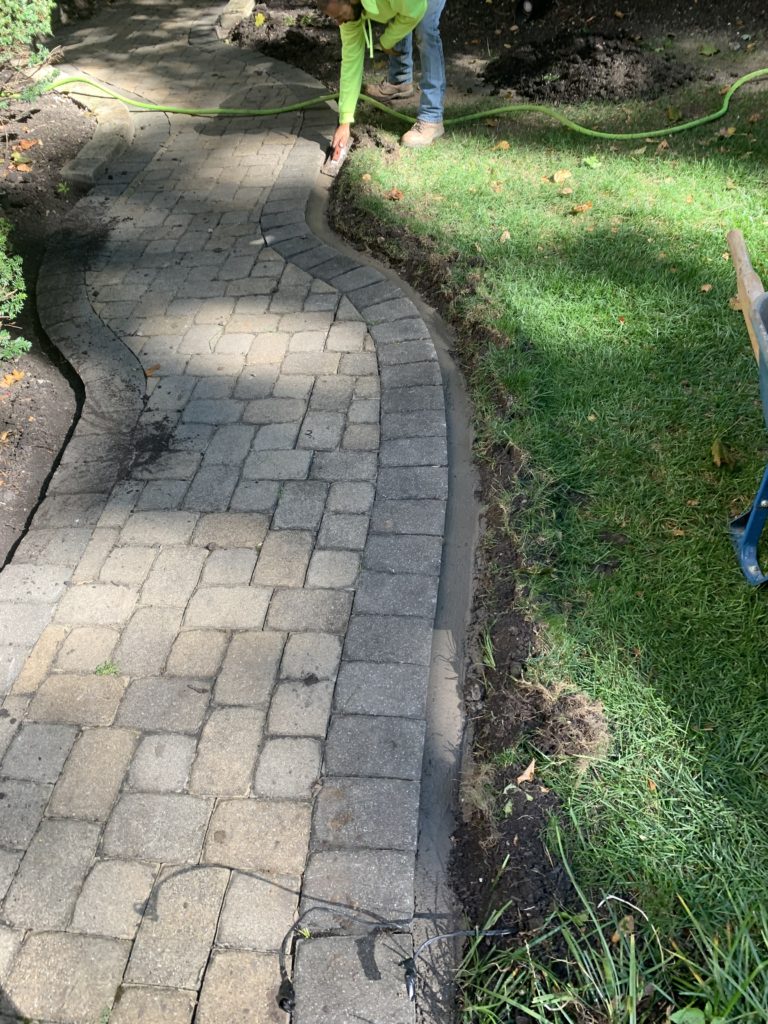
Credit: perfectpaverco.com
Maintain Lawn Edging
Lawn edging adds a neat border to your garden. Keeping it in good shape is important. Regular maintenance prevents damage and keeps your lawn looking tidy.
Proper care ensures the edges stay intact. Follow these simple tips to maintain your lawn edging effectively.
Regular Trimming Tips
Trimming helps keep the grass from growing over the edges. Use a pair of sharp shears for clean cuts. This stops grass from weakening the edging.
Make sure to trim the edges every couple of weeks. This prevents overgrowth and keeps the lawn looking neat.
- Trim after mowing the lawn
- Check for stones or debris before trimming
- Use a string trimmer for hard-to-reach areas
Preventing Future Damage
Prevent damage by installing durable materials. Use metal or plastic edging for longer-lasting borders.
Avoid using heavy machinery near the edges. This helps in reducing physical damage to the edging material.
- Choose weather-resistant materials
- Inspect edging for cracks or wear regularly
- Repair small damages immediately to avoid bigger issues
Frequently Asked Questions
How Do I Repair Cracked Plastic Lawn Edging?
To repair cracked plastic edging, clean the area first. Use strong adhesive or plastic welding kits. Clamp the edges until the glue dries. This prevents further damage and restores edging strength.
What Materials Fix Damaged Lawn Edging Effectively?
Common repair materials include plastic weld, adhesive glue, replacement stakes, and edging connectors. Choose based on your edging type for a secure fix.
How Can I Prevent Lawn Edging From Breaking Again?
Avoid using heavy equipment near edges. Regularly inspect and replace damaged parts. Install protective barriers to reduce impact and extend edging life.
When Should I Replace Damaged Lawn Edging?
Replace edging if cracks are extensive or repairs fail. Severe warping or missing sections also require full replacement for a neat lawn appearance.
Conclusion
Fixing damaged lawn edging keeps your yard neat and tidy. Small repairs save time and money later. Choose the right tools and materials for best results. Regular care prevents future damage and keeps edges sharp. A clean lawn edge makes your garden look cared for.
Try these simple steps to restore your lawn edging today. Enjoy a fresh, well-maintained outdoor space all year long.
