
Are you planning to grow a thriving garden or healthy lawn in your backyard? One key step you can’t afford to skip is testing your soil.
But how many soil samples do you really need to get accurate results? Taking too few might leave you guessing, while too many can waste your time and money. You’ll discover the simple way to figure out the right number of soil samples for your backyard.
Keep reading to make sure your soil testing sets you up for success and a garden that truly flourishes.
Factors Affecting Sample Number
Testing soil in your backyard helps you understand its health. The number of samples needed depends on some key factors.
Knowing these factors will guide you to take the right amount of samples for accurate results.
Backyard Size
Larger backyards usually need more soil samples. Small yards may only need a few samples to represent the soil well.
- Small yards (less than 500 sq ft): 3–5 samples
- Medium yards (500 to 2,000 sq ft): 5–10 samples
- Large yards (over 2,000 sq ft): 10 or more samples
Soil Variation
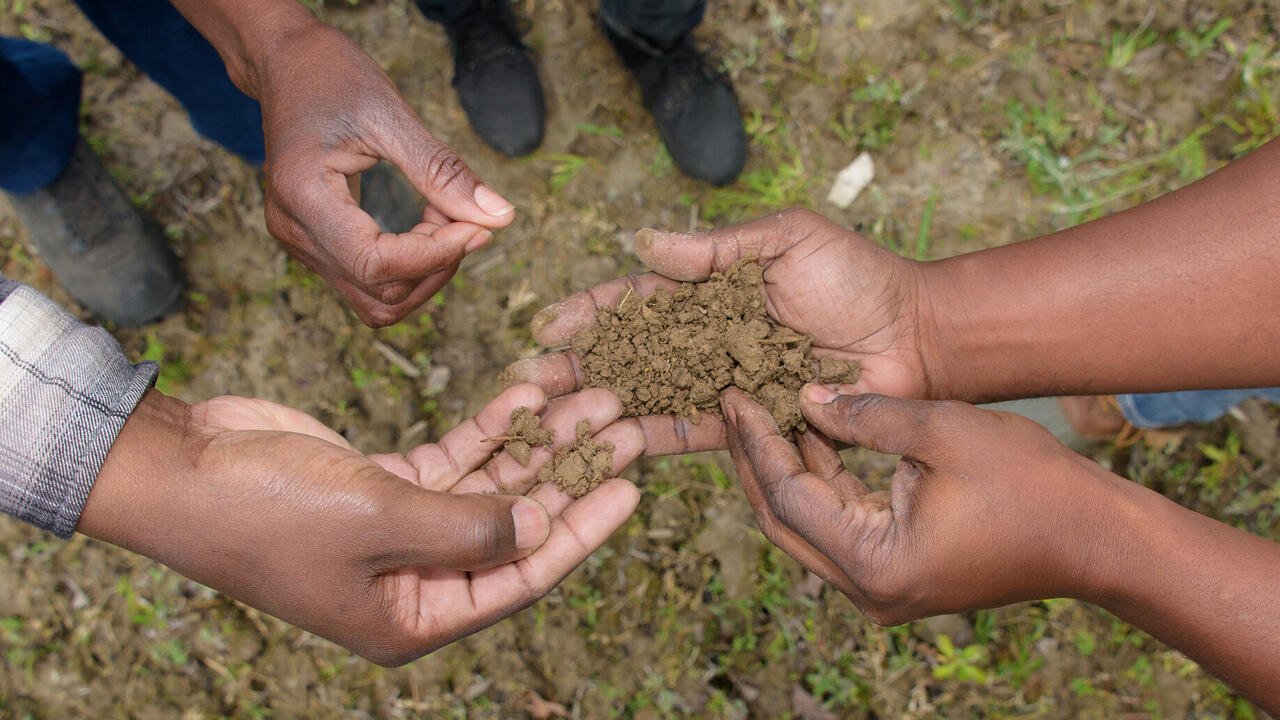
Soil changes in color, texture, and feel can mean different nutrient levels. More variation means you need more samples.
| Soil Condition | Sample Number Needed |
|---|---|
| Uniform soil | Few samples |
| Mixed soil types | More samples |
| Patchy or rocky soil | Many samples |
Purpose Of Testing
What you want to learn from your soil test affects how many samples to take. Different goals require different sampling strategies.
- General soil health check: fewer samples needed
- Gardening or planting specific crops: moderate samples
- Detailed nutrient or contamination study: many samples

Credit: gracefulgardens.com
Sampling Methods
Collecting soil samples helps you know what is in your backyard soil. Different methods show different results. Choosing the right method is important for good soil testing.
Each method gives a different way to collect samples. Some cover the area evenly, while others focus on parts. Here are three common sampling methods you can use.
Random Sampling
Random sampling means taking soil samples from random spots in your backyard. This method is simple and fast. It gives a general idea of the soil’s condition.
Random sampling works best if your soil looks the same everywhere. You can use a random number generator or close your eyes and pick spots.
Grid Sampling
Grid sampling divides your backyard into equal squares. You take one sample from each square. This method is good for large or uneven areas.
- Draw a grid over your yard on a map.
- Choose one spot in each grid box.
- Collect soil samples from these spots.
- Mix samples from each box to make one sample.
Grid sampling helps find soil differences across your yard. It is more detailed than random sampling but takes more time.
Zonal Sampling
Zonal sampling divides your yard into zones. Zones are based on how you use the land or soil types. You take samples from each zone separately.
| Zone Type | Description | Sampling Tip |
| Vegetable garden | Area where you grow vegetables | Take several samples due to varied soil use |
| Lawn | Grass-covered area | Take fewer samples, soil is usually uniform |
| Flower beds | Spots with flowers and shrubs | Sample near plant roots for best results |
Recommended Sample Quantities
Collecting the right number of soil samples helps you understand your backyard’s soil health. It ensures accurate test results for better gardening decisions.
The size of your backyard affects how many samples you need. Use these guidelines to decide how many soil samples to take.
Small Backyard
For a small backyard up to 500 square feet, take 3 to 5 soil samples. Mix them well to get a good average of the soil condition.
Medium Backyard
A medium backyard ranges from 500 to 1,500 square feet. Take 5 to 10 soil samples from different spots to cover soil variations.
- Divide the yard into sections
- Collect 1 or 2 samples per section
- Combine samples in a clean bucket
- Mix well before testing
Large Backyard
Large backyards over 1,500 square feet need 10 or more samples. More samples give a better soil picture for the whole area.
| Backyard Size | Recommended Sample Quantity | Notes |
|---|---|---|
| Small (up to 500 sq ft) | 3 to 5 samples | Mix for average results |
| Medium (500 to 1,500 sq ft) | 5 to 10 samples | Sample by sections |
| Large (over 1,500 sq ft) | 10+ samples | More samples improve accuracy |
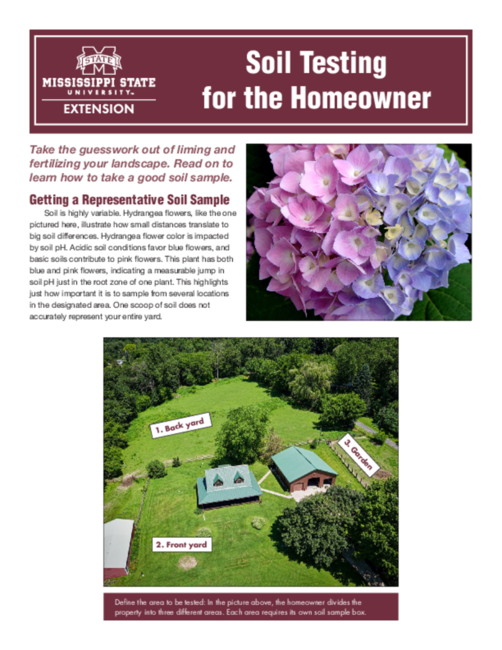
Credit: extension.msstate.edu
Collecting Soil Samples
Collecting soil samples helps you understand your backyard’s soil quality. This knowledge guides you to improve plant growth. Proper sampling is simple if you follow the right steps.
Gathering samples from different spots gives a clear picture of your soil. You will need a few tools and a proper method for depth and handling.
Tools Needed
Using the right tools makes soil sampling easier and more accurate. You do not need expensive gear.
- A garden trowel or soil probe to dig samples
- A clean bucket to mix soil from different spots
- Plastic bags or containers for storing samples
- Permanent marker for labeling
- Gloves to keep hands clean
Depth And Technique
Collect soil samples from the right depth for best results. Most backyard plants grow roots in the top 6 to 8 inches of soil.
| Soil Type | Sample Depth | Notes |
| Vegetable garden | 6-8 inches | Samples should be from root zone |
| Lawn or grass | 3-4 inches | Shallow roots need shallow samples |
| Flower beds | 6 inches | Include soil where plants grow |
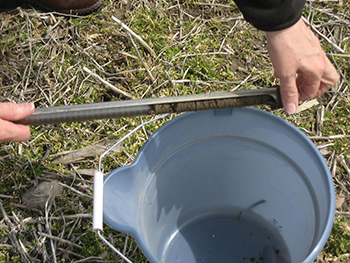
Use a clean trowel to dig straight down and take soil from several places. Mix these samples together in a bucket for one combined sample.
Labeling And Storage
Label each soil sample clearly before storage. Write the sample location and date on the bag or container.
Keep samples dry and cool until testing. Avoid mixing samples from different areas in one container unless you want a combined test.
Interpreting Soil Test Results
Testing your soil helps understand its health. Knowing this guides you on how to improve it for better plant growth.
Let’s explore the key elements of soil test results, focusing on nutrient levels, pH balance, and soil texture.
Nutrient Levels
Nutrients in soil are crucial for plant growth. Common nutrients include nitrogen, phosphorus, and potassium.
- Nitrogen boosts leaf growth.
- Phosphorus aids root development.
- Potassium strengthens plants’ resistance to disease.
Ph Balance
The pH level of soil affects nutrient availability. It is measured on a scale from 0 to 14. A pH of 7 is neutral.
| pH Range | Soil Type |
| Below 7 | Acidic |
| 7 | Neutral |
| Above 7 | Alkaline |
Soil Texture
Soil texture refers to the size of soil particles. It influences drainage and nutrient retention.
Common Mistakes To Avoid
Testing soil in your backyard is important. It helps you understand soil health. Many people make mistakes when collecting samples. Avoid these errors for accurate results.
Collecting the right number of samples is key. You need to consider several factors. This will ensure your results are reliable.
Insufficient Samples
Taking too few samples can lead to errors. It does not represent the whole area. Each part of your backyard may have different soil conditions.
More samples mean better accuracy. Aim for multiple samples from different spots. This helps you get a true picture of your soil.
- Collect from various locations
- Ensure samples are spread evenly
- Take at least 10-15 samples for a small yard
Contaminated Samples
Contamination can change your results. Use clean tools to collect samples. Avoid touching soil with your hands.
Store samples in clean containers. Avoid using metal tools that can alter soil pH. Plastic or stainless steel tools are best.
- Use clean tools and containers
- Avoid mixing samples with debris
- Label samples clearly
Ignoring Variability
Soil conditions can vary across your yard. Ignoring these differences leads to poor results. Different plants and activities affect soil differently.
Consider slope, shade, and plant types. Take samples from each area to understand variability. This helps you manage soil health better.
- Sample from sunny and shady areas
- Include high and low spots
- Consider areas with different plants
When To Retest Soil
Testing your backyard soil helps you understand its health. Retesting shows if changes work well.
Knowing the right time to retest saves effort and keeps plants strong.
After Amendments
After adding fertilizer or lime, wait before retesting. This time lets soil adjust to changes.
- Wait 3 to 6 months after applying amendments
- Retest to see if pH levels improved
- Check nutrient levels to avoid excess or shortage
Seasonal Changes
Soil changes with seasons. Temperature and moisture affect nutrients and soil life.
| Season | Soil Condition | Retesting Advice |
| Spring | High moisture, active life | Test early to plan planting |
| Summer | Dry, nutrients may deplete | Retest if heavy watering or fertilizing |
| Fall | Cooling, nutrient changes | Test after harvest to prepare soil |
| Winter | Dormant, less activity | Usually no retesting needed |
Crop Rotation
Rotating crops changes soil nutrient needs. Retest after each major crop cycle.
Use this checklist for retesting after crop rotation:
- Identify the crop types grown last season
- Check soil nutrient demands for new crops
- Test soil at the end of each crop cycle
- Adjust soil amendments based on test results
Credit: www.canr.msu.edu
Frequently Asked Questions
How Many Soil Samples Are Needed For A Small Backyard?
For a small backyard, take 3 to 5 soil samples. This ensures accurate nutrient and pH level readings. Mix samples for a representative analysis.
Why Is Multiple Soil Sampling Important In Backyards?
Multiple samples capture soil variability across your yard. This helps identify nutrient deficiencies and improves garden health and productivity.
How Deep Should I Collect Soil Samples?
Collect soil samples from 6 to 8 inches deep. This depth represents the root zone where most plants absorb nutrients.
Can I Mix Soil Samples Before Testing?
Yes, mix collected samples in a clean container. This composite sample gives an average soil condition for your backyard.
Conclusion
Testing your backyard soil helps plants grow better. Take enough samples to cover different areas. This way, you get a clear picture of soil health. Small gardens need fewer samples; large yards need more. Mix samples from each spot before testing.
This gives accurate results for your whole yard. Good soil means healthy plants and a beautiful garden. Regular testing keeps soil balanced and plants happy. Start with the right number of samples for best results. Simple steps lead to a thriving backyard garden.
