

Is your sprayer giving you a headache? You’re not alone.
Whether you’re a seasoned gardener, a dedicated farmer, or a DIY enthusiast, sprayers are essential tools that occasionally decide to act up. It’s frustrating when your trusty sprayer suddenly refuses to cooperate. You might be dealing with clogs, uneven sprays, or leaks that waste precious resources and time.
But don’t worry! This guide will uncover the secrets to diagnosing and solving those pesky sprayer problems that stand in your way. Imagine the relief when your sprayer is back to its prime, helping you achieve the lush garden or perfectly painted walls you envision. We’ll guide you step-by-step, so you can quickly identify the issue and fix it like a pro. Ready to transform sprayer struggles into smooth sailing? Let’s dive in!
Sprayer Won’t Start
A sprayer that does not start can delay your work. Troubleshooting helps find the cause fast.
Check simple parts first before calling for repairs. This saves time and money.
Check Power Sources
Ensure the sprayer is connected to a power source or the battery is charged. A loose cable can stop it from starting.
- Verify the power cord is plugged in firmly.
- Test the outlet with another device.
- Check the battery charge level.
- Inspect for blown fuses or tripped breakers.
Inspect Fuel And Oil
Fuel and oil quality affect engine start. Old fuel can cause clogging and poor ignition.
| Fuel Issue | Effect |
| Empty tank | Engine won’t start |
| Old or dirty fuel | Hard to start or stalls |
| Wrong oil level | Engine damage or failure |
| Contaminated oil | Poor lubrication, engine wear |
Examine Spark Plug
A dirty or damaged spark plug stops the spark needed to ignite fuel. Check and clean it regularly.
- Remove the spark plug carefully.
- Look for carbon buildup or cracks.
- Clean the plug with a wire brush if dirty.
- Replace if damaged or worn out.
- Ensure the gap is correct as per the manual.

Credit: www.youtube.com
Low Pressure Issues
Low pressure in sprayers can reduce their effectiveness. It makes spraying uneven and wastes chemicals.
Fixing low pressure is important for good spray coverage. Some simple checks can solve this problem.
Clean Or Replace Nozzles
Nozzles can get dirty or worn out. This blocks spray flow and lowers pressure.
Clean nozzles with water or a soft brush. Replace them if they are damaged or worn thin.
- Remove nozzles from the sprayer
- Soak them in warm water
- Use a soft brush to clear debris
- Check spray pattern for uniformity
- Replace if spray is uneven or weak
Check For Leaks
Leaks in the sprayer reduce pressure and waste liquid. Look for wet spots or drips.
Check hoses, seals, and connections. Tighten or replace parts that leak.
- Inspect hoses for cracks or holes
- Check seals around pumps and valves
- Tighten loose fittings
- Replace damaged parts
- Test sprayer after repairs
Clear Clogged Filters
Filters catch dirt but can clog over time. Clogged filters reduce spray pressure.
Remove filters and rinse with water. Replace filters if cleaning does not help.
- Locate filters in the sprayer system
- Take filters out carefully
- Rinse filters with clean water
- Use a soft brush if needed
- Replace if filters are damaged or too clogged
Uneven Spray Patterns
Uneven spray patterns can cause poor coverage and waste chemicals. This problem makes it hard to apply sprays evenly on plants.
Fixing uneven spray patterns helps protect plants and saves money. Check your sprayer parts to find the cause.
Adjust Nozzle Settings
Nozzles control how spray comes out. If the settings are wrong, the spray will be uneven.
Check the nozzle size and spray angle. Use the correct pressure for your sprayer.
- Use nozzles that match your spray type
- Set pressure within recommended range
- Clean nozzles before adjusting
Replace Worn Parts
Old or damaged parts cause uneven spray. Nozzles and seals wear out with use.
Inspect all parts regularly. Replace worn nozzles, gaskets, and seals to keep spray even.
- Look for cracks or damage on nozzles
- Replace parts that leak or drip
- Use parts made for your sprayer model
Verify Tank Agitation
Tank agitation keeps chemicals mixed. Without it, spray can be uneven and weak.
Check that the agitator works during spraying. Clean it if it is clogged or broken.
- Turn on agitator before spraying
- Inspect for blockages or damage
- Fix or replace agitator parts if needed
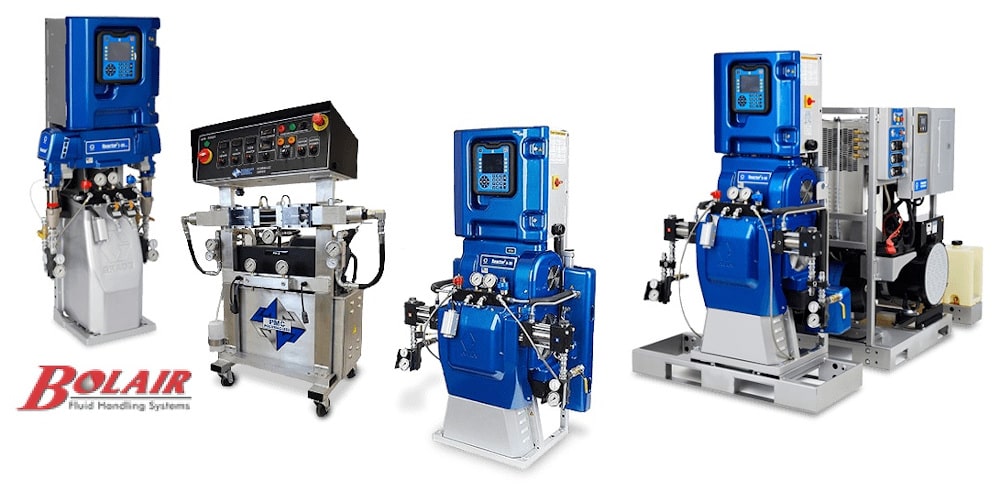
Credit: www.bolair.ca
Leaking Sprayer
Leaking sprayers waste liquid and make a mess. Fixing leaks helps save product and keeps work clean.
Check the sprayer often to find leaks early. Small leaks can become bigger problems if ignored.
Tighten Connections
Loose connections often cause leaks in sprayers. Make sure all parts are firmly joined together.
Use a wrench or hand tighten to secure fittings. Do not overtighten, as this can cause damage.
Replace Damaged Seals
Seals stop liquids from escaping the sprayer. Damaged seals lead to leaks and should be replaced.
Inspect seals for cracks or wear. Replace seals that look old or broken to keep the sprayer sealed tight.
Inspect Hoses For Cracks
Hoses carry the liquid inside the sprayer. Cracks or holes in hoses cause leaks and reduce pressure.
Check hoses carefully along their length. Replace any hose that shows signs of damage or wear.
Pump Malfunctions
Pumps are key parts of sprayers. They move liquid through the system. When pumps fail, spraying stops or becomes uneven.
Fixing pump problems can save time and money. Check common issues to keep your sprayer working well.
Prime The Pump
Priming the pump means removing air inside it. Air can block liquid flow and cause the pump to fail.
To prime, fill the pump chamber with liquid. Turn the pump on and off until liquid flows smoothly without bubbles.
Check Valve Function
Valves control liquid direction in the pump. A bad valve stops liquid or leaks air inside.
Inspect valves for cracks or dirt. Clean or replace valves that do not open and close properly.
- Remove valve covers carefully
- Check for worn or broken parts
- Clean dirt and debris
- Replace if damaged
Lubricate Moving Parts
Moving parts need lubrication to work smoothly. Dry parts cause friction and pump damage.
Apply the right lubricant to all moving parts. Check your sprayer’s manual for the best type.
- Lubricate pump seals
- Oil bearings and shafts
- Avoid over-lubrication to prevent dirt build-up
Electrical Problems
Electrical problems can stop your sprayer from working properly. These issues often come from the battery, wiring, or fuses.
Fixing electrical faults is easy if you know what to check. Start by testing the battery, inspecting wiring, and replacing blown fuses.
Test Battery Health
The battery powers the sprayer’s electrical parts. A weak or dead battery causes many problems.
Use a voltmeter to check the battery voltage. A fully charged battery shows about 12.6 volts or more.
- Turn off the sprayer before testing
- Connect the voltmeter leads to battery terminals
- Read the voltage on the meter display
- Charge or replace the battery if voltage is low
Inspect Wiring
Wiring carries electricity to sprayer parts. Loose or damaged wires cause failures or shorts.
Look for cuts, cracks, or corrosion on wires and connectors. Make sure all plugs fit tightly.
- Check wiring near battery and control panel
- Repair or replace broken wires
- Clean corroded terminals with a wire brush
- Secure loose wires with zip ties
Replace Blown Fuses
Fuses protect the sprayer’s electrical circuits. A blown fuse breaks the circuit and stops power flow.
Check the fuse box for any blown fuses. Replace blown fuses with the same type and rating.
- Turn off the sprayer before checking fuses
- Remove the fuse box cover
- Look for fuses with broken metal strips
- Use a fuse puller or pliers to remove fuses
- Insert new fuses carefully
Maintenance Tips
Keeping your sprayer in good shape helps it work better and last longer. Regular care avoids common problems that can slow you down.
Follow simple maintenance steps to keep your sprayer ready for every job. This guide covers cleaning, storage, and inspections.
Regular Cleaning
Cleaning your sprayer after each use stops clogs and damage. Dirt and chemicals can build up and cause leaks or poor spray patterns.
- Empty the tank and rinse it with clean water.
- Flush the hoses and nozzles to clear residue.
- Use a mild detergent if the sprayer handled sticky or oily substances.
- Dry all parts before reassembling or storing.
Proper Storage
Store your sprayer in a cool, dry place to avoid damage. Extreme heat or cold can harm seals and plastic parts.
| Storage Tip | Reason |
| Keep sprayer upright | Prevents leaks and damage to valves |
| Remove batteries or power source | Avoids corrosion and power loss |
| Cover with a cloth | Keeps dust and debris out |
| Store away from direct sunlight | Protects plastic parts from cracking |
Routine Inspections
Check your sprayer regularly to catch small problems early. Inspections help maintain safety and performance.
- Look for leaks around seals and hoses.
- Test the spray pattern for even coverage.
- Check that all switches and triggers work smoothly.
- Inspect nozzles for clogs or wear.
- Tighten loose fittings or replace damaged parts.

Credit: www.youtube.com
Frequently Asked Questions
Why Is My Sprayer Not Spraying Evenly?
Uneven spraying often results from clogged nozzles or incorrect pressure. Clean the nozzles thoroughly and check for blockages. Adjust the pressure to the manufacturer’s recommended level. Regular maintenance ensures consistent spray patterns and effective coverage.
How Do I Fix A Leaking Sprayer Tank?
Check the tank for cracks or damaged seals causing leaks. Tighten all fittings and replace worn gaskets. Using proper cleaning methods prevents damage. Inspect regularly to catch leaks early and avoid chemical waste.
What Causes Sprayer Hose To Crack Or Burst?
Hoses may crack or burst due to age, UV exposure, or chemical corrosion. Use hoses made from chemical-resistant materials. Store sprayers away from direct sunlight. Regularly inspect and replace hoses to maintain safe operation.
How Can I Prevent Nozzle Clogging In Sprayers?
Filter your spray solution before use to remove debris. Clean nozzles after every use with water or a soft brush. Avoid using thick or undissolved chemicals. Routine cleaning extends nozzle life and improves spray quality.
Conclusion
Sprayer problems can slow down your work and cause frustration. Regular cleaning and checking parts help keep sprayers running well. Small issues like clogs or leaks are easy to fix early. Always use the right tools and follow safety steps.
Taking care of your sprayer saves money and time. Keep an eye on performance to spot problems fast. A well-maintained sprayer makes tasks smoother and more efficient. Don’t ignore signs of trouble; act quickly for best results. Simple care goes a long way in sprayer maintenance.
