

Are you looking to add a touch of elegance to your garden? Imagine transforming your outdoor space with beautiful, flowing curves that guide the eye and create a sense of harmony.
Lawn edging is the secret to achieving this stunning effect. Whether you’re a seasoned gardener or just starting out, mastering the art of cutting curves with lawn edging can elevate your landscape from ordinary to extraordinary. You might be wondering how you can accomplish this with precision and ease.
Don’t worry; we’ve got you covered! In this guide, you’ll discover simple, effective techniques to help you cut curves like a pro, making your garden the envy of the neighborhood. Stay with us, and soon you’ll see how easy it is to turn your lawn into a masterpiece.
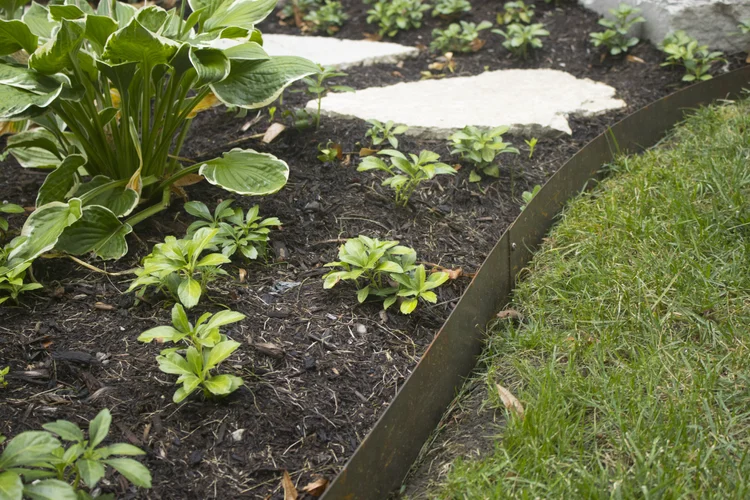
Credit: www.glennfrazee.com
Choosing The Right Lawn Edging
Cutting curves with lawn edging looks neat and keeps grass in place. Picking the right edging makes the job easier and lasts longer.
This guide explains types of lawn edging, best choices for curves, and tools needed to cut smooth bends.
Types Of Lawn Edging Materials
Lawn edging comes in many materials. Each type has strengths and suits different yard styles.
- Plastic:Flexible and easy to shape, good for curves.
- Metal:Strong and thin, holds shape well but less flexible.
- Brick or Stone:Durable and natural look, harder to curve.
- Wood:Classic look, can be cut to shape but may rot.
- Concrete:Very durable, best for straight lines or gentle curves.
Best Edging For Curved Borders
Choose edging that bends easily to follow smooth curves in your garden.
| Material | Flexibility | Ideal Use |
| Plastic | High | Tight curves and shapes |
| Metal | Medium | Gentle curves and clean lines |
| Wood | Medium | Soft curves with custom cuts |
| Brick/Stone | Low | Wide curves or straight borders |
| Concrete | Low | Long straight edges or wide arcs |
Tools Required For Cutting Curves
Use the right tools to cut clean curves in lawn edging material.
- Utility knife for plastic edging
- Metal snips for thin metal edging
- Hand saw or jigsaw for wood edging
- Angle grinder for stone or concrete
- Measuring tape and garden hose to mark curves
Preparing The Lawn For Edging
Cutting curves with lawn edging needs careful preparation. Good preparation makes the edging neat and strong.
Start by understanding the area to edge. This helps you work faster and avoid mistakes.
Marking The Curve Lines
Marking the curve lines guides you during edging. Use tools like garden hoses or string to shape the curve.
- Lay a garden hose along the desired curve
- Adjust the hose until the shape looks smooth
- Use spray paint to mark the curve on the grass
- Check the marks from different angles
Clearing The Edging Path
Clear the path along the marked curve. Remove grass, plants, rocks, and debris to get a clean edge.
- Cut grass close to the curve line
- Dig out plants and roots along the edge
- Remove stones and sticks from the path
- Level the soil if needed for smooth edging
Measuring And Planning
Measure the length and depth of the curve before cutting. Planning helps you buy the right amount of edging material.
| Task | Details |
| Measure Curve Length | Use a tape measure along the marked line |
| Check Soil Depth | Dig a small test hole to see soil type and depth |
| Plan Material | Calculate edging pieces needed for full curve |
| Gather Tools | Prepare spade, gloves, and measuring tape |
Techniques For Cutting Curves
Cutting curves in lawn edging helps create smooth, natural-looking garden borders. Different materials need different methods for bending and cutting.
This guide explains three ways to cut curves in lawn edging safely and clearly.
Scoring And Bending Edging Material
Scoring means making shallow cuts on the inside of the curve line. This helps the edging bend without breaking.
- Mark the curve on the edging with chalk or pencil.
- Use a utility knife or scoring tool to score along the line.
- Apply gentle pressure to bend the edging along the scored line.
- Check the curve shape and adjust scoring if needed.
Using A Heat Gun For Flexibility
Heat softens plastic or rubber edging, making it easier to bend into curves.
Hold the heat gun 6 to 8 inches away from the edging. Move it slowly to warm the area evenly.
| Material | Heat Gun Temperature | Heating Time |
|---|---|---|
| Plastic | Low to medium | 30-60 seconds |
| Rubber | Medium | 45-90 seconds |
After heating, bend the edging slowly to the desired curve shape. Let it cool before fixing it in place.
Cutting With Hand And Power Tools
Use tools like hand saws, tin snips, or jigsaws to cut curves in lawn edging cleanly.
- Mark the curve line clearly on the edging.
- Select a tool suitable for the material and thickness.
- Cut slowly following the marked line for accuracy.
- Smooth the cut edges with sandpaper or a file to avoid sharp spots.
Installing Curved Lawn Edging
Curved lawn edging gives your garden a neat and natural look. It helps separate grass from flower beds or walkways.
Installing curved edging needs careful bending and fixing. Follow these simple tips to get smooth curves.
Setting The Edging In Place
Start by marking the curve on the ground using a rope or garden hose. This shows where to place the edging.
Dig a shallow trench along the marked line. The trench should be deep enough to hold the edging firmly.
Securing With Stakes Or Anchors
Use stakes or anchors to hold the edging in place. Drive them into the ground at regular intervals along the edging.
Make sure stakes are tight but do not bend the edging out of shape. This keeps the curve smooth and stable.
- Place stakes every 12 to 18 inches
- Use metal or plastic stakes for durability
- Check stakes often for loosening
Ensuring Smooth Transitions
Bend the edging gently to follow the curve line. Avoid sharp angles that spoil the shape.
Overlap ends slightly if joining pieces. Use connectors if provided to keep the line smooth.
- Work slowly when bending the edging
- Use warm water or heat if plastic edging is stiff
- Check the curve from different angles
Finishing Touches For Perfect Edges
Cutting curves with lawn edging looks great but needs some final steps. These finishing touches keep your edges neat and lasting longer.
Focus on soil, trimming, and care to keep your lawn borders sharp and tidy. Each step helps protect your work and lawn.
Backfilling And Compacting Soil
After placing the lawn edging, fill the gap with soil. This holds the edging firmly in place.
Use your hands or a tamper to press the soil down. Compacting prevents the soil from settling later.
Trimming Excess Material
Cut any extra edging material sticking out beyond the curve. This keeps the edge smooth and even.
- Use sharp garden shears or a utility knife for clean cuts.
- Work slowly to follow the curve precisely.
- Remove any loose or jagged bits after cutting.
- Check both sides of the edging for a uniform look.
Maintenance Tips For Longevity
| Task | Frequency | Notes |
| Inspect edging | Monthly | Look for movement or damage |
| Remove weeds | Weekly | Keep edges clean |
| Re-compact soil | After heavy rain | Prevents soil erosion |
| Trim grass | Every 2 weeks | Maintain clear edges |
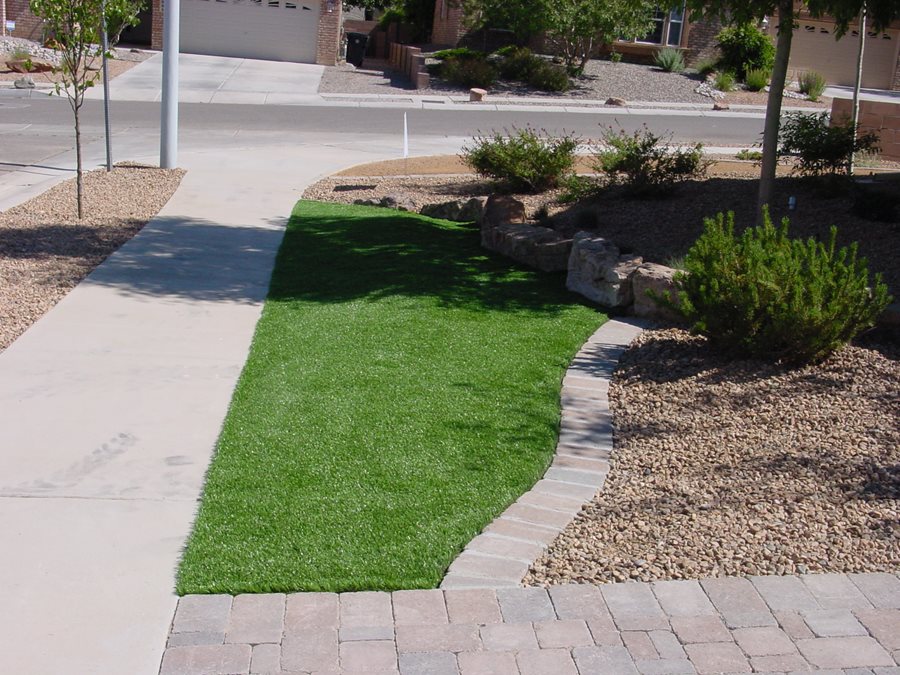
Credit: www.landscapingnetwork.com
Common Challenges And Solutions
Cutting curves with lawn edging can be tricky. It takes care and the right techniques to get smooth results.
This guide covers common problems you may face and easy ways to fix them while working on curves.
Dealing With Uneven Ground
Uneven ground can make your lawn edging look bumpy or crooked. The edges may not lie flat, causing gaps.
To fix this, start by leveling the soil where you want the edging. Use a rake or a shovel to smooth out bumps.
- Remove rocks and roots that cause bumps.
- Use a tamper or flat board to press soil down firmly.
- Add soil or sand to low spots and level them out.
Fixing Cracks And Breaks
Lawn edging can crack or break, especially on curves or if forced. This breaks the smooth line you want.
If you find cracks, use strong garden glue or adhesive made for plastic or metal edging. For breaks, replace the piece if needed.
- Clean the edges before applying glue for a better hold.
- Hold pieces firmly together until the glue sets.
- Use short edging sections to reduce stress on curves.
Adjusting For Tight Curves
Tight curves can be hard to shape with stiff edging. The material may bend unevenly or snap.
To handle tight curves, soften the edging before shaping. You can warm plastic edging with warm water or a heat gun.
- Bend the edging slowly and gently to avoid cracks.
- Use smaller edging pieces for sharper curves.
- Secure the edging with stakes close together to keep the shape.
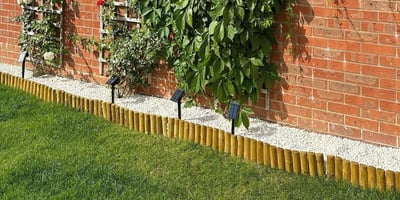
Credit: www.wickes.co.uk
Frequently Asked Questions
How Do You Cut Curves With Lawn Edging?
Cut curves by marking the desired shape on the edging. Use a flexible edging material and cut with a saw or heavy-duty scissors. Bend the edging gently to fit the curve. Secure it firmly into the ground to maintain the shape.
What Tools Are Best For Cutting Lawn Edging Curves?
A hacksaw or pruning shears work well for cutting lawn edging curves. Use a measuring tape and a garden hose to outline the curve before cutting. Choose tools based on the edging material to ensure clean, precise cuts without damaging it.
Can Plastic Lawn Edging Be Shaped Into Curves?
Yes, plastic lawn edging is flexible and can be shaped into curves. Warm the plastic slightly if it’s rigid, then bend it gently along the marked curve. Secure it firmly in the soil to keep the shape intact over time.
How To Maintain Curved Lawn Edging After Installation?
Keep the edging clean by removing debris regularly. Check for any loose sections and re-secure them promptly. Trim grass and weeds near the edging to prevent overgrowth. Proper maintenance ensures the curves stay defined and the edging lasts longer.
Conclusion
Cutting curves with lawn edging can improve your garden’s look. Use the right tools and take your time for best results. Practice makes cutting smooth and easy. Follow the steps carefully and adjust as needed. Enjoy a neat and clean lawn edge that stands out.
Keep your lawn edging sharp and well-maintained. Your garden will look tidy and welcoming all year round. Simple steps lead to great outdoor spaces.
