
Have you ever been in the middle of tackling a yard full of leaves when suddenly your leaf vacuum clogs up? It’s frustrating, right?
You’re not alone. Many people face this common issue. But don’t worry, you’re about to discover how to fix a leaf vacuum clog quickly and easily. Imagine how much more efficient your yard work could be if your tools worked seamlessly.
This guide will help you get there. Keep reading to learn the simple steps to ensure your leaf vacuum runs smoothly, making leaf collection a breeze. By the end of this article, you’ll be equipped with practical tips to prevent future clogs, saving you time and effort.
Common Causes Of Leaf Vacuum Clogs
Leaf vacuums help keep yards clean by picking up leaves and small debris. Sometimes, these machines get clogged and stop working well. Knowing what causes clogs can help you fix them quickly.
Clogs often happen because of things stuck inside the vacuum. Some common causes include wet leaves, large twigs, wrong bag attachment, and blocked airflow paths.
Wet Leaves And Debris
Wet leaves are heavy and sticky. They tend to stick inside the vacuum tube or bag. This causes the vacuum to slow down or stop working.
Debris mixed with wet leaves can form clumps. These clumps block the vacuum’s parts and reduce airflow. This makes the vacuum clog easily.
Large Twigs And Branches
Large twigs and branches do not fit well in the vacuum hose. They can get stuck and block the flow of leaves and air. This stops the vacuum from working properly.
Trying to vacuum big twigs can damage the machine. It is best to remove large branches before using the leaf vacuum.
Improper Bag Attachment
If the collection bag is not attached right, leaves can clog the vacuum. A loose or wrong bag lets leaves pile up inside the machine. This blocks the vacuum’s parts.
Make sure to attach the bag firmly and check for holes. A good fit helps the vacuum work smoothly without clogs.
Blocked Airflow Channels
Airflow channels carry air and leaves through the vacuum. If these channels are blocked, the vacuum clogs easily. Dirt, leaves, or debris can block these paths.
Regular cleaning of airflow channels keeps the vacuum running well. Clear any blockages to maintain good suction power.
Tools Needed To Clear A Clog
Clearing a leaf vacuum clog needs the right tools. These tools help you work safely and efficiently.
Having the right items ready makes the job easier and faster. Here are the main tools to prepare.
Protective Gloves
Wear protective gloves to keep your hands safe. Gloves protect against sharp leaves and debris. They also stop dirt and germs from touching your skin.
Screwdrivers And Wrenches
Use screwdrivers and wrenches to open the vacuum housing. These tools help you reach the clogged areas inside. Choose the right size to avoid damage.
- Flathead screwdriver for simple screws
- Phillips screwdriver for cross-head screws
- Adjustable wrench for bolts
- Socket wrench for tight spaces
Compressed Air Or Blower
Compressed air or a blower clears small debris from tight spots. They blow away dust and leaves stuck deep inside. Use short bursts for best results.
Flexible Cleaning Rods
Flexible cleaning rods help push out tough clogs. These rods bend to fit curved parts of the vacuum. They reach areas other tools cannot.
| Rod Type | Best Use |
| Plastic Rod | Light debris removal |
| Metal Rod | Stubborn clogs |
| Extendable Rod | Deep inside reach |
Step-by-step Clearing Process
Leaf vacuum clogs slow down yard work. Clearing the clog helps restore the vacuum’s power. Follow clear steps to fix the issue safely.
This guide shows how to clear a clog in your leaf vacuum. Each part focuses on a key task to get your machine working again.
Unplugging And Safety Checks
Before you start, make sure the leaf vacuum is off and unplugged. Check for loose parts or damage. Wear gloves to protect your hands.
Removing The Collection Bag
Remove the collection bag gently to avoid spilling leaves. Empty the bag fully and check if any debris is stuck inside. Clean the bag if needed.
Clearing The Intake And Tubes
Look inside the intake and vacuum tubes for any blockages. Use tools like a stick or a broom handle to push out stuck leaves carefully.
- Locate the clogged area in the tube or intake.
- Use a stick or long tool to push the debris out.
- Remove any stuck leaves by hand if reachable.
- Check the tube for small twigs or dirt that may block airflow.
- Clean the intake area with a brush if necessary.
Reassembling And Testing
Put the collection bag back securely. Reattach any parts removed during cleaning. Plug the vacuum in and turn it on to test.
| Task | What to Check |
| Reattach Bag | Bag fits tightly, no gaps |
| Secure Tubes | Tubes locked firmly in place |
| Power On | Vacuum runs smoothly, no strange sounds |
| Test Suction | Suction is strong and clears leaves |
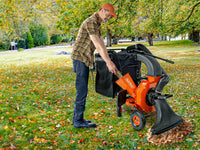
Credit: superhandyus.com
Preventing Future Clogs
Leaf vacuum clogs reduce the machine’s efficiency. Taking steps to avoid clogs saves time and effort. Proper care keeps the vacuum working well for longer.
This guide covers ways to prevent clogs by using regular maintenance, choosing the right debris, storing the vacuum properly, and checking for damage.
Regular Maintenance Tips
Clean your leaf vacuum after each use to avoid buildup. Remove any stuck leaves or dirt from the intake and tubes. Check the filters and empty the collection bag or bin often.
- Clear debris from the intake area
- Empty the collection container regularly
- Clean or replace filters as needed
- Inspect and clean the tubes
Using The Vacuum On Suitable Debris
Only vacuum dry leaves, grass clippings, and small twigs. Avoid wet leaves or large branches that can cause clogs. Do not vacuum heavy debris like stones or soil.
| Suitable Debris | Not Suitable Debris |
| Dry Leaves | Wet Leaves |
| Grass Clippings | Large Branches |
| Small Twigs | Stones and Soil |
Proper Storage Practices
Store your leaf vacuum in a dry place to prevent rust and damage. Keep it covered to protect from dust and moisture. Disconnect batteries or power sources before storage.
- Keep vacuum indoors or in a shed
- Cover with a protective cloth or plastic
- Remove batteries if stored for long periods
- Store away from extreme temperatures
Checking For Wear And Tear
Regularly inspect your leaf vacuum parts. Look for cracks, worn tubes, or loose screws. Replace damaged parts quickly to avoid clogs or breakdowns.
- Check tubes for cracks or blockages
- Inspect collection bags for holes
- Tighten loose screws and bolts
- Replace worn or broken parts promptly
When To Seek Professional Help
Leaf vacuums can clog or break during use. Sometimes, fixing them requires expert care. Knowing when to call a professional saves time and effort.
This guide explains key signs to get help with your leaf vacuum.
Persistent Clogs
Clogs that return after cleaning may mean a bigger problem. Dirt or debris stuck deep inside needs special tools.
- Clog remains after clearing the tube
- Leaves block the vacuum repeatedly
- Debris damages the filter or hose
In these cases, a professional can clean or replace hard-to-reach parts safely.
Mechanical Failures
Mechanical problems often need expert diagnosis and repair. Look out for these signs:
| Issue | Possible Cause | Action |
| Vacuum won’t start | Electrical or motor fault | Get professional check |
| Unusual noises | Broken fan or loose parts | Stop use and repair |
| Reduced suction | Worn motor or damage | Professional maintenance |
Trying to fix these issues without skill may cause more damage.
Warranty And Repairs
Check your vacuum’s warranty before fixing. Some repairs are covered and need a pro.
Follow these tips to handle warranty repairs:
- Keep your purchase receipt safe
- Contact the manufacturer for approved service
- Avoid unauthorized repairs that void warranty
- Use authorized parts for replacements
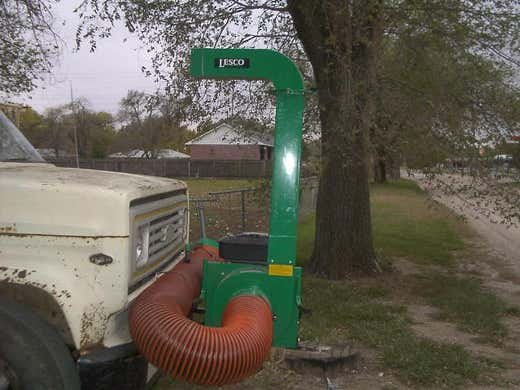
Credit: www.lawnsite.com

Credit: superhandyus.com
Frequently Asked Questions
How Do I Know If My Leaf Vacuum Is Clogged?
Signs include reduced suction, strange noises, and leaves not entering the bag. Check the vacuum tube and bag for blockages to confirm.
What Causes Leaf Vacuum Clogs Most Often?
Wet leaves, sticks, and debris buildup often cause clogs. Moisture makes leaves stick together, restricting airflow and causing blockages.
How Can I Safely Clear A Leaf Vacuum Clog?
Turn off and unplug the vacuum first. Remove the bag and use a stick or brush to clear debris from the tube gently.
How Often Should I Clean My Leaf Vacuum?
Clean your leaf vacuum after every use. Regular cleaning prevents clogs, maintains suction power, and extends the vacuum’s lifespan.
Conclusion
Clearing a leaf vacuum clog keeps your tool working well. Regular checks stop leaves from building up inside. Use simple tools to remove stuck debris quickly. Clean your vacuum after each use for best results. This saves time and avoids bigger problems later.
Keep your yard clean and equipment ready all season. Small fixes make a big difference in performance. Stay patient and follow these easy steps every time. Your leaf vacuum will thank you with smooth work.
