
Have you ever wondered why some plants in your backyard grow strong and healthy while others struggle? The secret often lies beneath your feet—in the soil.
Testing your backyard soil’s fertility is the first step to creating a thriving garden. By understanding what your soil needs, you can give your plants the right nutrients and watch them flourish like never before. You’ll discover simple, effective ways to test your soil’s health, so you can unlock your garden’s full potential.
Ready to transform your backyard into a green paradise? Let’s dive in!
Soil Fertility Basics
Soil fertility means how well soil can support plant growth. It depends on many factors like nutrients and soil type.
Testing soil helps you know what your soil needs. Good soil helps plants grow healthy and strong.
Key Nutrients For Plants
Plants need nutrients to grow. Some nutrients are more important than others. These are called key nutrients.
The main nutrients plants need are nitrogen, phosphorus, and potassium. These help with leaves, roots, and flowers.
- Nitrogen (N) helps plants grow leaves and stems.
- Phosphorus (P) supports strong roots and blooms.
- Potassium (K) helps plants resist diseases and drought.
Soil Ph And Its Role
Soil pH shows if soil is acidic or alkaline. It affects how plants use nutrients.
Most plants grow best in soil with pH between 6 and 7. If pH is too low or high, plants may not grow well.
- Acidic soil has pH below 6.
- Neutral soil has pH around 7.
- Alkaline soil has pH above 7.
Types Of Soil
Soil has different textures. Each type holds water and nutrients differently. This affects plant growth.
Common soil types are sandy, clay, silt, and loam. Loam is best for most plants.
| Soil Type | Description | Water Holding |
|---|---|---|
| Sandy | Coarse and drains quickly | Low |
| Clay | Fine and holds water well | High |
| Silt | Smooth and fertile | Medium |
| Loam | Balanced mix of sand, silt, clay | Good |
Credit: www.farmprogress.com
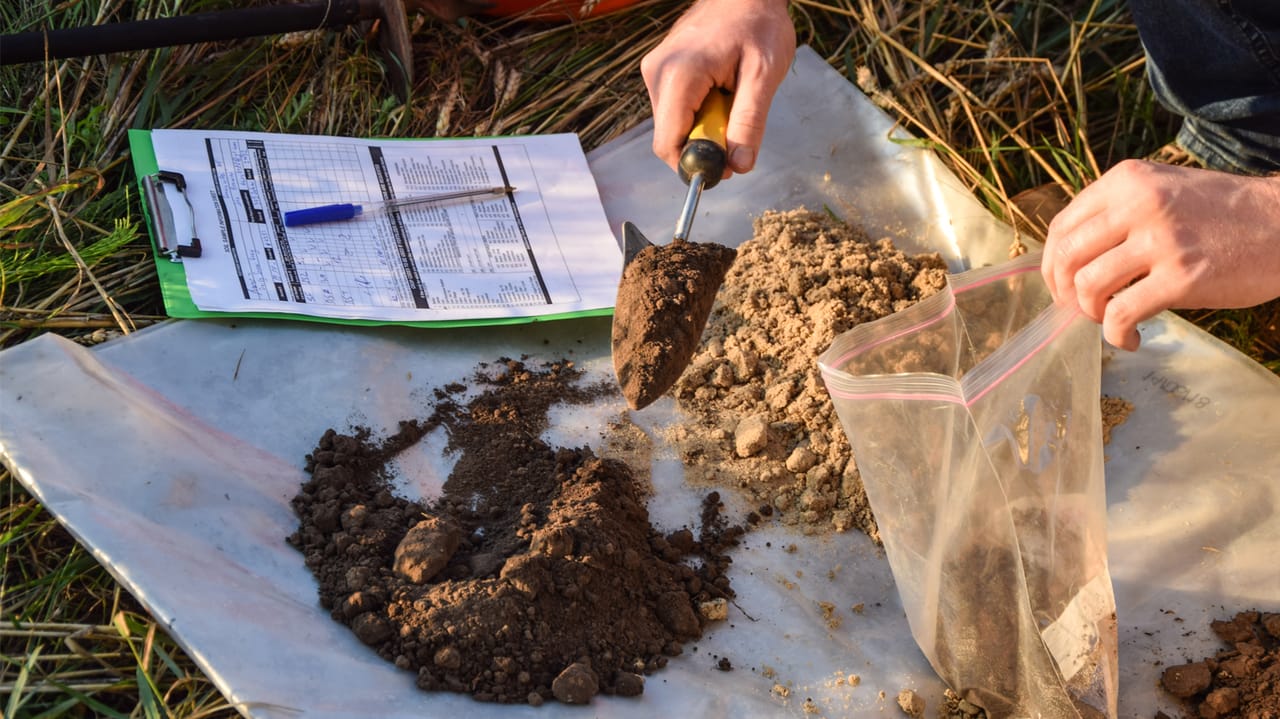
Gathering Soil Samples
Testing backyard soil helps you know what nutrients it needs. To do this, you must collect good soil samples first.
Collecting soil samples the right way gives accurate results. This guide explains how to gather samples correctly.
Tools Needed
Use simple tools to collect soil samples. These tools help you dig and store soil safely.
- Soil probe or garden trowel
- Clean plastic bucket
- Plastic bags or soil sample containers
- Permanent marker for labeling
- Gloves to keep hands clean
Choosing Sampling Spots
Pick spots that represent your whole backyard. Avoid places with unusual soil like compost piles or paths.
Take samples from different areas if your yard has varied soil. Mix these samples for one test.
- Divide yard into sections based on soil type or use
- Take 5 to 10 samples from each section
- Avoid sampling near fences, trees, or flower beds
Proper Sampling Techniques
Dig 6 to 8 inches deep to collect soil. Remove grass or debris before taking the sample.
Put each sample in the bucket and mix well. Then, put about a cup of mixed soil in a clean bag.
- Use a clean tool for each sample to avoid contamination
- Label bags with the area name and date
- Keep samples dry and cool before testing
Performing Simple Soil Tests
Testing your backyard soil is an easy way to know what plants will grow well. Simple tests give you useful information about soil health.
These tests do not need special tools. You can do them yourself with common items and test kits.
Texture Test
The texture test tells you if your soil feels sandy, silty, or clay-like. This affects water and air movement in the soil.
Take a small amount of moist soil and rub it between your fingers. Notice how it feels and forms.
- Sandy soil feels gritty and does not hold shape well.
- Silty soil feels smooth and holds shape moderately.
- Clay soil feels sticky and forms a strong ball.
Drainage Test
Good drainage means water moves through soil at the right speed. Poor drainage can harm plants.
Dig a hole about 12 inches deep. Fill it with water and watch how fast it drains.
- If water drains within 1 to 2 hours, drainage is good.
- Water that takes longer than 4 hours shows poor drainage.
- Very fast drainage means soil may be too sandy.
Ph Test Using Kits
Soil pH tells how acidic or alkaline your soil is. Plants grow best in certain pH ranges.
Buy a soil pH test kit from a garden store. Follow the instructions to test your soil sample.
- Collect soil from different spots in your yard.
- Mix soil with water in the test container.
- Add the test solution or strip as directed.
- Compare the color change to the chart in the kit.
- Most plants grow well in pH 6.0 to 7.5.

Credit: www.familyhandyman.com
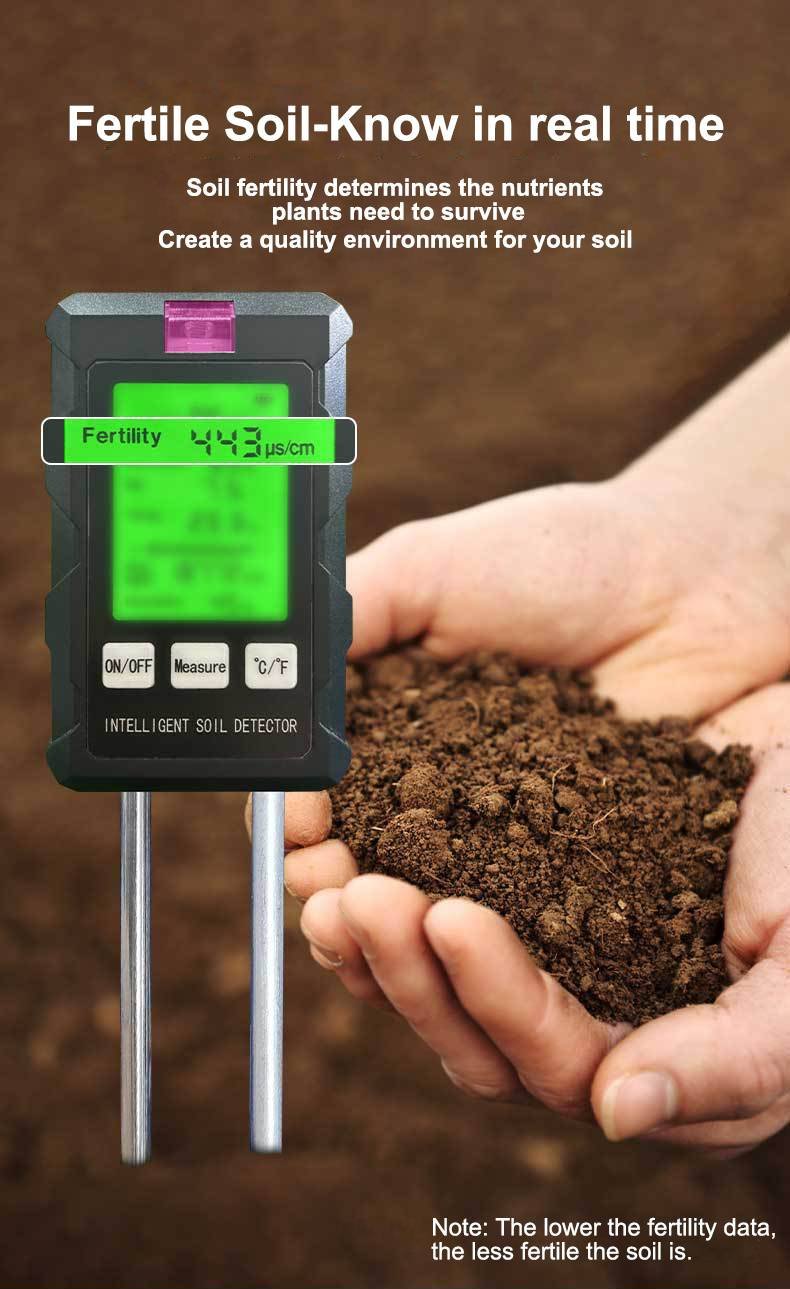
Using Home Soil Test Kits
Testing your backyard soil helps you grow healthy plants. Home soil test kits make it easy to check soil fertility.
These kits give quick results. You can learn about soil nutrients and pH at home without special tools.
Selecting The Right Kit
Choose a soil test kit that fits your needs. Some kits test for basic nutrients, while others check more details.
- Look for kits that test nitrogen, phosphorus, and potassium levels.
- Check if the kit measures soil pH for acidity or alkalinity.
- Choose kits with clear instructions and easy-to-read results.
- Consider the price and the number of tests included.
Step-by-step Testing Process
Follow these steps to test your soil using a home kit. Proper sampling is key to accurate results.
- Collect soil from several spots in your backyard.
- Mix the soil samples in a clean container.
- Remove stones, leaves, and debris.
- Fill the test container with soil as instructed.
- Add the test chemicals or strips provided in the kit.
- Wait the recommended time for color change or reaction.
- Compare the results with the color chart or guide.
Interpreting Results
Understanding your soil test results helps you decide what your soil needs. Look at nutrient levels and pH.
| Test Result | Meaning | Action |
| Low Nitrogen | Soil lacks nitrogen | Add nitrogen fertilizer |
| Low Phosphorus | Soil lacks phosphorus | Add phosphorus fertilizer |
| Low Potassium | Soil lacks potassium | Add potassium fertilizer |
| pH below 6.0 | Soil is acidic | Add lime to raise pH |
| pH above 7.5 | Soil is alkaline | Add sulfur to lower pH |
Sending Samples To Laboratories
Testing your backyard soil helps you grow healthy plants. Sending soil samples to a lab gives precise results. Labs check nutrients, pH, and other important soil features.
You must know how to find labs, prepare samples, and read reports. This guide covers these topics clearly and simply.
Finding Local Labs
Look for soil testing labs near your home. Local labs understand your area’s soil better. You can find labs through your local agriculture office or extension service.
Check if the lab tests for the nutrients and elements you want. Make sure they provide clear instructions for sample submission.
- Contact your county extension office
- Search online for soil testing labs nearby
- Ask garden centers or nurseries for recommendations
- Check lab services for soil nutrient analysis
Sample Submission Tips
Collect soil samples carefully to get accurate results. Use a clean tool and a clean container for each sample. Avoid mixing soil from different areas in one sample.
Label each sample with details like location and depth. Fill out the lab form with your contact and sample information. Send samples quickly to keep them fresh.
- Use a clean trowel or spade to collect soil
- Take samples from several spots in the test area
- Mix samples in a clean container but keep them separate if testing different areas
- Write sample ID and location on the bag or container
- Fill the lab form accurately with all required details
- Send samples to the lab on the same day if possible
Understanding Lab Reports
Lab reports explain your soil’s nutrient levels and pH. They help you know what your soil needs. Look for sections on nitrogen, phosphorus, potassium, and pH value.
Labs may also suggest fertilizer amounts or soil amendments. Follow their advice to improve your soil health. Keep the report for future soil tests.
- Check nutrient levels: nitrogen (N), phosphorus (P), potassium (K)
- Note soil pH and if it is acidic or alkaline
- Look for recommendations on fertilizer or lime
- Compare results with previous tests to track changes
- Ask the lab if you need help understanding the report
Improving Soil Fertility
Testing your backyard soil helps you know its fertility. Improving soil fertility makes plants grow better and healthier.
There are several ways to enhance the quality of your soil. Let’s explore some effective methods to boost soil fertility.
Adding Organic Matter
Organic matter is important for healthy soil. It improves the soil structure and provides nutrients for plants.
- Compost kitchen scraps like vegetable peels
- Add fallen leaves and grass clippings
- Use well-rotted manure as a natural fertilizer
Balancing Soil Ph
Soil pH affects how plants absorb nutrients. Testing soil pH helps in adjusting it to the right level for plant growth.
| pH Level | Action Needed |
| Below 6.0 | Add lime to raise pH |
| Above 7.5 | Add sulfur to lower pH |
Using Fertilizers Wisely
Fertilizers add essential nutrients to the soil. Use them carefully to avoid harming plants or the environment.
Maintaining Fertile Soil
Fertile soil is essential for growing healthy plants in your backyard. Testing soil fertility helps you understand what your soil needs.
By maintaining fertile soil, you can ensure better growth and yield of your plants. Let’s explore some methods to keep your soil in top condition.
Crop Rotation Benefits
Crop rotation means planting different crops in the same area over time. This practice keeps your soil healthy and fertile.
- Reduces soil erosion
- Improves soil structure
- Prevents pest and disease buildup
Cover Crops And Mulching
Cover crops and mulching protect and enhance your soil. They add nutrients and keep the soil moist.
Cover crops like clover or rye grow quickly and cover the soil. Mulch, such as straw or leaves, keeps the soil temperature steady.
Regular Soil Testing Schedule
Testing your soil regularly helps you know what nutrients your soil lacks. It guides you in adding the right fertilizers.
Plan to test your soil at least once a year. This helps you maintain the right balance of nutrients for healthy plant growth.
| Testing Frequency | Benefits |
|---|---|
| Once a year | Maintains nutrient balance |
| Twice a year | Better for high-demand crops |

Credit: www.amazon.com
Frequently Asked Questions
How Do I Test Backyard Soil Fertility At Home?
You can test soil fertility using a DIY kit or by sending samples to a lab. Kits measure pH, nitrogen, phosphorus, and potassium. Lab tests provide detailed nutrient levels and recommendations for amendments.
What Nutrients Are Essential For Backyard Soil Fertility?
Key nutrients include nitrogen (N), phosphorus (P), and potassium (K). These support plant growth, root development, and flowering. Testing ensures balanced nutrient levels for healthy plants.
How Often Should I Test My Backyard Soil?
Test soil fertility at least once a year, preferably in early spring. Regular testing helps monitor nutrient changes and guides fertilization for optimal plant health.
Can Soil Ph Affect Backyard Soil Fertility?
Yes, soil pH influences nutrient availability. Most plants prefer a pH between 6. 0 and 7. 5. Testing pH helps adjust soil conditions for better nutrient uptake.
Conclusion
Testing your backyard soil helps plants grow strong and healthy. Knowing soil fertility guides you on what to add or fix. Simple steps like collecting samples and using test kits work well. Regular checks keep your garden full of life and color.
Start testing today to enjoy better plants tomorrow. Soil health matters for every gardener’s success. Keep it balanced, and your garden will thank you.

