
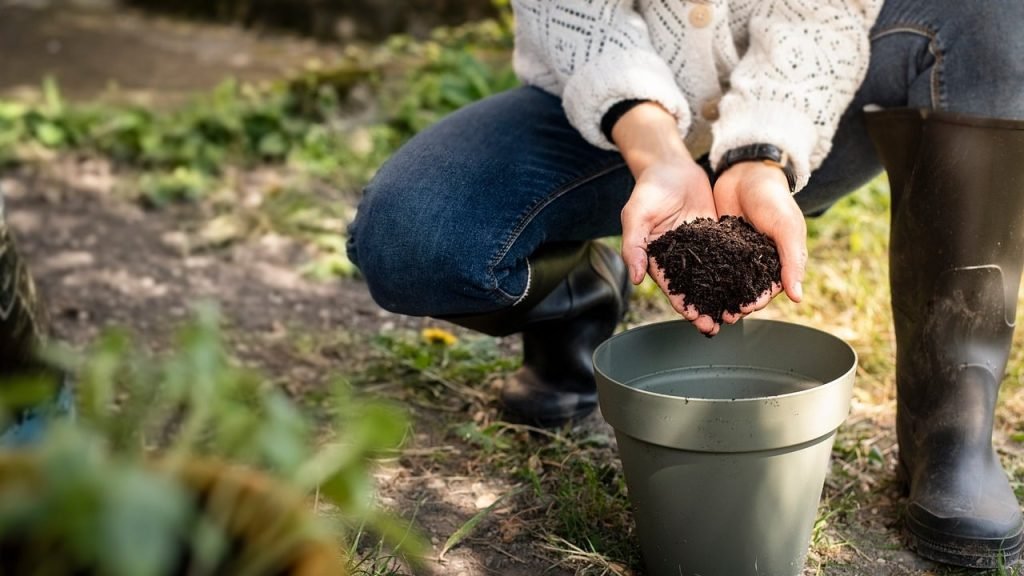
Are you dreaming of a lush garden or a thriving vegetable patch in your backyard? The secret to success lies beneath your feet.
Before you plant anything, you need to understand the health of your soil. Taking soil samples is the first step to unlocking the potential of your outdoor space. It might sound complicated, but it’s easier than you think. With a little guidance, you’ll be on your way to growing vibrant plants that flourish.
Curious to know how this simple process can transform your gardening experience? Let’s dig into the details and give your garden the best start possible!
Why Soil Sampling Matters
Soil sampling helps you learn what is in your backyard soil. It shows nutrients and pH levels.
Testing soil lets you grow healthy plants and fix problems early. It saves time and money.
Impact On Plant Health
Soil tests reveal if your plants get the right nutrients. Plants need balanced soil to grow strong.
Good soil helps plants resist pests and diseases. Poor soil can cause weak growth and yellow leaves.
Improving Soil Fertility
Soil sampling shows what nutrients your soil lacks. You can add the right fertilizers or compost.
Adding needed nutrients improves soil and helps plants grow better each year.
- Test soil pH for best nutrient use
- Add lime to raise low pH
- Add sulfur to lower high pH
- Apply fertilizers based on soil test
- Use organic matter to improve texture
Preventing Common Issues
Soil tests help prevent problems like nutrient buildup or toxic levels. This protects your plants.
Early detection of soil issues stops plant damage and reduces the need for harsh chemicals.
- Detect salt buildup from over-fertilizing
- Spot nutrient imbalances before plant stress
- Identify harmful pH levels
- Prevent soil compaction with proper care
- Save money by avoiding unnecessary treatments

Credit: www.amazon.ca
When To Collect Soil Samples
Knowing the right time to collect soil samples helps get accurate results. Soil tests guide how to care for your backyard plants.
Timing depends on seasons and how often you want to check soil health. Testing at the right time gives the best information.
Best Seasons For Sampling
Spring and fall are the best seasons to collect soil samples. Soil is easier to work with during these times.
- Spring: Collect samples before planting for nutrient needs.
- Fall: Test after harvest to prepare for next season.
- Avoid sampling when soil is very wet or frozen.
Frequency Of Testing
How often you test soil depends on garden size and goals. Regular testing helps track changes and improve soil health.
| Type of Garden | Testing Frequency |
| Vegetable Garden | Every 1-2 years |
| Flower Beds | Every 3 years |
| Lawn | Every 2-3 years |
| New Garden Area | Before planting and after 1 year |
Tools Needed For Sampling
Taking soil samples from your backyard helps you know what your soil needs. It is important to use the right tools. Good tools make the process easier and more accurate.
This guide covers the essential equipment and optional accessories for soil sampling. Use this list to prepare for taking good soil samples.
Essential Equipment
These tools are needed to collect soil samples properly. They help you dig, collect, and store soil safely.
- Soil Probe or Auger:A tool to remove soil cores from the ground easily.
- Garden Trowel or Shovel:Useful for digging if you do not have a soil probe.
- Clean Plastic Bucket:To mix soil samples from different spots in your yard.
- Sample Bags or Containers:To hold and label each soil sample for testing.
- Gloves:To keep your hands clean and protect them from dirt and germs.
- Permanent Marker:To label your sample bags with important details like location and date.
Optional Accessories
These extra tools can help make soil sampling easier or more accurate. They are not always needed but can be useful.
- Soil Knife:A sharp knife to cut through roots or hard soil layers.
- Measuring Tape:To measure distances between sampling spots for even coverage.
- Plastic Ruler:To check the depth of each soil sample.
- Field Notebook:To write notes about sample locations and conditions.
- Water Bottle:To clean tools between samples and avoid contamination.
Choosing Sampling Locations
Taking soil samples from the right spots helps you understand your backyard soil better. Good locations give clear results about soil health and needs.
You should pick places that represent different parts of your yard. Avoid spots that do not show the usual soil condition.
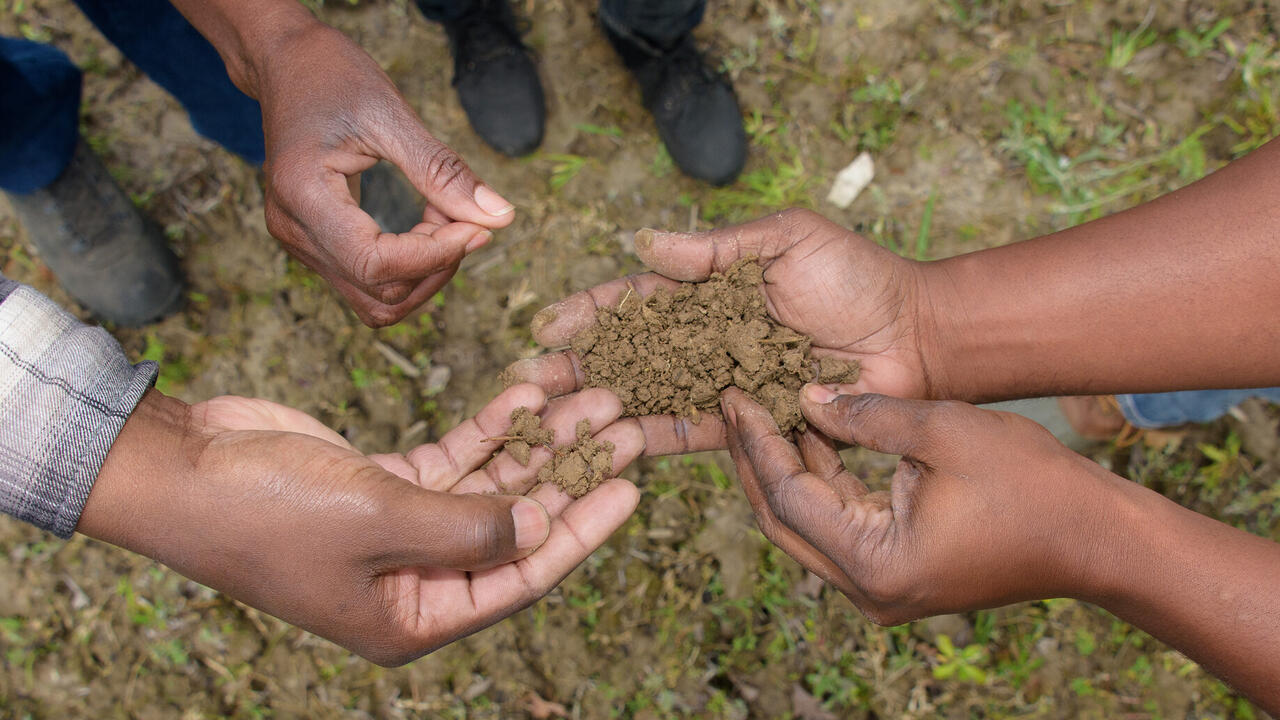
Identifying Different Soil Zones
Your backyard may have many soil zones. Each zone can have different soil types or uses.
Look for areas with different plants, slopes, or soil colors. These are clues to different soil zones.
- Garden beds
- Lawn areas
- Shady spots under trees
- Sunny open spaces
- Low spots where water gathers
Avoiding Contaminated Areas
Do not take soil samples near places with chemicals or waste. These areas can give false test results.
Avoid spots close to driveways, compost piles, or old paint cans. Also stay away from areas with pet waste.
Step-by-step Sampling Process
Taking soil samples helps you understand your backyard’s soil health. This guide shows you how to take samples correctly.
Follow these simple steps to collect soil samples for testing. Good samples give accurate results.
Preparing The Site
Clear the area where you want to take soil samples. Remove any grass, leaves, or debris from the surface.
Choose spots that represent different parts of your yard. Avoid unusual places like compost piles or paths.
- Pick 5 to 10 spots in your backyard
- Avoid areas with recent fertilizer or chemicals
- Mark spots to stay organized
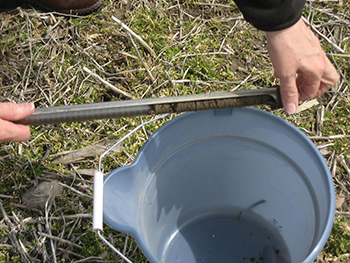
Collecting Soil Samples
Use a clean trowel or soil probe to dig 6 to 8 inches deep. This is the root zone where plants grow.
Take a small slice of soil from each spot. Place each sample in a clean container or bucket.
- Dig straight down to avoid mixing layers
- Take about one cup of soil per sample
- Collect samples quickly to avoid drying
Mixing And Storing Samples
Combine all soil slices in a clean bucket. Mix them well to make one uniform sample.
Place about two cups of the mixed soil into a clean plastic bag. Label it with the date and location.
- Remove stones, roots, and debris before mixing
- Keep the soil dry until testing
- Store samples in a cool, dry place
Credit: www.canr.msu.edu
Sending Samples For Testing
Sending soil samples for testing helps you know the health of your backyard soil. Labs analyze the samples and give advice on improving soil quality.
It is important to prepare and send samples correctly. This ensures accurate test results and proper soil care.
Selecting A Laboratory
Choose a lab that tests for the nutrients you want to check. Local labs often understand soil in your area better.
Check if the lab is certified and has good reviews. Ask about their sample size and handling instructions before sending your soil.
- Look for labs certified by agricultural agencies
- Verify the tests they offer match your needs
- Ask about sample size and container types
- Check turnaround time for results
Packaging And Shipping Tips
Use clean, dry containers to hold soil samples. Avoid plastic bags that can trap moisture and cause mold.
Label each sample with your name, address, and sample location. Include any forms the lab requires with the package.
- Fill containers with dry soil, not wet or muddy
- Seal containers tightly to prevent spills
- Use sturdy boxes or padded envelopes for shipping
- Send samples quickly to avoid changes in soil
- Include completed paperwork as instructed by the lab
Interpreting Soil Test Results
Soil test results give important information about your backyard soil. They show what nutrients are present and their levels. Understanding these results helps you improve soil health and plant growth.
Each soil nutrient has a role in plant health. Knowing the common indicators can guide you in choosing the right soil treatments.
Common Soil Nutrient Indicators
Soil tests often measure key nutrients like nitrogen, phosphorus, and potassium. These are essential for plants to grow strong and healthy.
| Nutrient | Role in Soil | Signs of Deficiency | Signs of Excess |
|---|---|---|---|
| Nitrogen (N) | Supports leaf and stem growth | Yellowing leaves, slow growth | Too much leaf growth, weak roots |
| Phosphorus (P) | Helps root and flower development | Poor root growth, dark green leaves | Can reduce zinc availability |
| Potassium (K) | Improves disease resistance and water use | Leaf edges turn brown | May lower magnesium uptake |
| pH Level | Indicates soil acidity or alkalinity | Limits nutrient uptake | Limits nutrient uptake |
Adjusting Soil Based On Results
After reading your soil test, you can take steps to fix any problems. Adjusting soil nutrients helps plants grow better in your backyard.
- If nitrogen is low, add compost or a nitrogen fertilizer.
- For low phosphorus, use bone meal or rock phosphate.
- Raise potassium by adding wood ash or potassium sulfate.
- If soil pH is too low (acidic), add lime to raise it.
- If soil pH is too high (alkaline), add sulfur or peat moss.
Always follow the recommended amounts from your soil test report. Too much fertilizer can harm plants and soil life.
Credit: extension.msstate.edu
Maintaining Healthy Backyard Soil
Healthy soil is the foundation for a thriving backyard garden. Taking care of your soil helps plants grow strong and resist pests.
Regular soil checks and good care practices keep your soil full of nutrients and moisture. This makes your backyard green and productive.
Regular Soil Testing Schedule
Test your soil every one to two years. This helps track nutrient levels and pH balance. You can collect samples from different spots to get accurate results.
- Use a clean trowel to dig 6 inches deep.
- Take small soil pieces from 5 to 10 locations.
- Mix the soil pieces in a clean bucket.
- Dry the soil before sending it for testing.
Organic Amendments And Fertilizers
Adding organic matter improves soil health. Compost and manure add nutrients and help soil hold water. Use fertilizers only if tests show a need.
| Type | Purpose | Application Time |
| Compost | Improves soil structure | Spring or Fall |
| Manure | Adds nitrogen and nutrients | Before planting |
| Balanced Fertilizer | Supplies nutrients | After soil test results |
Watering And Mulching Practices
Water your soil deeply but less often. This encourages roots to grow strong. Mulching keeps soil moist and stops weeds.
- Water early in the morning or late in the evening.
- Apply mulch like straw or wood chips around plants.
- Check soil moisture before watering again.
- Keep mulch a few inches away from plant stems.
Frequently Asked Questions
How Do I Collect Soil Samples From My Backyard?
Use a clean trowel to dig 6-8 inches deep at multiple spots. Combine samples in a clean container. Avoid surface debris for accurate results.
When Is The Best Time To Take Soil Samples?
Collect soil samples in early spring or fall. Avoid wet or frozen soil for precise testing. These seasons provide the most reliable soil conditions.
How Many Soil Samples Should I Take?
Take 10-15 samples from different backyard areas. Mixing them provides an average soil condition. More samples increase test accuracy and guide better gardening decisions.
What Tools Do I Need For Soil Sampling?
Use a clean trowel, bucket, and sample bags. Label bags clearly for each location. Proper tools help avoid contamination and improve test reliability.
Conclusion
Taking soil samples helps your backyard plants grow better. Test your soil regularly for best results. Use clean tools and take samples from different spots. Mix the samples well before sending them to a lab. Knowing your soil’s needs saves time and effort later.
Healthy soil means healthy plants and a happy garden. Start today and watch your backyard thrive. Simple steps can make a big difference in your garden’s health. Soil testing is a smart choice for every gardener.

