
Is your lawn looking tired, patchy, or unhealthy? The secret to a lush, green yard could be hiding just beneath the surface—in a thick layer of thatch.
That layer stops water, nutrients, and air from reaching your grass roots. But don’t worry, you don’t need expensive tools or professional help. You can easily solve this problem by dethatching your lawn using a mower attachment you probably already have or can get.
You’ll discover simple, step-by-step tips to bring your lawn back to life and keep it thriving all year long. Ready to give your grass the care it deserves? Let’s dive in!
Choosing The Right Mower Attachment
Dethatching your lawn keeps it healthy and green. Using a mower attachment makes the task easier. Picking the right attachment matters for good results.
This guide covers types of dethatching attachments, mower compatibility, and features to consider before buying.
Types Of Dethatching Attachments
Dethatching attachments vary by design and use. Some are manual, others attach directly to your mower. Choose one based on your lawn size and mower type.
- Blade Dethatchers:Use sharp blades to cut thatch. Good for small lawns.
- Spring Tine Dethatchers:Have flexible tines that pull up debris. Work well on most lawns.
- Drum Dethatchers:Use rotating drums with blades or tines. Suitable for larger areas.
- Power Rake Attachments:Attach to riding mowers. They remove thick thatch layers quickly.
Compatibility With Your Mower
Not all attachments fit every mower. Check your mower’s model and size before buying. Attachment type depends on mower power and frame.
| Mower Type | Compatible Attachments | Notes |
| Push Mower | Blade dethatchers, spring tine dethatchers | Best for small yards |
| Riding Mower | Power rake attachments, drum dethatchers | Handle larger lawns |
| Zero-Turn Mower | Power rake attachments | Must check frame fit |
Features To Consider
Look for features that make dethatching easier and more effective. Comfort, adjustability, and durability matter most.
- Adjustable depth control for different lawn conditions
- Easy attachment and removal system
- Durable materials like steel or heavy-duty plastic
- Weight of the attachment to avoid mower strain
- Availability of replacement parts

Credit: www.rurallifestyledealer.com
Preparing Your Lawn
Preparing your lawn before dethatching helps the process work better. It makes removing dead grass and debris easier.
This guide covers mowing and clearing debris, checking moisture, and marking problem spots.
Mowing And Clearing Debris
Cut your grass shorter than usual before dethatching. This gives the mower attachment better access to the thatch layer.
Remove leaves, sticks, and other debris from the lawn. They can block the mower and cause uneven dethatching.
- Mow the lawn to about 1.5 inches tall
- Rake or blow away leaves and twigs
- Check for pet waste and remove it
- Clear any large stones or objects
Moisture Levels For Dethatching
The lawn should be moist but not wet before dethatching. Too dry grass breaks too easily.
| Moisture Condition | Effect on Dethatching |
| Too Dry | Grass breaks and tears unevenly |
| Ideal Moisture | Thatch loosens and lifts well |
| Too Wet | Mower attachment clogs and clumps form |
Marking Problem Areas
Look for spots where the grass is thin or patchy. These areas may need extra attention during dethatching.
- Use small flags or sticks to mark spots
- Note areas with moss or heavy thatch buildup
- Check for uneven ground or bare soil
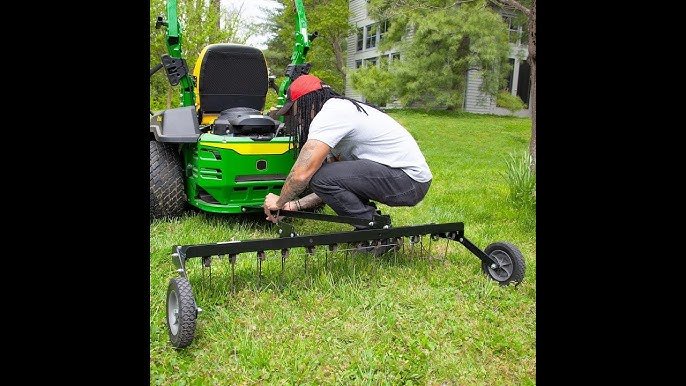
Attaching The Dethatcher To Your Mower
Attaching a dethatcher to your mower helps keep your lawn healthy. This guide shows how to connect it safely and correctly.
Follow these steps carefully to ensure the dethatcher works well and does not damage your mower or lawn.
Safety Precautions
Before attaching the dethatcher, take safety measures to avoid accidents. Always work in a clear, dry area.
- Turn off the mower and disconnect the spark plug.
- Wear gloves to protect your hands from sharp parts.
- Read the mower and dethatcher manuals carefully.
- Keep children and pets away from the work area.
- Use eye protection to avoid debris injury.
Step-by-step Installation
Attach the dethatcher by following these clear steps to ensure proper fit and function.
- Place the mower on a flat surface and engage the parking brake.
- Align the dethatcher frame with the mower’s hitch points.
- Secure the dethatcher using bolts or clips included with the kit.
- Tighten all fasteners with a wrench to keep the dethatcher firm.
- Connect any required cables or linkages according to instructions.
Checking Attachment Stability
After installation, check that the dethatcher is stable and safe for use. This step avoids damage and ensures good performance.
| Check Point | What to Look For |
|---|---|
| Fastener Tightness | All bolts and clips must be tight without movement |
| Alignment | Dethatcher should be straight and centered under the mower |
| Clearance | No parts should touch the ground except the dethatching blades |
| Cable Connection | Linkages must move freely without binding or slack |

Credit: jimsmowing.com.au
Dethatching Your Lawn
Dethatching removes dead grass and roots from your lawn. This helps air, water, and nutrients reach the soil.
Using a mower attachment makes dethatching easier and faster. It works well for small to medium lawns.
Optimal Speed And Settings
Set your mower to a slow speed to remove thatch effectively. Moving too fast will miss some areas.
Adjust the dethatcher blades or tines to the right depth. They should cut through the thatch but not harm the soil.
- Use low throttle for better control
- Set blades shallow for light thatch
- Set blades deeper for thick thatch
- Check settings on a test patch first
Technique For Even Coverage
Overlap your mowing paths slightly to cover every inch of grass. Skipping spots leaves thatch behind.
Move in straight lines or a grid pattern. This ensures the mower attachment hits all areas evenly.
- Start at one corner of the lawn
- Move forward in straight lines
- Overlap each pass by 2-3 inches
- Use a grid pattern for best results
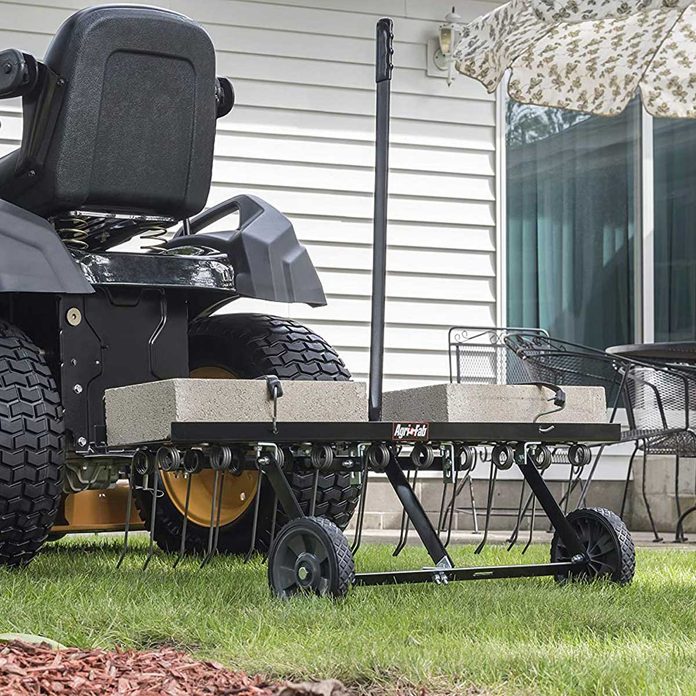
Handling Thick Thatch
Thick thatch may need several dethatching passes. Avoid removing too much at once to protect grass roots.
Rake the loose thatch away between passes. This helps the mower attachment work better on the next round.
- Do not remove more than one-third of thatch at once
- Rake and clear debris after each pass
- Water lawn lightly after dethatching
- Wait a week before the next pass if needed
Post-dethatching Lawn Care
After dethatching your lawn with a mower attachment, proper care is important. This helps your grass recover quickly and stay healthy.
Follow these steps to clean up and support new growth. Your lawn will look better and grow stronger over time.
Raking And Removing Thatch Debris
Start by raking up all the loosened thatch from your lawn. Removing this debris prevents it from blocking sunlight and water.
Use a stiff rake or a lawn sweeper to clear the thatch. Make sure to collect and dispose of the debris properly.
Aerating And Overseeding
Aerate the soil to allow air, water, and nutrients to reach the roots. Aeration helps reduce soil compaction.
After aerating, spread grass seed evenly over your lawn. Overseeding fills bare spots and improves grass density.
- Aerate using a core aerator for best results
- Choose seed that matches your current grass type
- Lightly rake seeds into soil for better contact
Watering And Fertilizing Tips
Water your lawn right after overseeding. Keep soil moist but not soggy to help seeds sprout.
Use a balanced fertilizer to support new growth. Follow the recommended amounts on the package.
- Water daily for the first two weeks
- Switch to watering deeply twice a week after seedlings grow
- Apply fertilizer 4-6 weeks after dethatching
Maintenance Of Mower Attachment
Mower attachments help keep your lawn healthy by removing thatch. Proper maintenance ensures they last longer and work effectively.
Regular care of your mower attachment saves time and money. It also makes lawn care easier and more efficient.
Cleaning After Use
Cleaning the mower attachment after each use prevents rust and buildup. It keeps the blades sharp and ready for the next task.
Use a brush to remove grass and dirt. Rinse with water to clean off remaining debris.
- Turn off the mower and detach the attachment
- Brush off visible grass and dirt
- Rinse with a hose
- Dry with a cloth to prevent rust
Inspecting For Wear And Tear
Regular inspections help you spot problems early. Check for any damage or worn parts on the attachment.
Look for cracks, dents, or loose parts. Replace any worn or broken components to keep it working well.
- Check blades for sharpness
- Look for loose screws or bolts
- Inspect belts and cables
Storage Recommendations
Proper storage keeps the mower attachment in good condition. Store it in a dry place to prevent rust.
Cover the attachment to protect it from dust and moisture. This helps maintain its performance for future use.
- Store in a cool, dry place
- Use a cover to prevent dust buildup
- Keep away from direct sunlight
Credit: www.familyhandyman.com
Frequently Asked Questions
What Is A Mower Attachment For Dethatching?
A mower attachment for dethatching is a tool that connects to your lawn mower. It helps remove thatch buildup efficiently, improving lawn health and allowing better water and nutrient absorption.
How Often Should I Dethatch My Lawn With Mower Attachment?
Dethatch your lawn once every 1-3 years, depending on grass type and thatch thickness. Avoid frequent dethatching to prevent lawn damage and stress.
Can I Use Any Mower Attachment For Dethatching?
No, only specific dethatching mower attachments are suitable. Ensure compatibility with your mower model for effective thatch removal and safe operation.
What Time Of Year Is Best For Dethatching Lawns?
The best time is during the lawn’s active growing season, typically spring or early fall. This timing allows quick recovery and promotes healthy growth.
Conclusion
Dethatching your lawn with a mower attachment keeps grass healthy. It removes dead layers that block water and nutrients. Doing this regularly helps grass grow strong and green. Always check your mower settings before starting. Take your time and work in small sections.
A clean, dethatched lawn looks better and stays alive longer. Try this easy method to keep your lawn fresh. You’ll enjoy a greener yard all season long.
