
If you love grilling, you know how important it is to keep your gas grill in top shape. One part that often gets overlooked is the drip tray.
A dirty drip tray can cause flare-ups, bad smells, and even damage your grill over time. But don’t worry—cleaning it is easier than you think. You’ll learn simple, effective steps to clean your gas grill’s drip tray quickly and safely.
By the end, your grill will be ready for your next cookout, and you’ll avoid common grilling problems. Let’s get started!
Tools Needed
Cleaning the drip tray on your gas grill is easier and more effective when you have the right tools on hand. Having these tools ready not only speeds up the process but also helps you avoid damage to your grill components. Let’s look at what you need to make this task simple and efficient.
Basic Cleaning Supplies
- Disposable gloves:Protect your hands from grease and grime.
- Scraper or putty knife:Great for removing stuck-on food and grease.
- Grill brush or sponge:Use a stiff brush or a heavy-duty sponge for scrubbing the tray.
- Dish soap:A mild detergent helps break down grease without harsh chemicals.
Additional Helpful Tools
- Bucket or basin:Fill with warm, soapy water to soak the drip tray.
- Paper towels or rags:For wiping off excess grease and drying the tray after cleaning.
- Trash bag:To safely dispose of grease and food debris without making a mess.
Optional But Useful Items
- Degreaser spray:If your drip tray has heavy buildup, a specialized degreaser can save time.
- Old toothbrush:Perfect for reaching corners and crevices you can’t access with larger brushes.
- Heat-resistant gloves:Handy if you want to clean the tray immediately after cooking while it’s still warm.
Have you ever tried cleaning your drip tray without the right tools? It can turn into a frustrating chore. Getting these items ready before you start makes the whole process smoother and even lets you enjoy your grill maintenance more.
Safety Precautions
Cleaning the drip tray on your gas grill might seem straightforward, but safety should never take a backseat. Ignoring precautions can lead to burns, gas leaks, or even fires. Paying attention to safety not only protects you but also extends the life of your grill.
Turn Off The Gas Supply
Before you start cleaning, make sure the gas supply is completely turned off. This prevents any accidental gas leaks that could cause fires or explosions. Double-check the valve on your propane tank or natural gas line to be certain.
Allow The Grill To Cool Down
Never touch the drip tray immediately after grilling. The tray can retain heat for a long time and cause serious burns. Wait at least 30 minutes or until you feel the metal is cool enough to handle safely.
Wear Protective Gloves
Drip trays often contain grease, old food particles, and sharp edges. Wearing heat-resistant gloves protects your hands from burns and cuts. It also keeps your hands clean and free from greasy residues.
Handle Grease Disposal Carefully
Grease can ignite if exposed to an open flame or spark. After cleaning, dispose of the grease in a sealed container rather than pouring it down the drain. This practice avoids clogged pipes and reduces fire hazards.
Work In A Well-ventilated Area
Cleaning products and leftover grease can produce strong fumes. Open windows or work outside to avoid breathing in harmful vapors. This step is especially important if you use chemical-based cleaners.
Inspect For Damage Before Cleaning
Check the drip tray and surrounding grill parts for rust or cracks before you begin. Damaged components can cause leaks or malfunction during use. If you spot any issues, replace the parts before the next grilling session.
Removing The Drip Tray
Removing the drip tray from your gas grill is the first task before cleaning. This tray collects grease and food debris during grilling. Regular removal prevents buildup and fire hazards. Most trays slide or lift out easily. Knowing how to remove it safely helps maintain your grill’s performance.
Locate The Drip Tray
Open the grill lid fully. Look under the main cooking area. The drip tray sits beneath the grill grates. It is usually a shallow metal pan. Some models have a tray behind the burner area.
Check For Fasteners Or Clips
Some trays have clips or screws holding them in place. Inspect the edges of the tray carefully. Use a screwdriver if screws are present. Most trays just slide out without tools.
Slide Or Lift The Tray Out
Grip the tray firmly with both hands. Pull it straight out or lift up gently. Avoid tipping to prevent spilling grease. Place the tray on a surface covered with paper towels or newspaper.
Wear Gloves For Safety
Grease on the tray can be hot or sticky. Use heat-resistant gloves if the grill was recently used. Gloves protect your hands and make cleaning easier.

Credit: monumentgrills.com
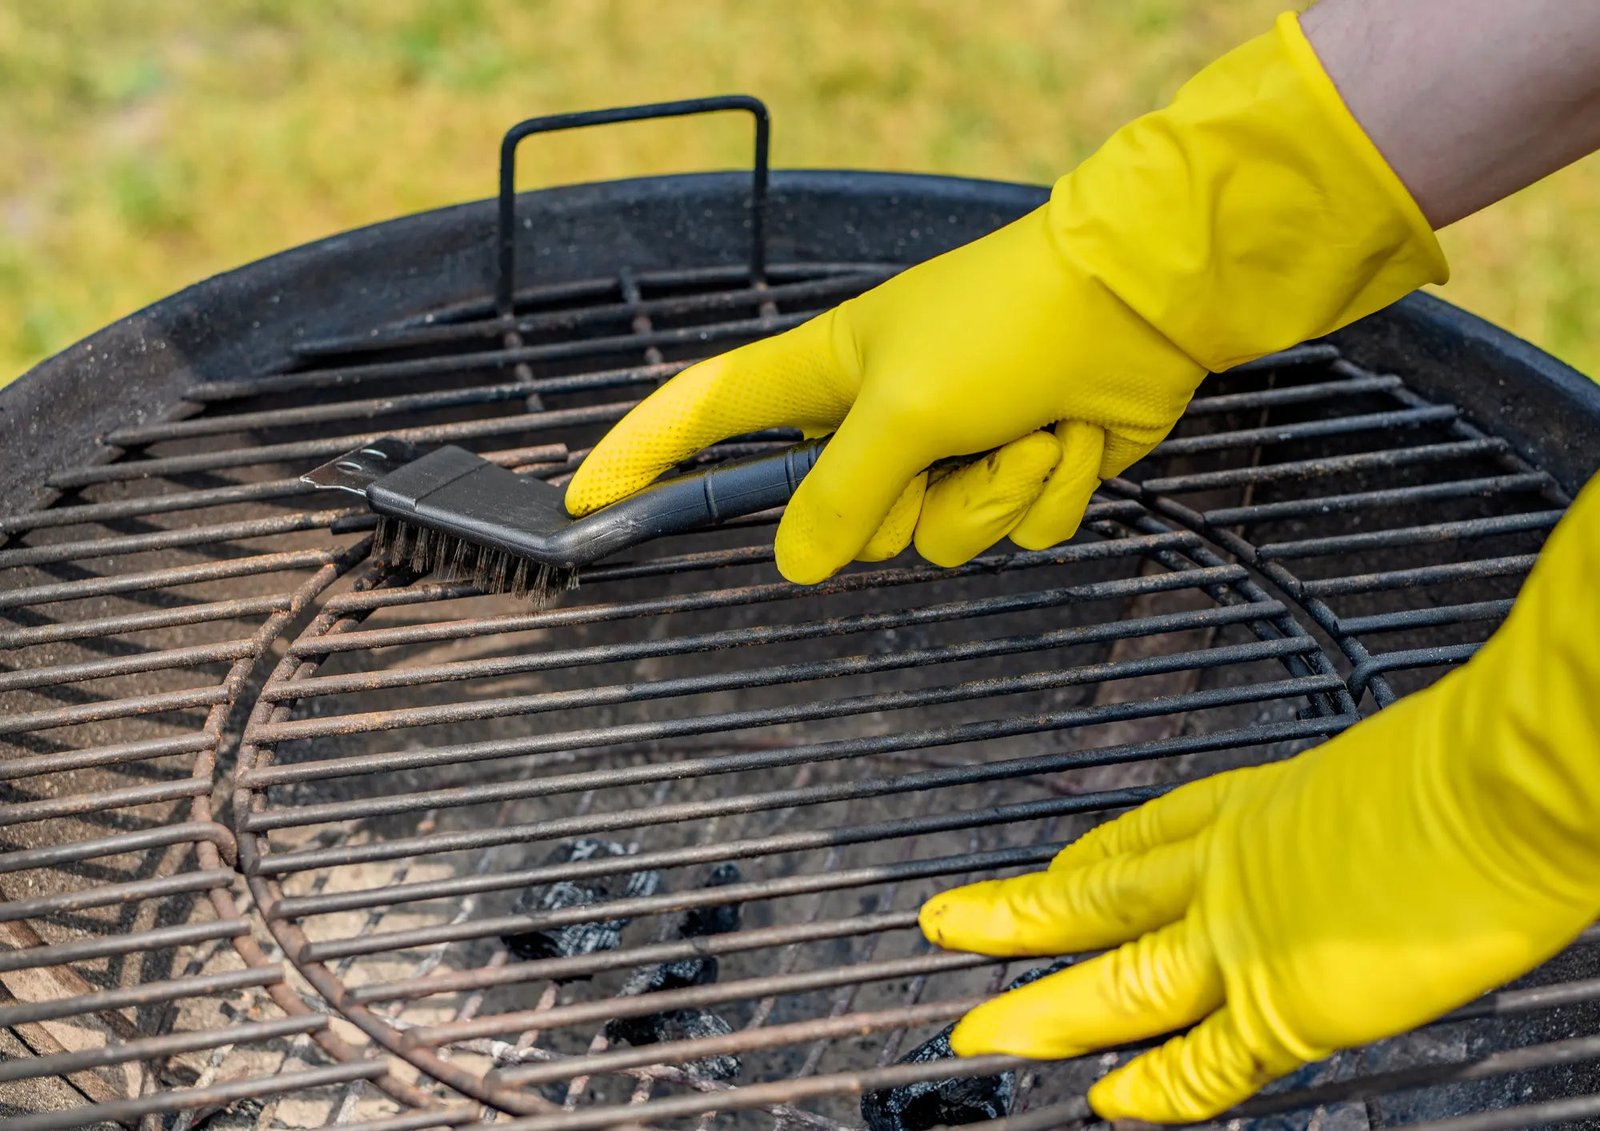
Cleaning Methods
Remove the drip tray carefully and discard leftover grease. Soak it in warm, soapy water to loosen grime. Scrub gently with a brush, rinse well, and dry before placing it back.
Cleaning Methods for a gas grill’s drip tray can seem daunting, but with the right techniques, it becomes a straightforward task. Whether you’re dealing with light grease or stubborn stains, there are effective methods to ensure your grill stays in top condition. Each approach caters to different levels of grime, allowing you to choose the most suitable for your needs.Using Soap And Water
Start with the simplest approach: soap and water. Fill a basin with warm water and add a few drops of dish soap. Use a soft sponge or cloth to scrub the drip tray, ensuring you reach all corners. This method is gentle yet effective for mild grease build-up. You might be surprised at how easily the grease loosens with just a little elbow grease.Applying Degreaser
For more stubborn grime, a degreaser comes to the rescue. Spray a generous amount of degreaser onto the tray, ensuring it covers all greasy spots. Let it sit for a few minutes to break down the grease. Then, scrub with a brush to lift off the residue. Make sure to rinse thoroughly with water to remove any chemical traces, leaving your tray spotless and ready for action.Soaking For Tough Stains
Sometimes, stains are so tough they need extra soaking. Fill a tub with hot water and add a few tablespoons of baking soda. Submerge the tray completely, allowing it to soak for an hour or more. This extended soak helps in breaking down hardened grease and grime. After soaking, a quick scrub will easily remove any remaining residue. Do you have your own secret method for cleaning a grill? Feel free to share your tips and tricks!Drying And Inspecting
After you’ve thoroughly cleaned the drip tray, the next important step is drying and inspecting it. Proper drying prevents rust and keeps your grill in top shape. Inspecting helps you catch any damage early before it becomes a bigger problem.
Drying Your Drip Tray Thoroughly
Use a clean, dry cloth to wipe down every surface of the drip tray. Don’t rush this step—moisture left behind can cause rust and unpleasant smells the next time you grill.
If you have time, let the drip tray air dry completely in a warm, sunny spot. Have you noticed how a damp drip tray can affect your grill’s performance? Staying ahead with proper drying can save you from that hassle.
Inspecting For Damage And Wear
Look closely for cracks, holes, or rust spots. These issues can cause grease leaks or uneven heat distribution. If you spot any damage, think about replacing the tray to keep your grill running smoothly.
Check the tray’s edges and corners carefully—these areas often wear out first. Have you experienced flare-ups caused by a faulty drip tray? Catching problems early helps you avoid dangerous flare-ups and keeps your cooking safe.

Credit: abell.co.uk
Reinstalling The Drip Tray
Reinstalling the drip tray is an important part of gas grill maintenance. It keeps your grill clean and prevents grease buildup. Proper placement ensures your grill works safely and efficiently.
Take your time to place the tray correctly. It should fit snugly in its spot without any gaps. This stops grease from leaking inside the grill.
Align The Drip Tray Properly
Make sure the tray lines up with the grill’s base. Check for any tabs or slots that help secure it in place. Aligning it well avoids shifting during cooking.
Slide The Tray Gently Into Place
Push the tray slowly into the grill’s drip pan area. Avoid forcing it, as this can cause damage. The tray should slide in smoothly and rest flat.
Secure The Tray If Needed
Some grills have clips or screws to hold the tray. Attach these parts carefully to keep the tray steady. This prevents movement when the grill heats up.
Check For Proper Fit Before Use
After reinstalling, double-check the tray’s position. Look for any gaps or uneven edges. A well-fitted tray improves grill safety and cleanup.
Maintenance Tips
Keeping your gas grill’s drip tray clean is key to extending the life of your grill and ensuring every cookout runs smoothly. Proper maintenance prevents grease buildup that can cause flare-ups or even damage your grill over time. Let’s dive into some practical tips that make this chore easier and more effective.
Regular Cleaning Schedule
Set a routine for cleaning your drip tray—ideally after every few uses. Waiting too long lets grease harden, which makes it tougher to remove. Think about how often you grill and mark your calendar accordingly to avoid neglecting this important task.
Use The Right Tools
A simple brush with stiff bristles and a scraper can make a huge difference. Avoid abrasive tools that might damage the tray’s surface. You might find a plastic spatula works well to lift off sticky residue without scratching.
Safe Disposal Of Grease
Don’t just pour grease down the drain—it can clog pipes and harm the environment. Instead, pour it into a disposable container or old can and throw it away with your regular trash. Have you ever experienced a clogged sink? Proper disposal helps you avoid that hassle.
Check For Rust And Damage
While cleaning, inspect the tray for signs of rust or cracks. Small rust spots can be scrubbed off with steel wool, but larger damage may mean replacement is needed. Catching these early keeps your grill functioning properly and safe to use.
Protective Measures After Cleaning
After washing and drying the tray, consider applying a light coat of cooking oil to prevent rust. This simple step protects the metal and makes the next cleanup easier. Do you notice how a little extra care can save you time later?
Credit: shop.thecarbonbar.ca
Frequently Asked Questions
How Often Should I Clean The Drip Tray On A Gas Grill?
Clean the drip tray after every 5-6 uses or when grease buildup is visible. Regular cleaning prevents flare-ups and maintains grill efficiency.
What Tools Are Needed To Clean A Gas Grill Drip Tray?
You need gloves, a scraper, warm soapy water, a sponge, and a trash bag. These tools help safely and effectively remove grease and debris.
Can I Use Household Cleaners On My Gas Grill Drip Tray?
Avoid harsh chemicals. Use mild dish soap and warm water to clean the drip tray. This prevents damage and keeps your grill safe for cooking.
How Do I Prevent Grease Buildup In My Gas Grill Drip Tray?
Empty the drip tray regularly and clean it after every few uses. Using a drip tray liner can also reduce grease buildup and simplify cleaning.
Conclusion
Cleaning your gas grill’s drip tray keeps it working well. Regular cleaning stops grease build-up and prevents fires. Use warm water and soap for easy cleaning. Scrape off stuck bits with a brush or scraper. Dry the tray completely before putting it back.
A clean drip tray makes grilling safer and more fun. Keep this simple step in your grill care routine. Your grill will last longer and cook better. Easy to do. Worth the effort.
