

Are you ready to take your grilling game to the next level? Knowing how to assemble your rotisserie attachment can transform your barbecue experience, giving you perfectly cooked, juicy meals every time.
But if you’ve ever felt unsure about putting it together, you’re not alone. This guide will walk you through each simple step, so you can start roasting like a pro without any hassle. Stick with me, and you’ll have your rotisserie ready to spin in no time.
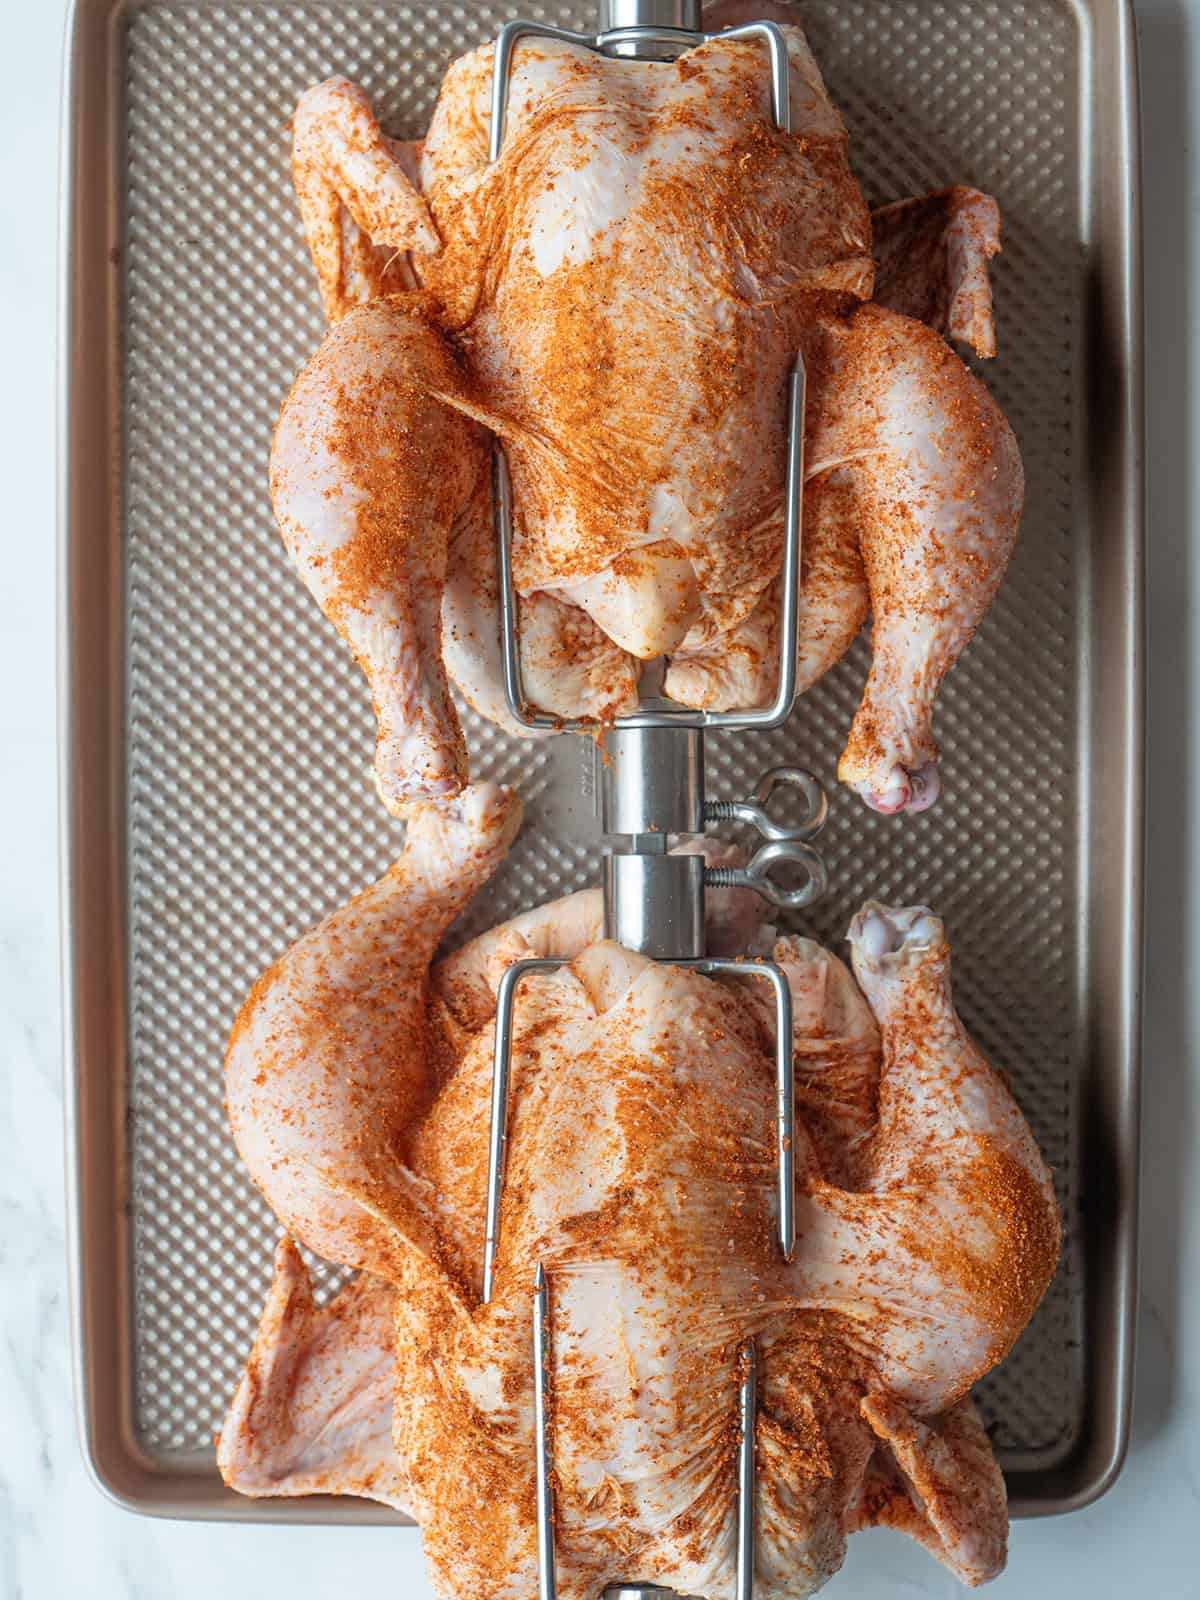
Credit: whatsgabycooking.com
Gathering Your Tools
Before you start assembling your rotisserie attachment, gathering the right tools is crucial. Having everything on hand prevents frustration and saves time. It also ensures your setup is safe and sturdy, so your cooking turns out perfectly.
Essential Tools Checklist
Make sure you have these basic tools ready:
- Screwdrivers:Both flathead and Phillips for tightening screws and bolts.
- Wrenches or Socket Set:To secure nuts and bolts firmly.
- Pliers:Useful for gripping and adjusting small parts.
- Measuring Tape:To check alignment and spacing.
- Work Gloves:Protect your hands while handling metal parts.
- Cleaning Cloth:To wipe down surfaces before and after assembly.
Missing even one tool can slow you down. Have you ever started a project only to realize the right screwdriver was nowhere to be found? Avoid that hassle by double-checking your toolkit before you begin.
Preparing Your Workspace
Set up a clean, flat surface with good lighting. A sturdy table or workbench works best to keep parts stable during assembly.
Clear the area of clutter to avoid losing small pieces. Lay out all the parts neatly so you can easily identify each one.
Consider covering your workspace with a soft cloth or mat to prevent scratches on metal components. This small step saved me from a costly mistake when I first built a rotisserie—damaged parts meant extra trips to the store.
What’s your current workspace like? Could a little reorganization make this project easier and more enjoyable?

Credit: www.vevor.ca
Identifying Parts
Before assembling your rotisserie attachment, identifying all parts is crucial. This step ensures a smooth assembly process. It prevents frustration and saves time. Knowing each component helps in understanding how they fit together. Take a moment to lay out all pieces in a clean space. Organizing parts makes the process clearer and easier.
Main Components Overview
The rotisserie kit usually includes several key parts. Each has a specific role in the assembly and cooking process.
- Rotisserie spit rod:The long metal rod that holds the food.
- Forks:Two pronged forks that secure the food on the rod.
- Motor:The device that turns the spit rod for even cooking.
- Brackets:Hold the rod and motor in place on the grill.
- Skewers or clamps:Secure the forks and food on the rod.
- Power cord:Connects the motor to a power source.
Each part works together to cook food evenly by rotating it slowly over heat.
Checking For Missing Pieces
Start by comparing your parts to the list in the instruction manual. Missing pieces can delay assembly or cause problems later. Check the box carefully, including small parts in plastic bags. Look for:
- All screws and bolts needed for assembly.
- Both forks and their securing clamps.
- The motor and its power cord.
- The spit rod and any additional accessories.
If any parts are missing, contact the seller or manufacturer before starting assembly. Having all parts ready makes the process quick and hassle-free.
Attaching The Spit Rod
Attaching the spit rod is a key step to ensure your rotisserie cooks evenly and safely. This part holds your meat steady over the heat, so getting it right matters. Let’s look at how to secure the forks and balance the rod effectively.
Securing The Forks
Start by sliding the forks onto the spit rod. These forks grip your meat, so they must be tight and well-positioned.
- Place one fork near the rod’s handle end.
- Slide the meat onto the rod between the forks.
- Push the second fork snugly against the meat on the other side.
Use the wing nuts to tighten the forks firmly. Loose forks can cause the meat to wobble or slip during cooking. Have you ever had your roast spin unevenly? Tight forks prevent that problem and keep your food secure.
Balancing The Rod
Balancing the spit rod is critical to avoid strain on your rotisserie motor and to cook the meat evenly. After securing the forks and meat, test the balance by placing the rod on a flat surface or using the rotisserie mount.
- Check if one side dips lower; this means it’s unbalanced.
- Adjust the meat or fork positions slightly to even out the weight.
- If necessary, add small pieces of meat or foil to the lighter side.
Balancing might seem tedious, but it saves you from motor burnout and uneven cooking. Have you noticed uneven cooking on one side of your rotisserie? Balancing the rod can fix that issue immediately.
Mounting The Motor
Mount the motor securely on the grill’s bracket. Ensure alignment for smooth rotation of the rotisserie. Tighten all screws firmly to prevent wobbling during cooking.
Mounting the motor is a crucial step in setting up your rotisserie attachment. It ensures that your meat is cooked evenly and consistently. By securely positioning the motor, you can enjoy perfectly roasted meals every time.Positioning The Motor
Start by identifying the correct side of your grill for the motor. Typically, the motor is mounted on the right side. Check your grill’s manual to confirm this, as some models may vary. Align the motor bracket with the pre-drilled holes on your grill. Ensure it sits flush against the grill to prevent any wobbling during operation. Tighten the screws securely, but be careful not to overtighten and strip the threads. Consider your cooking space. Will the motor be close to a wall or another obstruction? If so, you might want to adjust its position slightly to ensure there’s enough clearance for the spit to rotate freely.Connecting Power Source
Once the motor is mounted, it’s time to connect it to a power source. Ensure your power outlet is within reach, yet not too close to avoid any potential hazards. Safety should always be your top priority. Use a heavy-duty extension cord if your grill is located far from an outlet. Make sure the cord is rated for outdoor use to withstand the elements. Avoid running the cord in areas where it could become a tripping hazard. Test the motor before placing any food on the spit. Switch it on and observe its rotation. Is it smooth and consistent? If you notice any issues, address them before proceeding with your cooking. This simple test can save you from a culinary disaster.Fixing The Rotisserie To The Grill
Fixing the rotisserie attachment to your grill is a key step for a successful cookout. A secure fit prevents wobbling and ensures even cooking. Follow simple steps to attach it firmly and safely.
Aligning The Attachment
Start by positioning the rotisserie motor on the side of your grill. Look for the motor mount or bracket designed to hold the rotisserie. Align the spit rod so it fits into both the motor and the opposite side support.
Make sure the rod is straight and centered. This balance helps the food cook evenly. Check that the forks on the spit rod are set evenly around the food to hold it tight.
Locking Mechanisms
Most rotisserie attachments have locking pins or screws. Use these to secure the spit rod in place. Tighten all screws firmly but avoid over-tightening to prevent damage.
Check the motor connection. It should click or lock into the mount. This keeps the motor stable while it rotates the spit rod.
Test the setup by turning the spit rod by hand. It should rotate smoothly without wobbling or slipping.

Credit: www.amazon.ca
Testing The Rotation
Testing the rotation of your rotisserie attachment is crucial to ensure it works correctly. It helps confirm the motor and spit rod turn smoothly. This step avoids uneven cooking or damage during use. Spend time checking the rotation before cooking.
Ensuring Smooth Movement
Start by turning on the motor without load. Watch the spit rod carefully. It should rotate steadily and without jerks. Listen for unusual noises like grinding or rattling. These sounds may mean parts are loose or misaligned.
Check that the spit rod spins freely on its supports. The forks must hold the food tightly but not too tight to cause friction. Ensure the motor’s speed matches the rotisserie’s design. This balance keeps the rotation smooth and consistent.
Troubleshooting Common Issues
Rotation problems usually come from a few key areas:
- Loose forks or clamps causing wobbling.
- Misaligned spit rod that hits the grill sides.
- Weak motor struggling to turn heavy loads.
- Dirt or grease buildup interfering with movement.
Fix loose parts by tightening them securely. Adjust the spit rod to center it between supports. Clean the motor and rod to remove grease or debris. If the motor sounds weak, test with a lighter load to check its power.
Safety Tips
Safety is crucial when assembling your rotisserie attachment. Handling hot parts or an unsecured setup can lead to accidents that spoil your cooking experience. Paying attention to a few key safety tips keeps both you and your meal safe.
Handling Hot Surfaces
Rotisserie attachments get extremely hot during use. Always wear heat-resistant gloves when touching or adjusting the spit or motor housing. Avoid using wet cloths or towels, as they can cause burns due to steam.
Keep a safe distance when opening the grill lid to prevent sudden heat blasts. Have a designated spot for cooling down the spit after cooking, so you don’t accidentally touch it later. Can you imagine reaching for a hot spit without gloves? It’s a mistake you want to avoid.
Securing The Attachment Properly
Double-check that the rotisserie attachment is firmly locked in place before starting your grill. A loose setup can cause the spit to wobble, affecting cooking quality and creating a safety hazard. Make sure the forks are tightly gripping your food to prevent slipping.
Test the motor connection by running it briefly before loading the spit with heavy food. If the motor stalls or the spit moves unevenly, stop and adjust. Have you ever had a roast fall off mid-cooking? Proper securing prevents that mess and potential burns.
Cleaning And Maintenance
Keeping your rotisserie attachment clean and well-maintained extends its lifespan and ensures every meal tastes its best. Neglecting this part can lead to rust, buildup, or even damage that affects cooking performance. Let’s look at practical ways you can clean and store your attachment to keep it in top shape.
Post-use Cleaning Steps
Start by unplugging your rotisserie and letting it cool completely. This prevents burns and makes handling easier.
Remove all detachable parts like skewers, forks, and drip pans. Soak them in warm, soapy water to loosen any stuck-on grease.
- Use a soft brush or sponge to scrub away residue gently.
- Avoid harsh abrasives that can scratch metal surfaces.
- Rinse thoroughly with clean water to remove soap.
- Dry completely with a clean cloth to prevent rust.
Wipe down the main body of the attachment with a damp cloth. If grease has built up on non-detachable parts, a little baking soda paste can help break it down without damage.
Have you ever noticed how a quick wipe after cooking saves hours of scrubbing later? Small habits like this make a big difference.
Storage Recommendations
After cleaning, make sure all parts are fully dry before storing. Moisture is the enemy of metal and can cause rust spots quickly.
Store your rotisserie attachment in a dry, cool place away from direct sunlight. A kitchen cabinet or pantry shelf works well.
- Keep all small parts together in a labeled container or bag to avoid losing them.
- Consider covering the attachment with a cloth or plastic wrap to keep dust off.
- If you have limited space, disassemble the unit to save room and prevent damage.
Do you find that organizing your cooking tools makes meal prep smoother? Proper storage prevents frustration and keeps your rotisserie ready for action.
Frequently Asked Questions
What Tools Are Needed To Assemble A Rotisserie Attachment?
You typically need a screwdriver, wrench, and sometimes pliers. Always check the specific kit instructions to ensure you have all required tools ready before starting assembly.
How Do I Attach The Rotisserie Spit Rod Correctly?
Slide the spit rod through the meat evenly. Secure it tightly with forks and screws to prevent slipping during cooking.
Can I Use Any Grill For A Rotisserie Attachment?
Most rotisserie kits fit standard grills. Confirm compatibility with your grill model to ensure proper installation and safe use.
How Do I Balance The Rotisserie For Even Cooking?
Balance the meat by adjusting the forks on the spit. Proper balance reduces motor strain and ensures uniform cooking.
Conclusion
Assembling a rotisserie attachment is easier than it seems. Follow the steps carefully and take your time. Check that all parts fit securely before use. This helps cook food evenly and safely. Practice makes perfect with this cooking tool. Enjoy tasty meals with your rotisserie attachment soon.
Keep your equipment clean after each use. Happy grilling and great flavors await you!
