
Are you ready to enjoy delicious grilled meals wherever you go? Learning how to assemble your portable gas grill is the first step to unlocking endless outdoor cooking fun.
You might feel overwhelmed by the parts and instructions, but don’t worry—this guide will make it simple and stress-free. By the end, you’ll have your grill ready in no time, turning your next picnic, camping trip, or backyard hangout into a tasty success.
Keep reading, and let’s get your grill fired up!
Credit: www.consumerreports.org
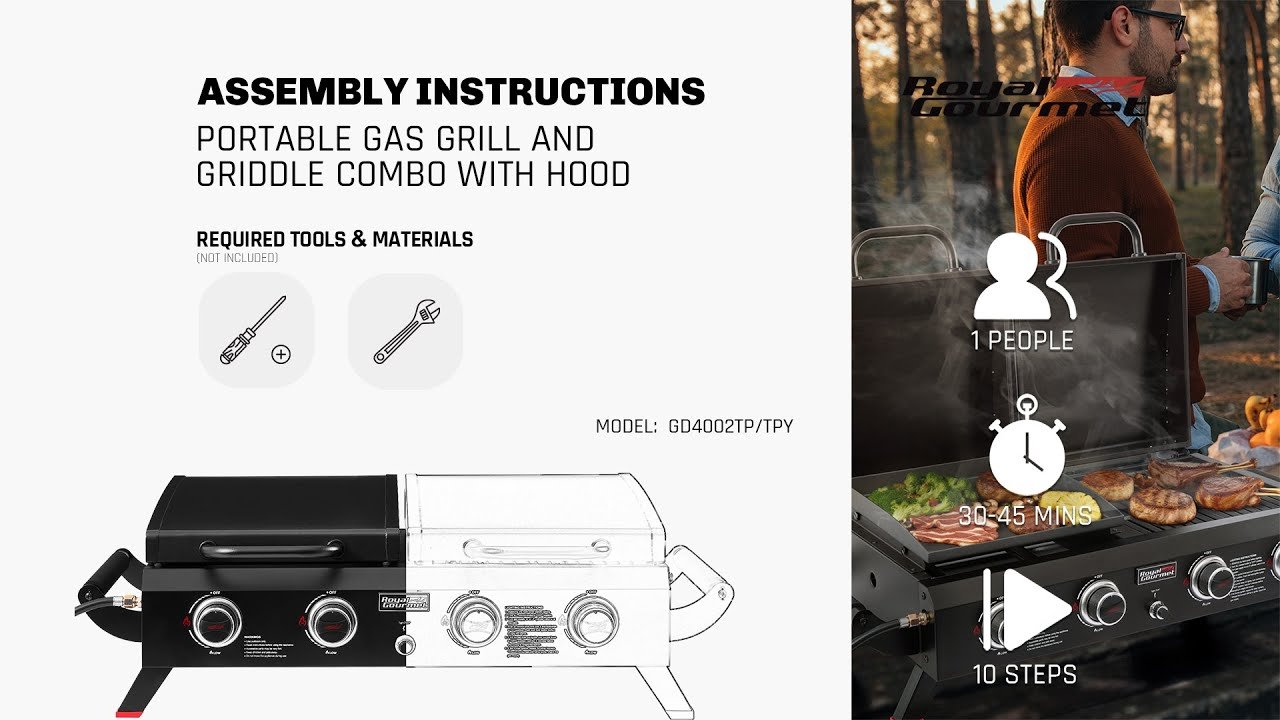
Tools And Parts Needed
Before you dive into assembling your portable gas grill, gathering the right tools and parts is crucial. Missing a key component or tool can slow you down and cause frustration. Ensuring everything is ready will make the process smoother and more enjoyable.
Essential Tools
Most portable gas grills are designed for easy assembly, but you still need a few basic tools. Having these on hand saves time and prevents unnecessary trips to the store.
- Screwdriver:A Phillips head screwdriver is often the main tool required.
- Adjustable wrench:Useful for tightening nuts and bolts securely.
- Allen wrench (Hex key):Some grills include bolts that need this tool, which is sometimes provided in the package.
- Pliers:Handy for gripping and holding parts steady during assembly.
Check your grill’s instruction manual to confirm which tools you need. Have them ready before you start to avoid interruptions.
Grill Components Checklist
Knowing exactly what parts come with your grill helps you identify missing pieces early. It also makes the assembly process faster and less confusing.
- Main grill body:The core part where the cooking happens.
- Grill lid:Usually detachable and equipped with a handle.
- Cooking grates:Metal racks where food sits during grilling.
- Burner assembly:Includes the gas burner and ignition system.
- Legs or stand:Provides stability and proper height.
- Gas hose and regulator:Connects the grill to your propane tank safely.
- Control knobs:For adjusting heat levels.
- Hardware pack:Contains screws, bolts, washers, and nuts.
Have you ever started assembling only to find a missing screw or part? Taking a few minutes to lay out all components lets you avoid that hassle and keeps your project on track.

Credit: www.youtube.com
Preparing Your Workspace
Preparing your workspace is the first key to assembling a portable gas grill smoothly. A clean, safe area helps prevent accidents and makes the process easier. Organizing tools and parts before starting saves time and frustration.
Setting up the right environment leads to a better grilling experience later. Focus on safety and order from the beginning.
Choosing A Safe Location
Select a flat, stable surface for your grill assembly. Avoid places near flammable materials or heavy foot traffic. Outdoors or well-ventilated spaces reduce risks from gas fumes. Keep children and pets away to ensure safety. Make sure there is enough space to move around freely.
Clearing And Organizing Area
Remove clutter and unnecessary items from your workspace. Lay down a clean mat or tarp to catch small parts. Arrange all grill components and tools within easy reach. Group similar items together to avoid confusion. Good organization helps spot missing pieces quickly and speeds up assembly.
Assembling The Grill Frame
Assembling the grill frame is the foundation of your portable gas grill setup. It creates the base that holds all parts steady and secure. A strong frame ensures safety and ease of use during cooking.
Attaching Legs And Supports
Start by unpacking the legs and support bars. Match each leg to its designated spot on the frame. Use the provided screws and bolts to fix the legs firmly. Tighten all connections to prevent wobbling. Ensure the legs stand straight and even. Adding support bars between legs increases stability. Attach these bars securely to strengthen the frame.
Securing The Base
Place the grill base onto the assembled legs and supports. Align the base holes with the frame holes carefully. Use bolts to fasten the base tightly. Check that the base sits flat without gaps or tilts. Secure all bolts with a wrench to avoid loosening later. A steady base supports the grill’s weight safely.
Installing The Gas Components
Connect the gas hose securely to the grill and the propane tank. Check all fittings for leaks before lighting the grill. Tight connections ensure safe and efficient gas flow.
Installing the gas components of your portable grill ensures safety and efficiency. This process involves connecting the gas hose, attaching the regulator, and checking for leaks. Each step is crucial for a safe grilling experience. Follow these steps to set up your grill correctly.Connecting The Gas Hose
Locate the gas inlet on your grill. It’s usually on the side or back. Find the gas hose, ensuring it is clean and undamaged. Align the hose connector with the gas inlet. Push it firmly into place. Turn the connector clockwise to secure it tightly. Ensure it is snug but not over-tightened.Attaching The Regulator
Find the regulator in your grill components. It controls gas flow to the grill. Align the regulator with the end of the gas hose. Push the regulator onto the hose end. Twist it clockwise until it is firmly attached. Make sure it is secure to prevent gas leaks.Checking For Leaks
Safety first. Mix soap and water in a spray bottle. Spray the mixture on the gas connections. Turn on the gas supply slightly. Look for bubbles forming around the connections. Bubbles indicate a leak, which needs fixing. Tighten connections if necessary. Repeat the test until no bubbles appear. Always ensure no leaks before lighting the grill.Setting Up The Cooking Surface
Setting up the cooking surface is a key part of assembling your portable gas grill. This stage ensures even heat distribution and a safe grilling experience. Proper placement of components helps you cook food evenly and avoid flare-ups. Take time to set up the cooking surface carefully for the best results.
Placing Grill Grates
Grill grates hold your food above the heat source. Place them evenly across the grill frame. Ensure the grates fit securely without wobbling. Clean grates before placing them to remove dust or residue. This step prevents food from sticking and improves cooking quality.
Use both hands to lower the grates gently. Align the edges with the grill’s support bars. Check that grates sit flat and stable. Proper placement helps maintain consistent cooking temperature.
Adding Heat Shields Or Plates
Heat shields protect grill burners from dripping fat and food debris. They also spread heat evenly across the cooking surface. Place the shields directly over the burners. Make sure they cover the entire burner area without gaps.
Check the grill manual for specific shield placement. Some models use metal plates; others use ceramic briquettes. Position these components securely to avoid shifting during cooking. Correct setup of heat shields extends burner life and improves heat control.
Final Adjustments And Safety Checks
Before firing up your portable gas grill for the first time, it’s crucial to perform final adjustments and safety checks. These steps ensure your grill works smoothly and, more importantly, keeps you safe while cooking. Skipping them can lead to frustrating malfunctions or dangerous situations.
Tightening All Screws
Loose screws can cause parts to wobble or even fall apart during use. Take a moment to go over every screw and bolt on your grill, tightening each one firmly but without overdoing it. Pay special attention to the legs, burner brackets, and side tables, as these areas support the grill’s stability.
Have you ever experienced a grill shaking unexpectedly? It’s usually because a key screw was overlooked. Making sure everything is snug prevents accidents and gives you confidence while grilling.
Testing The Ignition
Before connecting the gas, test the ignition system to confirm it sparks correctly. Press the ignition button and listen for the clicking sound, which shows the electrical mechanism is working. If you don’t hear a click, check the battery or wiring, depending on your grill model.
Once connected to the gas, ignite the burners one at a time. This helps you spot any issues early, such as delayed ignition or inconsistent flames. Would you want to discover a faulty igniter mid-cookout? Testing now avoids that hassle.
Ensuring Proper Ventilation
Your grill needs good airflow to burn gas safely and efficiently. Make sure the vents on your grill are open and unobstructed. Proper ventilation prevents dangerous gas buildup and helps maintain steady heat.
Check the surrounding area too—avoid using your grill in enclosed spaces or near flammable materials. Have you considered how ventilation affects both safety and cooking quality? Keeping air flowing is a simple step that makes a big difference.
Maintenance Tips For Longevity
Keeping your portable gas grill in top shape extends its life and ensures every cookout is a success. Regular maintenance prevents rust, buildup, and mechanical issues that could ruin your grilling experience.
Cleaning After Use
Right after grilling, allow the grill to cool slightly but remain warm enough to loosen residue. Use a grill brush to scrape off food particles from the grates. This simple step stops buildup from hardening and becoming tougher to remove later.
Wipe down the exterior with a damp cloth to remove grease splatters. Avoid harsh chemicals; mild soap and water work well. If you notice stubborn spots, soak a cloth in warm soapy water and let it sit for a few minutes before scrubbing.
Storing The Grill Safely
Think about where you keep your grill when not in use. Storing it in a dry, covered place protects it from moisture and dust, which cause rust and wear. If you don’t have a dedicated spot, invest in a good grill cover designed for your model.
Before storing, double-check that the gas tank valve is closed tightly. Disconnect the propane tank if you plan to store the grill for an extended period. This reduces the risk of leaks or damage to the gas system.

Credit: www.youtube.com
Frequently Asked Questions
How Do I Start Assembling A Portable Gas Grill?
Begin by unpacking all parts and checking the instruction manual. Attach the legs and side shelves first. Connect the grill body to the base securely before attaching the gas tank and burner components.
What Tools Are Needed For Portable Grill Assembly?
Typically, you need a screwdriver, wrench, and sometimes pliers. Most portable grills come with basic tools included. Always check the manual to confirm the exact tools required for your model.
How Do I Safely Connect The Gas Tank?
Ensure the grill is off before connecting. Attach the gas hose securely to the tank valve. Check for leaks by applying soapy water on connections and watching for bubbles.
How Long Does It Take To Assemble A Portable Gas Grill?
Assembly usually takes 20 to 45 minutes depending on the grill’s complexity. Reading the instructions carefully speeds up the process. Organizing parts beforehand also helps reduce assembly time.
Conclusion
Assembling your portable gas grill is simple with clear steps. Take your time and follow each instruction carefully. Check all parts fit tightly before use. A well-assembled grill ensures safe and fun cooking outdoors. Practice makes perfect, so don’t rush.
Soon, you will enjoy grilling anywhere you want. Keep your grill clean and store it properly. Ready for your next barbecue adventure?
