

Are you tired of watching your edging slip, peel, or lose its neat look? Keeping edging in place can feel like a constant battle, but it doesn’t have to be that way.
Imagine a clean, sharp border that stays put, making your garden or walkway look flawless all year round. You’ll discover simple, effective tips that anyone can use to keep edging secure and looking great. Stick with me, and you’ll learn how to save time, avoid frustration, and enjoy a polished outdoor space every day.

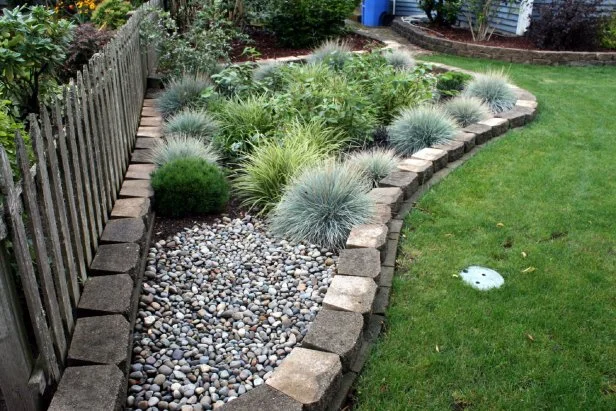
Credit: perfectpavers.com
Choosing The Right Tools
Keeping edging in place is easier with the right tools. Using good tools helps create clean lines and neat borders.
Choosing tools that suit your needs and comfort makes the job faster and better. Below are key points to consider.
Types Of Edging Tools
There are many edging tools available. Some are manual, and others are powered. Each type fits different tasks and garden sizes.
- Manual Edgers:Simple tools like half-moon edgers or spades. Best for small gardens.
- Powered Edgers:Use gas or electricity. Good for large areas and tough soil.
- Trimmers with Edging Function:String trimmers that can switch to edging mode. Versatile and easy to use.
- Edging Shears:Handheld shears for trimming grass along borders.
Materials And Durability
Tool material affects how long it lasts and how well it works. Choosing durable materials saves money over time.
| Material | Durability | Weight | Cost |
| Stainless Steel | High | Medium | Moderate |
| Carbon Steel | High | Heavy | Low |
| Aluminum | Medium | Light | High |
| Plastic | Low | Light | Low |
Ergonomics And Comfort
Comfort is key for long edging sessions. Tools with good grips and balanced weight reduce hand strain.
- Look for padded handles to avoid blisters.
- Choose tools with adjustable handles for your height.
- Pick lighter tools to reduce arm fatigue.
- Check that the tool feels balanced in your hand.
Credit: www.hgtv.com
Preparing The Surface
To keep edging in place, start by preparing the ground well. A smooth and clear surface helps the edging stay firm.
Follow these steps to prepare the surface before installing your edging material.
Clearing Debris And Grass
Remove all debris, rocks, and grass from the area where you want to place the edging. This prevents bumps and gaps under the edging.
- Use a shovel or garden rake to clear the soil.
- Pull out grass roots carefully to avoid regrowth.
- Remove stones and sticks that might block the edging.
- Dispose of all debris away from the work area.
Leveling The Ground
Make sure the ground is flat and even. Leveling helps the edging fit tightly and prevents shifting later.
| Tool | Purpose |
|---|---|
| Garden Rake | Break up soil and smooth the surface |
| Level | Check for flatness and evenness |
| Shovel | Dig out high spots and fill low areas |
Marking The Edging Line
Draw a clear line to show where the edging will go. This guides you during installation for a neat look.
Use these tools to mark the line:
- Garden hose or rope to shape curves
- Spray paint or chalk for a visible line
- Measuring tape to keep consistent width
Installation Techniques
Proper edging installation keeps your garden beds tidy and defined. It also helps prevent soil and mulch from spilling onto walkways.
Using the right methods makes edging last longer and stay secure during weather changes and gardening activities.
Setting The Edging Deep Enough
Place your edging material deep enough in the ground to stop it from moving. A shallow setting can cause the edging to tip over or shift.
Dig a trench that matches the height of your edging plus a few extra inches for stability. This depth helps the edging hold its place firmly.
Securing With Stakes Or Anchors
Use stakes or anchors to fix edging firmly in place. These supports stop the edging from moving under pressure or wind.
- Choose metal or plastic stakes that match your edging type.
- Place stakes every 12 to 24 inches along the edging.
- Drive stakes deep into the ground beside the edging.
- Ensure stakes are tight against the edging without bending it.
- Trim any stake tops that stick out above the edging for a neat look.
Joining Edging Sections Seamlessly
Connect edging pieces smoothly to avoid gaps and weak spots. Proper joints make the edging look continuous and strong.
| Joint Type | Description | Best Use |
| Butt Joint | Ends of edging sections meet directly. | Simple straight lines |
| Overlap Joint | One section overlaps the other for extra strength. | Areas with heavy pressure |
| Interlocking Joint | Edges lock together using built-in connectors. | Plastic or metal edging with connectors |
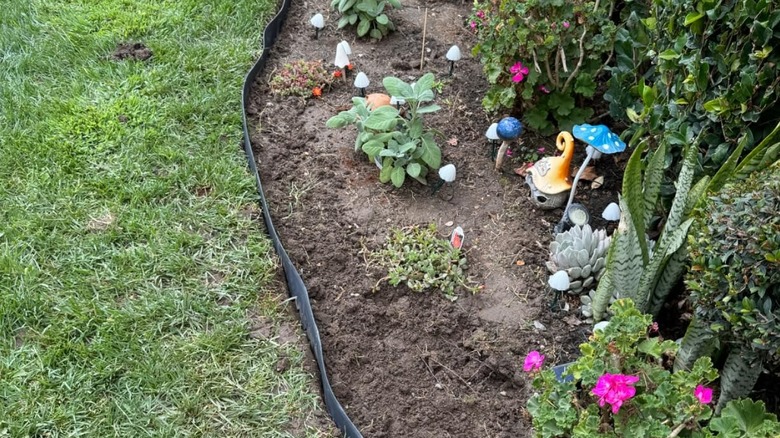
Credit: www.housedigest.com
Maintaining Edging Stability
Keeping your garden edging stable helps maintain a neat and tidy look. Stable edging also protects your plants and soil. Regular care prevents damage and keeps everything in place.
This guide covers simple ways to check and fix edging. You will also learn how to stop soil from washing away around your edging.
Regular Inspections
Check your edging every few weeks. Look for signs of movement or damage. Early spotting of problems helps avoid big repairs later.
- Walk around your garden and inspect the edges
- Look for gaps between edging and soil
- Check for broken or cracked pieces
- Note spots where soil has washed away
- Mark any areas that need repair
Repairing Loose Sections
Fix loose edging quickly to keep the structure strong. Use stakes or clamps to hold edges in place. Replace damaged parts to stop problems from spreading.
| Issue | Repair Method |
| Loose edging piece | Re-secure with metal or plastic stakes |
| Cracked edging | Remove and replace the damaged section |
| Gaps between edging and soil | Add soil or mulch to fill the space |
| Wobbly edging | Use clamps or adhesive to tighten joints |
Preventing Soil Erosion
Soil erosion can cause edging to shift or sink. Use these tips to keep soil in place and protect your edging.
- Plant ground cover to hold soil with roots
- Apply mulch to reduce water runoff
- Build small barriers or terraces on slopes
- Install drainage to direct water away from edging
- Compact soil near edging to prevent washing out
Enhancing Longevity
Keeping edging in place helps maintain a neat and attractive garden or pathway. Proper care can extend the life of your edging materials and save time on repairs.
This guide shares simple ways to protect your edging and keep it stable over time.
Using Protective Coatings
Applying protective coatings prevents damage from moisture, dirt, and sunlight. It also helps reduce wear and tear.
- Choose a coating suitable for your edging material, such as sealants for wood or rust-proof sprays for metal.
- Apply the coating evenly to all surfaces, including edges and corners.
- Reapply coatings every year or after heavy rain to maintain protection.
- Clean the edging before applying coatings to ensure good adhesion.
Avoiding Common Damage Causes
Damage to edging often comes from simple mistakes. Avoid these to keep your edging in good shape.
| Damage Cause | How to Avoid |
| Impact from lawn mowers | Keep mower blades sharp and use guards |
| Soil erosion | Install proper drainage and add mulch |
| Root growth pushing edging | Trim nearby roots regularly |
| Weather wear | Apply protective coatings often |
Seasonal Care Tips
Season changes affect edging differently. Follow these tips for each season to keep edging strong.
- Spring: Inspect for winter damage and clean debris.
- Summer: Water plants near edging to prevent soil shrinkage.
- Autumn: Remove fallen leaves and check for loose sections.
- Winter: Clear snow gently and avoid salt near edging.
Alternative Edging Solutions
Keeping edging in place helps define garden beds and pathways. It stops soil and mulch from spilling out.
There are many edging options besides traditional materials. You can choose natural or flexible types.
Natural Edging Options
Natural edging uses stones, wood, or plants to create borders. These options blend well with outdoor spaces.
Wood logs or bark give a rustic look. Stones or bricks add a sturdy, classic edge. Plants like boxwood or lavender form living borders.
- Wood logs or bark
- Natural stones or bricks
- Low-growing shrubs or flowers
Flexible Vs. Rigid Edging
Flexible edging bends to follow curves and shapes. It works well for winding paths or round beds.
Rigid edging holds a straight line and stays firm. It suits sharp corners and formal garden layouts.
- Flexible: plastic, rubber, or thin metal strips
- Rigid: concrete, stone, or metal with strong support
Diy Vs. Professional Installation
DIY edging lets you save money and customize your garden. It needs time and some tools to install correctly.
Professional installation ensures edging stays in place longer. Experts handle tricky spots and use proper techniques.
- DIY: lower cost, hands-on work, flexible timing
- Professional: higher cost, expert skills, faster results
Frequently Asked Questions
How Do I Secure Edging In Place Effectively?
Use stakes or pins to anchor edging firmly. Ensure the ground is compacted and edges fit tightly together. Regularly check and adjust to prevent shifting.
What Materials Work Best For Durable Garden Edging?
Metal, plastic, and stone are popular for edging durability. Choose based on garden style and soil type for best results. Each offers different strength and flexibility.
Can Edging Be Installed Without Digging A Trench?
Yes, some flexible plastic or rubber edging can be installed above ground. Secure with spikes or adhesive for stability. This method is quicker and less disruptive.
How Often Should I Maintain My Garden Edging?
Inspect edging every 3 to 6 months. Clean debris and tighten loose sections. Regular maintenance prevents damage and keeps edging looking neat.
Conclusion
Keeping edging in place requires focus and careful planning. Start by choosing the right materials. They should be durable and suited for your garden. Regular maintenance helps them last longer. Check for any shifts or movements. Adjust as needed to maintain alignment.
Consistent upkeep prevents weeds and erosion. This keeps your garden looking tidy and well-cared-for. With these tips, your edging will stay put and enhance your outdoor space. Enjoy a neat, organized garden all year round. Remember, a little effort goes a long way.
Happy gardening!
