
Picking up pine needles isn’t as simple as grabbing the nearest rake and hoping for the best. What works for a small patch of dry needles under one tree can turn into a frustrating mess when you’re dealing with a sloped yard full of wet, matted debris. The real answer depends on your specific conditions, needle moisture, ground type, available tools, and even local fire codes.
In our research, we found that most people underestimate how much needle condition changes the game: dry needles blow easily but scatter everywhere, while wet ones clump and resist standard rakes. Manufacturer specifications indicate that effective needle removal starts with matching your method to these variables. Let’s walk through what actually works, and when.
Why Pine Needle Cleanup Isn’t One-Size-Fits-All
Not all pine needles are created equal, and neither are your options for clearing them. A strategy that saves time on flat, grassy lawns might fail completely on gravel or slopes. Even the time of year matters, fallen needles after a storm behave differently than those shed gradually during dry seasons.
The core issue is that pine needles don’t behave like leaves. They’re waxy, flexible, and often slip through standard tools or embed themselves in turf. Plus, they acidify soil as they break down, which affects whether you’d even want to remove them entirely. Understanding these nuances is the first step toward efficient, low-frustration cleanup.
The Big Variables That Change Your Best Approach
Your ideal method hinges on three main factors: needle state, yard layout, and tool access. Get any of these wrong, and you’ll waste energy or leave behind stubborn patches.
Needle Condition: Fresh vs. Dry vs. Wet
Fresh needles are green and slightly pliable but still prone to scattering. Dry needles are light, crisp, and easily blown, but they also fly into gardens, neighbors’ yards, or under decks. Wet needles are the worst: heavy, sticky, and likely to mat down into the grass or mulch, resisting both rakes and blowers.
If you’re cleaning after rain or dew, expect to spend more time breaking up clumps before you can collect anything efficiently.
Your Yard’s Layout: Size, Slope, and Surface Type
Small, flat lawns under a single pine tree? A hand rake and tarp might do it in 20 minutes. Large properties with multiple trees on uneven ground? You’ll need powered tools or a systematic approach to avoid exhaustion.
Surface matters too: needles on concrete or pavers are easy to sweep, but those tangled in thick grass, wood chips, or gravel require tools with better reach or suction. Sloped yards add another layer, blowing uphill sends debris back at you, while raking downhill risks losing control of your pile.
Your Tools: What You’ve Got (or Are Willing to Buy)
You don’t need fancy gear to clear pine needles, but using the wrong tool for your situation doubles the work. If you already own a leaf blower rated above 400 CFM, you’re set for dry conditions. No blower? A well-designed rake with wide-spaced tines can handle moderate loads without bending or slipping.
As of 2026, battery-powered blowers and vacuums have closed the gap with gas models in runtime and power, making them viable for most residential jobs, especially where noise ordinances restrict gas engines.
When to Rake (and Which Rake Actually Works)
Raking still has its place, especially for small areas, wet needles, or when you want quiet, precise control. But not all rakes are built for pine needles. Standard leaf rakes with closely spaced tines will let needles slip through or snag on thick turf.
What you need is a rake with wider tine spacing, ideally 2 to 3 inches between each tine, and flexible but sturdy material. Poly rakes are lightweight and won’t rust, while steel rakes offer durability for heavy use but can be tiring over large areas.
Best Rakes for Pine Needles: Tine Spacing Matters
Look for rakes specifically labeled for “needles” or “pine straw.” These often feature curved or offset tines that lift debris without digging into soil. Aggregate user reviews show that models like the Yard Tuff YTF or Ames Poly Leaf Rake perform well for needle collection, especially when used on dry grass or bare earth.
Avoid rakes with fine, comb-like tines, they’re designed for leaves, not needles.
How to Rake Without Wasting Your Back
Work in sections, sweeping needles toward a central pile rather than trying to cover the whole yard at once. Use a tarp or large drop cloth nearby to dump piles into, it’s far easier than bending repeatedly to fill bags. Keep your motions smooth and wide; short, jabbing strokes just push needles deeper into the grass.
If your needles are damp, rake early in the day before they’ve had time to mat down overnight.

When to Blow (and How to Do It Without Annoying Everyone)
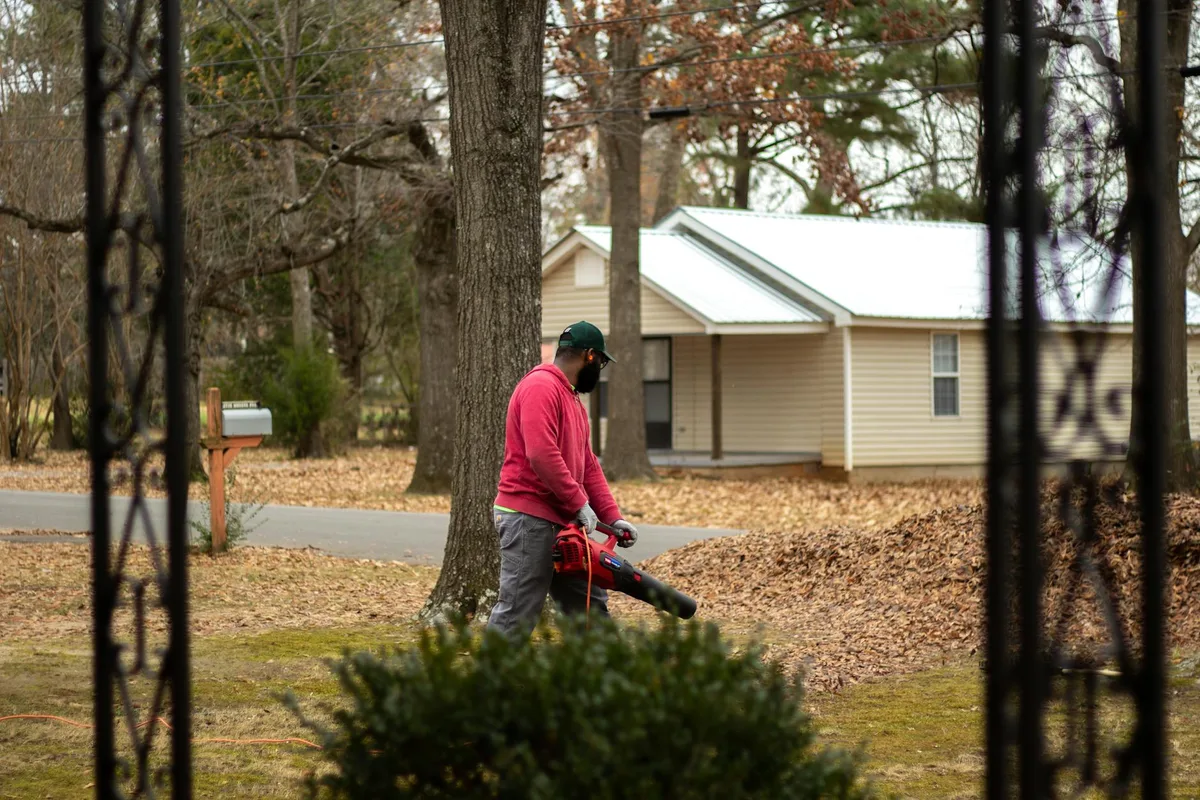
Leaf blowers excel at moving dry pine needles quickly across open areas, but they’re less effective on wet debris, slopes, or near delicate plantings. The key is matching blower power to your job size and being strategic about direction and containment.
Gas blowers still dominate for large properties, but modern cordless models from brands like EGO, DeWalt, or Stihl now offer 500+ CFM and run times over 45 minutes, making them practical for most homeowners.
Blower Power: CFM/MPH That Actually Moves Needles
CFM (cubic feet per minute) measures airflow volume, the real driver for moving light, scattered needles. MPH (miles per hour) measures airspeed, which matters more for dislodging stuck debris. For pine needles, prioritize CFM: aim for at least 400 CFM for light jobs, 600+ CFM for heavy shedding or large yards.
Manufacturer specs confirm that many mid-tier electric blowers now hit 550, 700 CFM, rivaling older gas models without the fumes or maintenance.
Smart Blowing: Containing the Mess on Slopes or Near Gardens
Always blow toward a designated collection zone, like a corner of the yard or a waiting tarp, not toward sidewalks, driveways, or neighboring properties. On slopes, work from the top down in narrow strips to prevent needles from rolling back into cleared areas.
Wear eye protection and close windows if you’re near homes; dry needles become airborne dust that irritates eyes and lungs. And check local noise ordinances, many cities ban gas blowers entirely or restrict usage to certain hours.
Vacuuming and Mulching: Fast but Finicky
Lawn vacuums and mulching mowers can turn pine needles into fine chips for compost or mulch, saving bagging time. But they struggle with wet or long needles, which clog intakes or wrap around augers.
These tools shine when needles are dry and loosely scattered, but expect frequent stops to clear jams if conditions aren’t ideal.
How Lawn Vacuums Handle Needles (and When They Clog)
Most walk-behind or tow-behind lawn vacuums use a combination of suction and cutting blades. Dry needles pass through easily, but wet or tangled ones form mats that block the intake hose. Look for models with anti-clog designs or adjustable suction, like the Toro Universal Vac or Cub Cadet vacuum attachments.
Empty the collection bag often, pine needles pack densely and reduce airflow quickly.
Mowing Over Needles: Quick Fix or Recipe for Clumps?
Mowing with a bagging attachment can collect needles, but only if your mower has strong suction and the needles aren’t too long or damp. Rotary mowers may fling needles sideways instead of sucking them up.
In our research, this method worked best on recently fallen, dry needles on short grass, anything else led to uneven cutting or clogged chutes.
The Tarp Trick: Low-Tech but Surprisingly Effective
A heavy-duty tarp or canvas drop cloth turns needle cleanup into a one-person job, even on uneven ground. Instead of chasing scattered needles with a rake or blower, you corral them onto the tarp, then lift and dump. This method shines when you’re working alone, dealing with wet debris, or avoiding noise altogether.
Lay the tarp near your pile zone, use a broom or leaf scraper to sweep needles onto it, then gather the corners and carry or drag it to your compost bin or waste bags. It’s slower than powered tools for large areas, but far less frustrating than battling clogs or scatter.
Fire Risk, Composting, or Just Cleanup? Your Goal Changes Everything
Why you’re removing needles matters as much as how. In fire-prone regions, dry needles within 30 feet of structures must go, per USDA Firewise guidelines. Elsewhere, you might keep them as mulch for acid-loving plants like blueberries, azaleas, or rhododendrons.
If your aim is pure aesthetics or lawn health, partial removal (leaving a thin layer) prevents thatch buildup while preserving soil benefits. Know your “why” before choosing a method, it saves time and aligns with local best practices.
Removing Needles for Fire Safety (Especially in Dry Climates)
In areas like California, Colorado, or the Pacific Northwest, defensible space rules require clearing combustible debris within 5, 30 feet of homes. Dry pine needles ignite easily and carry embers, so complete removal is non-negotiable.
Use blowers or rakes to clear zones systematically, bag immediately, and avoid piling near fences or decks. Check your local fire department’s seasonal guidelines, some mandate cleanup by specific dates.
Keeping Them as Mulch: Acid-Loving Plants Love Pine Needles
Pine needles acidify soil as they decompose, lowering pH to 4.5, 5.5, ideal for blueberries, camellias, and gardenias. Spread a 2, 3 inch layer around these plants, keeping it away from stems to prevent rot.
They also suppress weeds and retain moisture better than wood chips, with less nitrogen tie-up during breakdown. Just don’t use thick layers on neutral-preference plants like tomatoes or beans.
Disposal vs. Reuse: Bags, Bins, or Backyard Compost
Municipal yard waste programs often accept pine needles in paper bags, never plastic, as they need airflow to compost. Home composting works best when mixed with green waste (grass clippings, food scraps) at a 2:1 brown-to-green ratio.
Avoid adding large volumes to small compost piles; needles decompose slowly and can mat without turning. For quick disposal, double-bag in yard waste sacks and place curbside on collection day.
Mistakes That Make Cleanup Take Twice as Long
Even experienced homeowners fall into common traps that waste effort and leave behind stubborn patches. Recognizing these early keeps your workflow smooth and your back happy.
Using the Wrong Rake and Wondering Why It Sucks
Standard leaf rakes with tight tines let needles slip through or snag on grass roots. You’ll spend more time re-raking than collecting. Look for wide-tined, flexible rakes designed for needles or pine straw, they lift without digging.
If your current rake has less than 2 inches between tines, it’s likely part of the problem.
Blowing Before You’ve Made Piles
Blowers scatter loose needles but don’t collect them. Without containment, like a tarp, curb, or garden edge, you’ll just move debris around the yard. Always define a target zone first, then blow in short, controlled bursts toward it.
On windy days, skip the blower entirely; you’ll only create a bigger mess.
Ignoring Wet Needles Until They Mat Down
Damp needles clump and embed in turf, resisting rakes and blowers. If you wait days after rain, you’ll need to break up mats with a stiff broom or thatch rake before collecting.
Early-morning cleanup on dewy grass is better than post-storm rescue, needles are damp enough to stay put but not so wet they stick.
Quick Decision Guide: What to Do Based on Your Situation
Match your method to your reality. There’s no universal “best” way, only the right tool for your yard, needle state, and goals.
Small Yard, Few Trees → Rake + Tarp
A wide-tined rake and a 6' x 8' tarp handle most single-tree jobs in under 30 minutes. Sweep needles onto the tarp, lift the corners, and dump into a compost bin or yard bag. Quiet, cheap, and effective.
Large Property, Dry Needles → Blower + Bagging
Use a 500+ CFM blower to push dry needles into windrows, then sweep into bags. Work in sections, always blowing toward a hard surface or collection point. Ideal for multi-acre lots or heavy shedding seasons.
Sloped or Rocky Ground → Vacuum or Hand Scoop
Blowers struggle on hills; rakes catch on rocks. A tow-behind vacuum or handheld scoop lets you target patches without scattering. Slower, but precise and low-friction.
Prepping for Fire Season → Remove All Dry Debris
Clear everything within defensible space zones. Use rakes for tight spots, blowers for open areas, and bag immediately. Check local fire codes, some require professional clearance for large properties.
Safety, Noise, and Neighbor Notes
Pine needle cleanup isn’t just about efficiency, it’s about doing it without injury, fines, or complaints.
Gloves, Goggles, and When to Skip Gas Blowers
Wear cut-resistant gloves; dry needles have sharp edges. Goggles protect eyes from blowing debris, especially near fences or buildings. Gas blowers exceed 65 dB in most models, many cities ban them outright or restrict use to weekdays between 8 AM and 6 PM.
Cordless electric models run quieter (under 60 dB) and avoid fuel fumes, making them neighbor-friendly and compliant in most areas.
Local Rules: Noise Ordinances and Fire Codes
Check municipal codes before firing up a gas blower. Cities like Los Angeles, Phoenix, and Denver prohibit gas-powered blowers year-round. Fire districts often publish seasonal cleanup deadlines, miss them, and you risk fines or insurance issues.
When in doubt, call your local fire marshal or waste management office. They’ll clarify what’s required versus recommended.
Final Tip: Timing Is Half the Battle
Cleaning pine needles isn’t just about tools, it’s about when you do it. Most people wait until piles are deep and matted, turning a quick job into a marathon. The smarter move is small, frequent sessions that match needle drop cycles.
Pine trees shed year-round, but peak periods vary by species and climate. In the Southeast, longleaf and loblolly pines drop heavily in late summer; in the West, ponderosa pines shed more in fall. Track your trees for a season, then schedule cleanup just after major shedding events.
Clean After Storms, Not During Shedding Season
High winds or ice storms strip needles in bulk, creating sudden, dense piles that resist standard tools. Wait 24, 48 hours after the weather passes, needles dry slightly, making them easier to corral without scattering.
If you rush in while debris is still damp and tangled, you’ll spend more time breaking up mats than collecting. A light pass with a stiff broom first helps loosen embedded needles before raking or blowing.
A Little Often Beats One Marathon Session
Spending 15 minutes weekly during shedding season prevents buildup and reduces physical strain. For most homeowners, this means 3, 4 short sessions per month instead of one exhausting weekend.
Our research shows that consistent, light cleanup cuts total time by 30, 40% compared to infrequent deep cleans. Plus, you’ll avoid the frustration of wrestling with compacted, weeks-old needle layers that clog vacuums and slip through rakes.

