
Are you ready to take your beef to the next level? Using a smoker can turn ordinary cuts into mouthwatering, tender masterpieces packed with smoky flavor.
But if you’ve never smoked beef before, it might feel a bit overwhelming. Don’t worry—you’re about to learn simple, clear steps that will help you master the art of smoking beef. Whether you want to impress your family or become the star of your next barbecue, this guide will show you exactly how to use your smoker to get perfect results every time.
Keep reading, and soon you’ll be serving up beef that everyone will rave about.
Choosing The Right Smoker
Choosing the right smoker is key to smoking beef that tastes great and cooks evenly. The right smoker matches your needs, space, and budget. Consider the type, fuel, and size before buying. These factors affect flavor, cooking time, and ease of use.
Types Of Smokers
Smokers come in many shapes and styles. Common types include:
- Offset Smokers:Separate firebox for indirect heat. Great for large cuts of beef.
- Vertical Water Smokers:Compact with a water pan to keep meat moist.
- Electric Smokers:Easy to use with a consistent temperature.
- Pellet Smokers:Use wood pellets for flavor and automatic temperature control.
Each type offers different control levels and flavor profiles.
Fuel Options
Fuel choice changes the taste and cooking style.
- Charcoal:Classic smoky flavor. Requires more attention to maintain heat.
- Wood:Adds strong, natural smoke taste. Needs skill to control fire.
- Electric:Convenient and easy. Less smoky flavor.
- Pellets:Blend of wood and convenience. Good flavor and steady heat.
Pick a fuel that fits your comfort level and flavor preference.
Size And Capacity
Think about how much beef you want to smoke at once.
- Small smokers suit beginners or small families.
- Medium size fits most home cooks and moderate amounts of meat.
- Large smokers work well for parties or frequent cooking.
Also, check the smoker’s cooking area and storage space. A bigger smoker needs more fuel and space but cooks more meat at once.
Selecting The Best Beef Cuts
Choosing the right beef cut is key for a tasty smoked meal. The cut affects flavor, tenderness, and cooking time. Some cuts handle smoke better than others. Understanding the best cuts helps achieve rich, juicy results. Below are important details to help select and prepare beef for smoking.
Popular Cuts For Smoking
- Brisket: A classic choice with rich flavor and fat.
- Chuck Roast: Affordable and well-marbled, cooks well low and slow.
- Ribs: Beef ribs have great taste and absorb smoke deeply.
- Short Plate: Often used for pastrami, tender after smoking.
- Tri-Tip: Leaner but still flavorful with proper smoking.
Marbling And Quality
Marbling means fat inside the meat. It adds flavor and keeps meat moist. Look for cuts with even, white marbling. Fat melts during smoking, making beef tender. Choose fresh beef with a deep red color. Avoid meat with dark spots or dryness. Quality beef improves the final taste and texture.
Preparing The Meat
Trim excess fat but keep a thin layer for flavor. Pat the beef dry to help smoke stick. Apply a dry rub or simple salt and pepper. Let meat sit at room temperature for 30 minutes. This helps even cooking. Proper prep enhances smoke absorption and taste.
Preparing The Smoker
Preparing your smoker properly sets the stage for perfectly smoked beef. Taking time to get your equipment ready ensures even cooking and deep flavor development. It’s not just about turning it on; it’s about creating the right environment for your beef to shine.
Cleaning And Maintenance
Before you start smoking, check your smoker for leftover ash, grease, or old wood chips. A clean smoker prevents unwanted flavors from mixing into your beef. Use a wire brush to scrape down grates and wipe surfaces with a damp cloth.
Inspect seals and vents for damage or blockages. A well-maintained smoker holds temperature better and smokes more consistently. You don’t want a surprise leak ruining your slow-cooked masterpiece.
Setting The Temperature
Knowing the right temperature to set your smoker is crucial. For beef cuts like brisket or ribs, aim for a steady 225°F to 250°F. This low and slow heat breaks down tough fibers without drying the meat.
Use a reliable thermometer to monitor the internal smoker temperature, not just the dial. Fluctuations can cause uneven cooking or tough texture. Have you noticed how a steady fire changes the whole smoking experience?
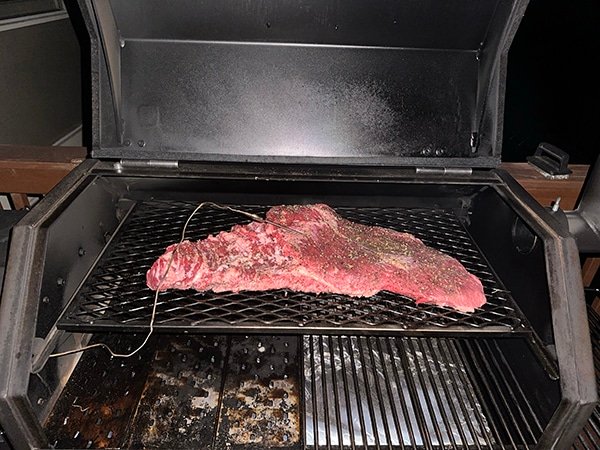
Adding Wood Chips
Wood chips are what give smoked beef its signature flavor. Choose hardwoods like hickory, oak, or mesquite for a robust, smoky taste. Soak chips in water for about 30 minutes before adding them to the smoker to slow down their burn.
Add chips gradually instead of dumping them all at once. This helps maintain a consistent smoke level and prevents bitter flavors. Try mixing different woods to find your own signature smoke profile—what flavors excite your palate?

Credit: www.kamadojoe.com
Seasoning And Marinades
Seasoning and marinades play a crucial role in bringing out the best flavors in smoked beef. They don’t just add taste; they enhance texture and moisture, making your smoked beef more tender and juicy. Choosing the right seasoning or marinade can be the difference between a good meal and a memorable one.
Dry Rubs
Dry rubs are a simple yet powerful way to add flavor to your beef before smoking. They usually consist of a blend of spices, salt, sugar, and herbs that you rub directly onto the meat’s surface.
Try mixing paprika, garlic powder, black pepper, and brown sugar for a balanced flavor. Let the rub sit on the beef for at least an hour, or overnight if you want deeper flavor penetration.
Have you ever wondered how much salt is enough? Too little, and the flavors won’t pop; too much, and it can overpower the meat. Testing with smaller cuts can help you find your perfect balance.
Wet Marinades
Wet marinades add moisture and infuse your beef with flavor through a liquid base, often containing acid like vinegar or citrus juice. This acid helps break down tough fibers in the meat, making it more tender.
A simple marinade could include olive oil, soy sauce, garlic, and lemon juice. Marinate your beef for 4 to 12 hours in the fridge, but avoid going too long or the acid might make the texture mushy.
Don’t forget to pat dry the beef before smoking to get that delicious crust. What flavors do you think would surprise your taste buds when mixed in a marinade?
Brining Techniques
Brining involves soaking your beef in a saltwater solution, sometimes with added sugar and spices. This method helps the meat retain moisture during the smoking process, resulting in juicier beef.
Use about 1/4 cup of salt per quart of water, and add aromatics like bay leaves, peppercorns, or garlic for extra flavor. Keep the beef in the brine for several hours depending on the cut size.
Have you considered how brining can affect the seasoning you apply later? It can amplify or mellow certain flavors, so it’s worth experimenting to see what matches your taste.
Smoking Process
Smoking beef is more than just placing meat over wood smoke—it’s about controlling heat and time to enhance flavor and tenderness. Mastering the smoking process means paying close attention to temperature, smoke duration, and internal meat temperature. These factors work together to create that perfect, juicy, smoky beef you crave.
Temperature Control
Maintaining the right temperature is crucial. Aim for a steady range between 225°F and 250°F (107°C to 121°C). This allows the beef to cook slowly, breaking down tough fibers without drying out.
Use your smoker’s built-in thermometer or an external one to monitor heat. Avoid opening the smoker too often—each time you do, heat escapes and the temperature drops. Have you noticed how a small temperature shift can change your beef’s texture? That’s why staying consistent matters.
Smoke Time Guidelines
Smoking beef depends on the cut and size. Brisket usually needs about 1 to 1.5 hours per pound, while ribs might take less time. Don’t rush—slow cooking lets smoke fully penetrate the meat.
- Smaller cuts like steaks: 1-2 hours
- Medium cuts like brisket: 8-12 hours
- Larger roasts: 12+ hours
Keep an eye on the meat’s appearance, too. A deep mahogany color often signals good smoke absorption. What’s your experience with timing—do you trust the clock or your eyes more?
Using A Meat Thermometer
A meat thermometer is your best friend during smoking. It tells you exactly when your beef reaches the safe and ideal internal temperature. Insert it into the thickest part of the meat, avoiding bones or fat.
Target temperatures vary by cut and preference:
| Beef Cut | Internal Temperature |
|---|---|
| Brisket | 195°F – 205°F (90°C – 96°C) |
| Ribs | 190°F – 203°F (88°C – 95°C) |
| Steaks (medium rare) | 130°F – 135°F (54°C – 57°C) |
Have you ever pulled your beef too soon and ended up with a dry texture? Using a thermometer helps avoid that mistake and ensures juicy results every time.

Credit: snakeriverfarms.com
Finishing Touches
Finishing touches make your smoked beef truly delicious. This stage is key to locking in flavors and making the meat tender. Proper handling after smoking affects taste and texture greatly. Follow these tips to bring out the best in your beef.
Resting The Meat
Rest the beef after smoking for 20 to 30 minutes. This lets juices spread evenly inside. Wrap the meat loosely in foil or butcher paper. Avoid cutting too soon to keep it juicy. Resting also makes slicing easier and cleaner.
Slicing Tips
Use a sharp knife for smooth, even slices. Cut against the grain to make meat tender. Thin slices work best for brisket or chuck roast. For steaks, thicker cuts keep moisture locked in. Keep your knife clean between slices for neat presentation.
Serving Suggestions
- Serve with classic barbecue sauces for extra flavor.
- Pair with fresh coleslaw or pickled vegetables for balance.
- Offer warm bread or buns for sandwiches.
- Include simple sides like baked beans or roasted potatoes.
- Garnish with fresh herbs to add color and aroma.
Troubleshooting Common Issues
Smoking beef can be rewarding but sometimes problems arise. These issues can affect flavor, texture, and overall results. Understanding common troubles helps keep your smoker working well. Here are solutions to frequent problems.
Avoiding Dry Meat
Dry beef ruins the eating experience. Keep the smoker temperature steady between 225°F and 250°F. Too high heat cooks meat too fast and dries it out. Use a water pan inside the smoker to add moisture. Wrap the beef in foil during the last hour to lock in juices. Let the meat rest after smoking to redistribute juices. These tips help keep your beef tender and juicy.
Managing Flare-ups
Flare-ups cause burnt spots and bitter taste. Use hardwood charcoal or wood chunks instead of lighter fluid. Avoid dripping fat hitting flames by placing a drip pan under the meat. Keep a spray bottle of water nearby to control sudden flames. Open vents slowly to prevent oxygen surges feeding the fire. Managing flare-ups protects your beef’s flavor and appearance.
Maintaining Consistent Smoke
Consistent smoke is key for rich flavor. Use dry, seasoned wood for steady smoke output. Avoid smoldering, which creates bitter, harsh smoke. Control airflow with smoker vents to balance oxygen and fuel. Keep the fire small and steady instead of large and wild. Check the smoke color; thin blue smoke is ideal. Proper smoke control improves taste and smell.

Credit: www.youtube.com
Enhancing Flavor With Wood Types
Enhancing the flavor of beef with the right wood type makes all the difference. The wood you choose impacts the taste profile of your smoked beef. Different woods impart unique aromas and flavors to the meat. Let’s explore popular wood types that can elevate your smoking game.
Hickory And Mesquite
Hickory adds a strong, hearty flavor to beef. It has a smoky, bacon-like taste, making it a favorite for many. Mesquite, on the other hand, provides a bold, earthy flavor. It’s potent and best used in moderation to prevent overpowering the meat.
Fruit Woods
Fruit woods like apple and cherry offer a milder, sweeter flavor. Apple wood delivers a light and fruity aroma, perfect for beef. Cherry wood adds a subtle, sweet touch, enhancing the beef’s natural richness. Both are great for a gentle, balanced smoke.
Experimenting With Blends
Blending different woods creates unique flavor profiles. Mix hickory with apple for a robust yet sweet taste. Combine mesquite with cherry for a smoky, sweet balance. Experimenting allows you to discover what suits your palate best.
Frequently Asked Questions
How Long Should I Smoke Beef For Best Flavor?
Smoking beef typically takes 6 to 8 hours at 225°F. This slow cooking allows the flavors to fully develop and the meat to become tender and juicy.
What Wood Is Best For Smoking Beef?
Hickory, oak, and mesquite woods are ideal for smoking beef. They provide a rich, smoky flavor that complements the beef’s natural taste.
Should I Marinate Beef Before Smoking?
Marinating beef before smoking is optional but recommended. It enhances flavor and helps keep the meat moist during the smoking process.
How Do I Maintain The Smoker Temperature For Beef?
Keep your smoker steady at 225°F to 250°F. Use a reliable thermometer and adjust vents or fuel to maintain consistent heat.
Conclusion
Smoking beef takes patience and attention to detail. Keep the temperature steady and choose the right wood. Watch the meat closely to get the best flavor. Rest the beef before slicing to keep it juicy. Practice helps you improve with each try.
Enjoy the process and share your tasty results. Smoking beef can be simple and fun with these tips. Your next meal will impress friends and family.
