
Are you ready to transform your garden but don’t know where to start? Using a garden tiller can make preparing your soil easier and faster than ever.
Whether you want to grow fresh vegetables or create a beautiful flower bed, mastering this tool is the first step. In this guide, you’ll discover simple, clear instructions that will help you use a garden tiller safely and effectively. By the end, you’ll feel confident and excited to get your hands dirty and watch your garden thrive.
Keep reading to unlock the secrets to a healthier, more vibrant garden!
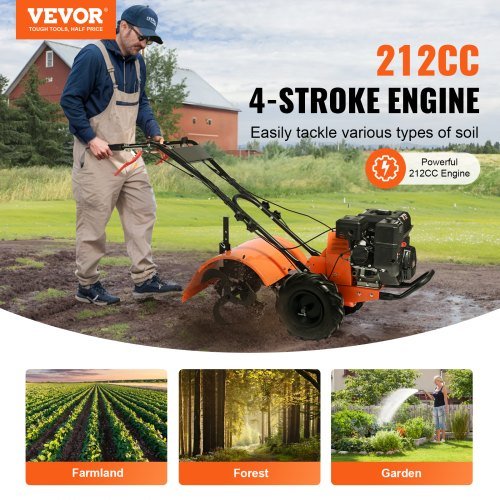
Choosing The Right Tiller
Using a garden tiller can make preparing your soil much easier. Picking the right tiller depends on your garden size and soil type. This guide helps beginners choose the best tiller for their needs.
Types Of Garden Tillers
There are different types of garden tillers. Some are designed for small gardens, while others handle large areas. Understanding each type helps you select the right one.
- Front-tine tillers:These have tines in front and are good for light soil work.
- Rear-tine tillers:These have tines in the back and are better for heavy, tough soil.
- Cultivators:Smaller tools for mixing soil in flower beds or small spaces.
Gas Vs Electric Tillers
Gas and electric tillers have different advantages. Your choice depends on power needs and ease of use.
| Feature | Gas Tillers | Electric Tillers |
| Power | High, good for tough soil | Lower, best for small gardens |
| Noise | Loud | Quieter |
| Maintenance | Requires fuel and engine care | Minimal maintenance |
| Weight | Heavier | Lighter and easier to handle |
Size And Power Considerations
Choose a tiller size and power that match your garden’s needs. A small tiller is easy to control but may not work well in hard soil. Larger tillers can handle tough ground but need more strength to use.
- Small tillers: Ideal for gardens under 500 square feet.
- Medium tillers: Work well for 500 to 2,000 square feet.
- Large tillers: Best for areas over 2,000 square feet or very tough soil.
Preparing Your Garden
Before using a garden tiller, prepare the area carefully. Good preparation helps the tiller work well and protects your plants.
This guide covers three key steps to get your garden ready for tilling.
Clearing Debris And Rocks
Remove all sticks, stones, and trash from your garden space. These can damage the tiller or block its blades.
- Pick up large rocks by hand
- Rake smaller stones and sticks into a pile
- Dispose of leaves and old plants to clear the soil
- Check for hidden debris under thick ground cover
Marking Your Tilling Area
Mark the edges of the area you want to till. This helps you till evenly and avoid going outside your garden.
- Use garden stakes or small flags at each corner
- Stretch string between stakes to form straight lines
- Measure your space to keep the area square or rectangular
Checking Soil Moisture
Test the soil moisture before tilling. Soil that is too wet or too dry can cause problems.
| Soil Condition | Effect on Tilling | What to Do |
|---|---|---|
| Too Wet | Soil clumps and clogs tiller | Wait for soil to dry a day or two |
| Too Dry | Hard soil breaks tiller blades | Water soil lightly a day before tilling |
| Just Right | Soil crumbles easily | Start tilling right away |
Safety Tips For Beginners
Using a garden tiller can make soil preparation easier. Safety is very important for beginners.
Follow simple safety tips to avoid accidents and injuries while tilling your garden.
Wearing Proper Gear
Wear the right clothes before you start the tiller. This helps protect you from dirt and sharp parts.
Use strong shoes, gloves, and eye protection. Loose clothes can get caught in the machine.
- Wear closed-toe shoes or boots
- Use sturdy gloves to protect your hands
- Wear safety goggles to protect your eyes
- Avoid loose or flowing clothes
- Tie back long hair
Handling The Tiller Safely
Hold the tiller firmly with both hands. Keep your feet away from the blades at all times.
Start the tiller on a flat surface. Walk slowly and do not rush the work to stay in control.
- Read the tiller’s manual before use
- Keep a firm grip on the handles
- Do not force the tiller into hard soil
- Turn off the tiller before adjusting or cleaning
- Use both hands while operating
Avoiding Common Hazards
Check the area for rocks, wires, and roots before tilling. These can damage the tiller or cause injury.
Be aware of your surroundings. Keep children and pets away from the work zone.
- Clear the soil of stones and sticks
- Look out for underground pipes or cables
- Do not use the tiller in wet conditions
- Keep bystanders at a safe distance
- Stop if you feel tired or distracted

Credit: www.reddit.com
Starting The Tiller
Using a garden tiller can make soil preparation easier. Starting the tiller correctly is important for safety and performance.
This guide covers how to set up the machine, start it, and adjust the tilling depth for beginners.
Setting Up The Machine
Place the tiller on a flat, stable surface before starting. Check the fuel level and oil to ensure the machine runs smoothly.
- Fill the fuel tank with fresh gasoline.
- Check the oil level and add if needed.
- Inspect the tines for damage or debris.
- Make sure the throttle and choke controls move freely.
Starting Procedures
Follow these steps to start your garden tiller safely and correctly.
- Engage the choke to help start the engine.
- Turn the fuel valve to the “on” position.
- Hold the tiller firmly and pull the starter cord quickly.
- Once the engine starts, gradually push the choke back to “run”.
- Let the engine warm up for a few minutes before tilling.
Adjusting Tilling Depth
Set the tilling depth based on the soil condition and the type of plants you want to grow. Adjusting depth helps protect the machine and soil health.
| Soil Type | Recommended Depth | Notes |
|---|---|---|
| Soft or sandy soil | 4-6 inches | Shallow depth prevents damage |
| Loamy soil | 6-8 inches | Good for most garden beds |
| Clay or hard soil | 3-5 inches | Multiple passes may be needed |
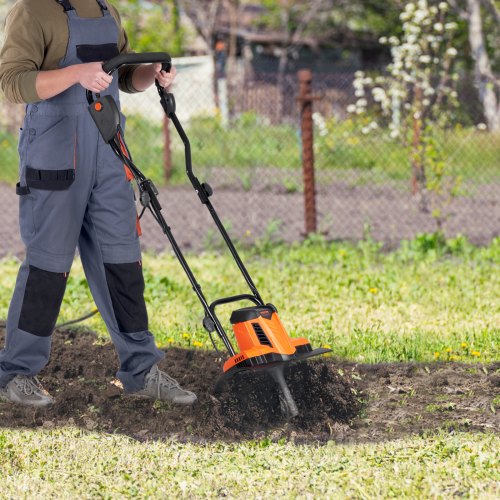
Tilling Techniques
Tilling helps prepare soil for planting. It breaks up hard ground and mixes nutrients.
Using the right tilling technique improves soil health and plant growth. Beginners should learn basic patterns.
Basic Tilling Patterns
Start tilling by moving in straight lines across your garden. This creates even soil texture.
Next, till in a perpendicular direction to break up clumps and mix soil well.
- Till forward in rows
- Till across the rows at a right angle
- Overlap slightly to avoid missed spots
Working With Different Soil Types
Soil varies by type: sandy, clay, or loamy. Each needs a different tilling approach.
Sandy soil needs light tilling to avoid damage. Clay soil requires deeper tilling to loosen it.
- Sandy soil: till shallowly to keep structure
- Clay soil: till deeply to improve drainage
- Loamy soil: till moderately for best mix
Avoiding Over-tilling
Too much tilling harms soil. It breaks natural layers and kills helpful organisms.
Limit tilling to only what is needed. Stop once soil is loose and crumbly.
- Do not till wet soil to prevent compaction
- Use tiller only once or twice before planting
- Leave some soil undisturbed to protect microbes

Credit: www.angi.com
After Tilling Care
Once you’ve finished tilling your garden, it’s important to care for your equipment properly. This ensures that your garden tiller remains in good condition for future use.
Proper after-tilling care involves cleaning, maintenance, and storing the tiller correctly. Let’s explore how to manage each step.
Cleaning The Tiller
Cleaning your garden tiller after use is crucial. Dirt and debris can damage the machine over time.
Start by removing all soil from the blades. Use a hose to wash off mud and dirt.
- Check for any stuck plant material
- Inspect the tiller for any loose parts
- Dry the machine to prevent rust
Maintenance Tips
Regular maintenance ensures your tiller runs smoothly. Check the engine oil and replace it if needed.
Inspect the air filter and clean it regularly. This helps the engine breathe better.
- Sharpen the blades to keep them effective
- Tighten any loose bolts or screws
- Examine the fuel system for leaks
Storing Your Equipment
Proper storage is vital for the longevity of your tiller. Store it in a dry place to avoid moisture damage.
Cover the tiller to protect it from dust and debris. Use a tarp or a specialized cover.
- Store in a cool, dry area
- Keep away from chemicals or corrosive materials
- Disconnect the spark plug for safety
Credit: www.vevor.com
Frequently Asked Questions
What Is The Best Soil Condition For Using A Garden Tiller?
The best soil for a garden tiller is moist but not soggy. Avoid tilling dry or waterlogged soil to prevent damage. Ideal soil is crumbly and easy to turn, promoting better aeration and root growth. This improves tiller efficiency and garden health.
How Deep Should I Till My Garden Soil?
For beginners, till soil about 6 to 8 inches deep. This depth loosens soil, breaks up clumps, and removes weeds. Avoid tilling too deep to protect soil structure and microorganisms. Proper depth ensures better seedbed preparation.
When Is The Best Time To Use A Garden Tiller?
The best time to till is early spring or late fall. Soil should be dry enough to avoid clumping. Tilling before planting helps mix nutrients and aerate soil. Avoid tilling during wet conditions to prevent compaction.
How Do I Maintain My Garden Tiller Properly?
Regularly clean the tiller after use to remove dirt. Check and tighten bolts and blades often. Lubricate moving parts as per the manual. Store in a dry place to prevent rust. Proper maintenance extends tiller life and performance.
Conclusion
Using a garden tiller can make soil preparation easier and faster. Start slow and keep safety in mind. Regularly check the tiller for any issues. Work in small sections for better control. Healthy soil helps your plants grow strong. With practice, tilling will feel natural and simple.
Enjoy the process and watch your garden thrive. Stay patient and take breaks when needed. Your garden will thank you for the care.

