
If your trimmer isn’t responding like it used to, the throttle cable might be the problem. Replacing it may sound tricky, but with the right steps, you can fix it yourself and save time and money.
In this guide, you’ll learn exactly how to replace your trimmer throttle cable quickly and safely. Keep reading to get your trimmer back to full power without any hassle.

Credit: www.repairclinic.com
Tools And Materials Needed
Gathering the right tools and materialsmakes replacing the throttle cable easier. A replacement throttle cableis essential. Use screwdriversto remove covers and screws. Pliershelp grip and pull the old cable. A wrench setadjusts nuts and bolts. Keep a clean clothhandy to wipe dirt.
Having a small containerto hold screws prevents loss. A lubricant sprayhelps the new cable move smoothly. Wear glovesto protect your hands. Good lightinglets you see small parts clearly. Organize tools on a flat surface for easy reach.

Credit: www.repairclinic.com
Preparing The Trimmer
Always wear protective glovesand safety glasses. Make sure the trimmer is offand coolbefore starting. Work in a well-lit areato see all parts clearly.
Remove the engine coverby loosening screws. Find the throttle cable running from the handle to the engine. Carefully pull back any clips or fastenersholding the cable in place.
Removing The Old Throttle Cable
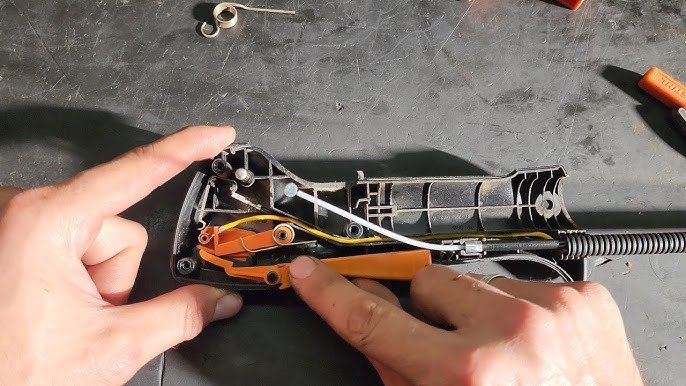
Start by locating the throttle cable on the handle. Use a screwdriver to loosen the screws holding the cable. Be careful not to lose the screws. Gently pull the cable out of its slot. Check for any damage or wear on the cable. If damaged, it will need replacing. Clean the handle area to remove dirt and debris. Ensure the handle is clear before attaching a new cable.
Find the throttle cable connected to the engine. Loosen the screws with a screwdriver. Carefully detach the cable from the engine. Inspect the cable for any signs of wear. If the cable is worn, replace it. Clean the engine area after removing the cable. Make sure there is no dirt blocking the engine. Attach a new cable securely to ensure proper function.
Installing The New Throttle Cable
Start by routing the cablealong the same path as the old one. Avoid sharp bends or twists. Keep the cable tight but not stretched. This ensures smooth throttle action and prevents damage.
Connect the cable to the handle by sliding it into the throttle lever slot. Make sure it fits snugly. The lever should move freely without sticking. Check the throttle trigger to confirm smooth movement.
Attach the other end of the cable to the engine. Hook it onto the throttle arm or linkage. Secure it with the clip or screw provided. Test the throttle by pulling the handle and watching the engine part move.
Adjusting The Throttle Cable
Proper tensionon the throttle cable is key for smooth operation. The cable should be tight enough to respond quickly but not so tight it binds. Loosen the cable adjuster first, then pull the cable slightly to remove slack. Tighten the adjuster until the throttle lever feels firm but can still move freely.
Check the cable movementby slowly moving the throttle trigger. It should move smoothly without sticking or lag. If the cable snaps back too fast or stays loose, adjust the tension again. Make small changes and test each time to find the right balance.
- Ensure no kinks or bends in the cable.
- Keep the cable clean and lubricated.
- Replace damaged cables for safety.
Final Checks
Check the throttle cable moves smoothlywithout sticking. Pull and release the throttle to test its response. Make sure the cable is not too tight or loose. Adjust the tension if needed for a steady throttlefeel.
Inspect all connections to ensure they are secure. Tighten any loose screws or clamps. Confirm the cable is properly seated in the throttle lever and engine.
- Look for any signs of wear or damage on the cable.
- Replace any worn-out parts before final assembly.
- Ensure the cable path is clear and does not rub against sharp edges.
- Double-check that the throttle spring works correctly.
Test the trimmer by starting the engine and gently using the throttle. The engine should respond quickly and smoothly. Any sticking or lag means adjustments are needed.

Credit: www.youtube.com
Frequently Asked Questions
How Do I Know If My Trimmer Throttle Cable Needs Replacement?
If the throttle response is slow or stuck, the cable may be damaged. Visible fraying or rust also indicates replacement is needed.
What Tools Are Required To Replace A Trimmer Throttle Cable?
You typically need screwdrivers, pliers, a wrench, and a replacement throttle cable for the job. These tools help remove and install the cable properly.
How Long Does It Take To Replace A Trimmer Throttle Cable?
Replacing the throttle cable usually takes about 15 to 30 minutes, depending on your experience and the trimmer model.
Can I Replace The Throttle Cable Myself Safely?
Yes, if you follow the safety instructions and use the right tools, replacing the cable yourself is safe and cost-effective.
Conclusion
Replacing a trimmer throttle cable is simple with the right steps. Take your time and follow each part carefully. A working throttle cable keeps your trimmer running smoothly. Regular checks help avoid unexpected problems later. Now, you can fix your trimmer and save money.
Trust your skills and enjoy your gardening work more. Keep practicing, and it will get easier every time.

