
Are your tools scattered everywhere, making it hard to find what you need when you need it? Imagine having a simple, organized space where every hammer, screwdriver, and wrench has its own spot.
Building your own DIY tool rack is easier than you think—and it can save you time, frustration, and even money. In this guide, you’ll discover step-by-step how to create a sturdy, customized tool rack that fits your space and your tools perfectly.
Ready to transform your workspace and keep your tools within easy reach? Let’s get started!

Credit: www.youtube.com
Choosing The Right Materials
Choosing the right materials is key to building a sturdy and long-lasting DIY tool rack. The materials affect the rack’s strength, appearance, and ease of assembly. Select items that fit your needs and budget. Quality materials also make your project safer and more reliable.
Focus on materials that offer durability and easy maintenance. Consider the environment where the rack will be placed. Indoor racks have different needs than outdoor ones. This guide covers wood choices, essential tools, and hardware for your project.
Wood Options
Wood is a popular choice for tool racks. It is strong, easy to work with, and looks good. Choose between softwoods and hardwoods.
- Pine:Affordable and easy to cut. Good for light to medium tools.
- Oak:Very strong and durable. Ideal for heavy tools.
- Birch:Smooth surface and good strength. Great for painted racks.
- Plywood:Cost-effective and stable. Use high-quality plywood for better results.
Check for smooth boards without cracks or knots. Sand the wood before use for a clean finish.
Essential Tools
Having the right tools makes the project easier and faster. Basic tools include:
- Measuring tape for accurate cuts.
- Hand saw or power saw for cutting wood.
- Drill for making holes and driving screws.
- Screwdriver or impact driver for assembling parts.
- Level to ensure the rack is straight.
- Clamps to hold pieces while working.
Use sharp blades and bits for clean cuts and holes. Wear safety gear during work.
Hardware And Accessories
Hardware keeps the rack stable and functional. Choose strong screws or nails that fit the wood thickness.
- Screws:Provide a tight hold. Use wood screws or deck screws.
- Nails:Easier to use but less secure than screws.
- Brackets:Add extra support to corners or shelves.
- Hooks:Perfect for hanging tools like hammers and wrenches.
- Wall anchors:Needed for mounting racks on drywall or masonry.
Choose rust-resistant hardware for moisture-prone areas. This prevents damage over time.
Planning Your Tool Rack
Planning your tool rack is the foundation of a successful DIY project. Without a clear plan, you risk creating a rack that doesn’t fit your space or meet your storage needs. Taking time to measure, design, and choose the right storage types ensures your tools stay organized and easy to access.
Measuring Your Space
Start by measuring the wall or area where you want to install your tool rack. Use a tape measure and note the width, height, and depth available. Don’t forget to check for obstacles like light switches, outlets, or studs that could affect placement.
Imagine building a rack only to find it’s too wide for the wall or blocks a door. Accurate measurements prevent costly mistakes and wasted materials. You might want to sketch your space on paper to visualize how much room you have.
Designing The Layout
Think about how you use your tools daily. Which ones do you grab most often? Place those within easy reach on your rack. Less frequently used items can be stored higher or lower.
Design your layout to balance accessibility and storage capacity. Group similar tools together—like hammers with screwdrivers or paintbrushes with rollers. This makes finding and putting away tools faster and less frustrating.
Try drawing a simple diagram of your rack with labeled sections. This helps you avoid clutter and ensures every tool has its place. What would make your work routine smoother?
Selecting Storage Types
Different tools need different storage solutions. Hooks work well for hanging wrenches and pliers. Shelves or small bins are great for screws, nails, and drill bits.
- Consider pegboards for flexibility—they let you rearrange hooks and holders as your tool collection grows.
- Magnetic strips can hold metal tools securely and save space.
- Use small containers or jars attached to the rack for tiny items like nails or nuts.
Choose storage types that fit your tools and your working style. The right choice keeps your rack tidy and your tools protected. What storage options would make your workspace more efficient?
Cutting And Preparing Components
Cutting and preparing your components accurately sets the foundation for a sturdy and functional DIY tool rack. Precision here saves you time and frustration later. Before you pick up a saw, ensure your measurements are exact and your workspace is safe and organized.
Marking Measurements
Start by clearly marking your wood pieces with a pencil and a ruler or measuring tape. Double-check each measurement before making any cuts—accuracy here is key. Use a square tool to keep your lines straight and ensure corners will fit perfectly.
Have you ever cut a piece too short and had to start over? Taking a moment to mark carefully can prevent that costly mistake. Label each piece after marking to avoid confusion during assembly.
Safe Cutting Techniques
Safety is non-negotiable when cutting wood. Always wear protective goggles and gloves to shield your eyes and hands. Use clamps to hold your wood steady, so your hands stay clear of the blade.
Choose the right saw for your cuts—hand saws work well for small pieces, while a circular saw speeds up straight cuts on larger boards. Cut slowly and steadily, following your marked lines precisely. Remember, rushing increases the risk of injury and mistakes.
Sanding And Finishing
After cutting, sand all edges and surfaces to remove splinters and rough spots. Start with medium-grit sandpaper, then finish with fine grit for a smooth touch. This step not only improves safety but also helps paint or stain adhere better.
Pay special attention to corners and holes where your tools will hang—smooth edges protect your tools and your hands. Have you noticed how a well-sanded rack just feels more professional and lasts longer? A little extra effort here makes a big difference.

Credit: www.pvcfittingsonline.com
Assembling The Frame
Begin by connecting the main frame pieces securely using screws or nails. Ensure all corners are square and the frame sits flat. Tight joints create a strong base for your tool rack.
Assembling the frame of your DIY tool rack is a crucial step that sets the foundation for a sturdy and efficient storage solution. This phase requires precision and attention to detail to ensure your tool rack serves its purpose effectively. Let’s dive into the specific steps involved in putting together a solid frame.Joining Pieces
Begin by laying out all your wooden pieces on a flat surface. This helps you visualize the final structure and ensures you have all necessary components. Align the pieces so that they fit together seamlessly. It’s like assembling a puzzle; each piece should have a designated spot. Make sure edges are flush, as gaps can compromise the structure’s integrity. Use a square to check that corners form perfect right angles.Ensuring Stability
Stability is paramount for any tool rack. Think about the weight it will bear—your power tools, wrenches, and hammers can add up quickly. Reinforce joints with additional support, such as corner braces or metal brackets. These add much-needed strength and prevent wobbling. Consider adding a cross brace if your frame is wide. This diagonal support can significantly enhance the overall sturdiness of your rack.Using Screws And Nails
Screws and nails are your best friends in this project, each serving a distinct purpose. Use screws for stronger, more durable joints, especially in load-bearing areas. Pre-drill holes to prevent wood from splitting. This extra step can save you from frustrating setbacks later on. Nails can be used for quicker assembly and work well for non-load-bearing parts. However, always prioritize screws for key joints to ensure long-lasting strength. How does it feel to see your tool rack taking shape? With a well-assembled frame, you’re one step closer to transforming your workspace into an organized haven.Adding Storage Features
Adding storage features to your DIY tool rack boosts its usefulness. It helps keep tools organized and easy to find. Smart storage solutions save space and protect your tools from damage. You can customize storage based on the types and sizes of your tools.
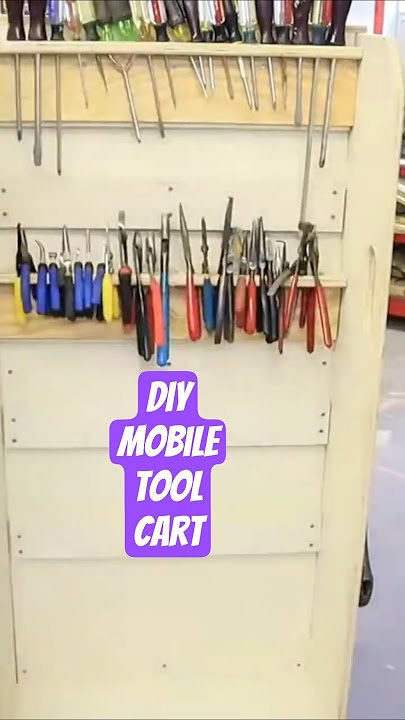
Installing Hooks And Pegs
Hooks and pegs provide simple, accessible storage for hanging tools. Attach sturdy hooks or pegs to the rack’s wooden board. Use screws or nails for secure fixing. Arrange them to hold items like hammers, wrenches, and scissors. Hooks keep tools visible and ready to grab. Pegs fit perfectly for smaller tools such as screwdrivers and pliers.
Creating Shelves And Compartments
Shelves add flat storage space for toolboxes and power tools. Build shelves using wood planks fixed horizontally on the rack frame. Add dividers to make compartments for sorting smaller items. Compartments prevent tools from mixing and make finding them easier. Customize shelf height to fit different tool sizes. This method keeps your workspace tidy and tools well-organized.
Using Magnetic Strips
Magnetic strips hold metal tools firmly in place. Mount strong magnetic bars on the tool rack surface. They work well for screwdrivers, pliers, and drill bits. Magnetic storage reduces clutter and keeps tools off work surfaces. It makes tool removal quick and effortless. Choose strips with enough magnetic strength to support your tool weight.
Mounting The Tool Rack
Mounting the tool rack securely on your wall is crucial to keep your tools organized and accessible. It’s not just about fixing it anywhere but finding the right spot and attaching it properly to handle the weight. Let’s break down how to get your tool rack mounted safely and effectively.
Choosing Wall Placement
Start by picking a spot that’s easy to reach and close to your main workspace. Think about where you usually grab your tools and avoid cramped or cluttered areas. A wall near your workbench or garage entrance often works best.
Consider the height too—mount the rack so you don’t have to bend or stretch too much. Would you prefer your tools at eye level or lower for quick grabs? Finding the right height can save you time and prevent strain.
Securing To Studs
Locating the wall studs is key for a strong hold. Use a stud finder or gently tap the wall to listen for solid spots behind the drywall. Screwing directly into studs ensures the rack won’t pull away under the weight of heavy tools.
Mark the stud locations clearly before drilling. Use long screws—at least 2 inches—to anchor the rack firmly. If you’re mounting on drywall without studs, you’ll need heavy-duty anchors designed for the load.
Final Adjustments
After mounting, check the rack’s level with a spirit level to make sure it’s straight. A crooked rack not only looks off but can cause tools to slide off unexpectedly. Tighten all screws and brackets securely, but avoid over-tightening which can damage the wall or rack.
Test the rack by hanging a few tools to see if it holds well and is easy to use. If anything feels unstable, adjust the screws or reposition as needed. Your goal is a balance between sturdiness and convenience—how does your setup feel after the first try?
Maintaining Your Tool Rack
Maintaining your DIY tool rack keeps it functional and looking good. Proper care extends its life and saves time searching for tools. Simple upkeep prevents damage and clutter. Regular checks make sure everything stays in place and ready to use.
Regular Cleaning
Dust and dirt build up on your tool rack quickly. Wipe it down with a dry or slightly damp cloth often. Avoid harsh chemicals that may damage wood or paint. Clean metal parts to stop rust from forming. A clean rack keeps tools visible and easy to find.
Organizing Tools Efficiently
Arrange tools by type and size for quick access. Use hooks, bins, or slots to separate items. Keep frequently used tools at eye level or within reach. Label sections to help remember where things belong. An organized rack saves effort and reduces clutter.
Upgrading Features
Add extra hooks or shelves to fit more tools. Install magnetic strips for small metal items like screws and drill bits. Use pegboard inserts to customize spaces. Consider adding lighting for better visibility. Simple upgrades make your rack more useful and adaptable.

Credit: www.ramblingrenovators.ca
Frequently Asked Questions
What Materials Do I Need For A Diy Tool Rack?
You need wood planks, screws, nails, hooks, a saw, drill, and measuring tape. Choose sturdy materials for durability and safety.
How Long Does It Take To Build A Tool Rack?
Building a basic DIY tool rack typically takes 2 to 4 hours. Time depends on design complexity and your skill level.
Can I Customize The Tool Rack Size?
Yes, you can adjust the rack size to fit your workspace and tools. Measure your area before starting for perfect fit.
What Tools Are Essential For Making A Tool Rack?
Essential tools include a drill, saw, screwdriver, hammer, level, and measuring tape. These tools ensure precise and secure construction.
Conclusion
Building a DIY tool rack saves space and keeps tools organized. You can customize it to fit your needs and workshop style. Using basic materials and simple steps makes the project easy and affordable. It also helps you find tools quickly and work more efficiently.
Try making your own tool rack to enjoy a tidier workspace. Small efforts lead to big improvements in your daily tasks. Start today and see the difference it makes!
