
Are you tired of your garden looking messy around the edges? A well-defined border can instantly lift the whole look of your outdoor space.
But when your garden border curves and twists, edging it neatly can feel tricky. Don’t worry—you can master this with a few simple steps. In this guide, you’ll discover easy ways to edge your curved garden border so it looks sharp, clean, and inviting.
Keep reading, and you’ll transform your garden’s edges into a stunning highlight you’ll be proud of.
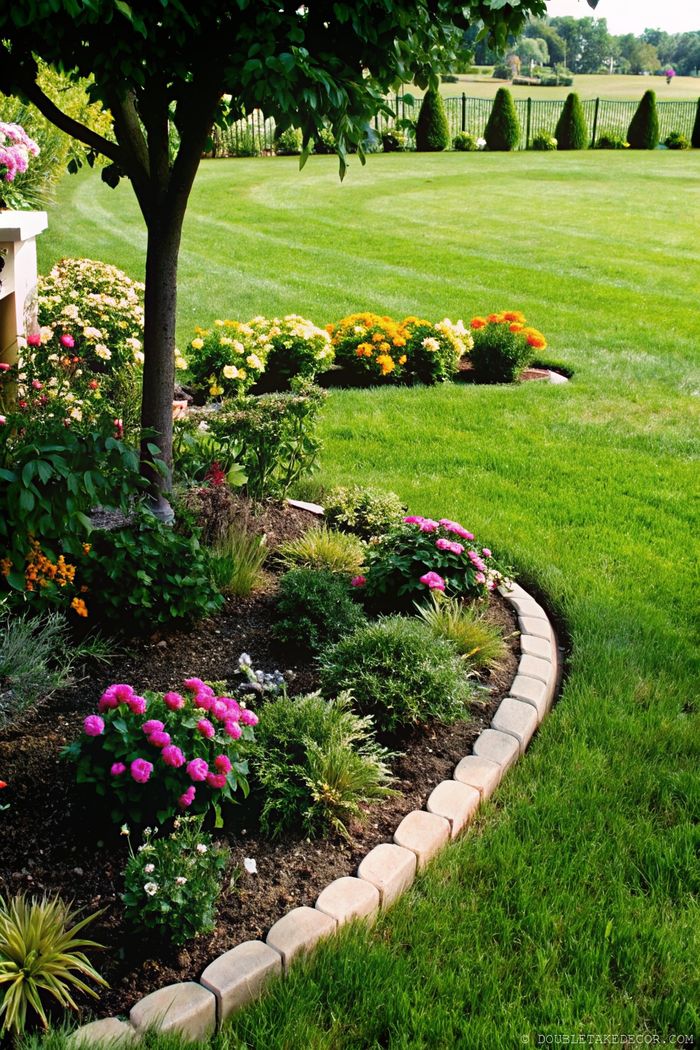
Credit: doubletakedecor.com
Tools For Curved Edging
Edging a curved garden border needs the right tools. Using proper equipment helps create clean, smooth curves. It also makes the job easier and safer.
This guide covers essential hand tools, safe use of power tools, and how to pick the right edging material for your garden.
Essential Hand Tools
Hand tools let you work carefully along curves. They give you control and precision. Good tools make shaping the edge less tiring.
- Garden spade with a sharp, narrow blade for cutting soil
- Half-moon edger for neat, rounded edges
- Hand trowel to remove small plants or roots
- Garden gloves to protect your hands
- Measuring tape or garden string to mark curves
- Hammer or mallet to set edging material firmly
Using Power Tools Safely
Power tools speed up edging but need care. Follow safety rules to avoid accidents. Wear protective gear and check tools before use.
- Wear safety glasses and gloves
- Read the tool manual before starting
- Keep power cords clear of the work area
- Use a string line to guide straight or curved cuts
- Cut slowly along the curve to avoid mistakes
- Turn off and unplug when adjusting or cleaning
Choosing The Right Edging Material
| Material | Best Use | Advantages | Drawbacks |
|---|---|---|---|
| Plastic | Flexible curves | Easy to install, affordable | Less durable |
| Metal | Sharp clean lines | Long-lasting, strong | Can rust, harder to bend |
| Stone | Natural look | Very durable, attractive | Heavy, expensive |
| Brick | Formal gardens | Classic style, sturdy | Labor intensive installation |
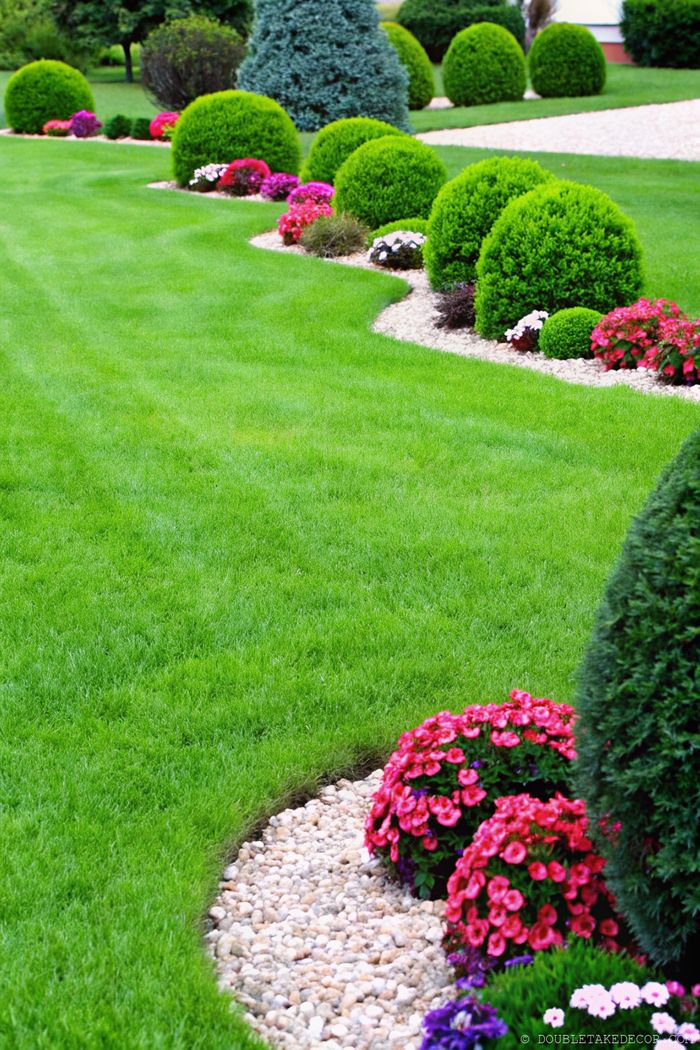
Credit: doubletakedecor.com
Preparing The Garden Border
Edging a curved garden border helps keep plants tidy and soil in place. Proper preparation makes the edging last longer and look neat.
Start by clearing the area, marking the curve, and preparing the soil. These steps set a strong base for your garden edge.
Clearing The Area
Remove any grass, weeds, and debris from the garden border. This gives you a clean space to work and helps the edging fit well.
Use a spade or garden fork to dig out roots and tough plants. Clear soil allows better digging and shaping.
Marking The Curve
Mark the shape of your curved border with a garden hose or rope. Lay it on the ground in the shape you want.
Use spray paint or flour to trace along the hose or rope. This shows a clear line to follow when edging.
Soil Preparation Tips
Loosen the soil along the marked curve using a spade or garden fork. Soft soil makes it easier to insert edging materials.
If the soil is hard or compacted, add some compost or sand to improve drainage and texture.
- Remove rocks and large roots
- Level the soil surface
- Moisten dry soil before digging
- Compact soil slightly after placing edging
Techniques For Creating Curves
Edging a curved garden border adds beauty and structure to your outdoor space. Curves soften the garden’s look and create a natural flow.
Using simple tools and clear methods helps you shape smooth and consistent curves. This guide explains key techniques for success.
Using A Garden Hose Or Rope
A flexible garden hose or rope works well to outline curved borders. Lay it on the ground to form the desired shape before cutting.
- Place the hose or rope along the planned edge.
- Adjust it until the curve looks smooth and natural.
- Mark the outline with spray paint or chalk.
- Remove the hose or rope before digging or cutting.
Measuring Consistent Curves
Keep the curves even by measuring key points along the border. Use a string or tape to check distances from a fixed center.
| Tool | Use | Tip |
| Measuring tape | Measure radius lengths | Mark points every 2 feet |
| String and stake | Set center points | Keep string taut for accuracy |
| Spray paint | Mark curve edges | Use bright colors for visibility |
Maintaining Smooth Transitions
Smooth transitions between curves and straight edges make the border look polished. Blend the shapes by adjusting edges carefully.
Tips for smooth transitions:
- Use a garden spade to soften sharp corners.
- Check curves from different angles as you work.
- Fill gaps with soil or mulch to even out edges.
- Step back often to view the overall shape.
:max_bytes(150000):strip_icc()/spr-easyflex-no-dig-landscape-edging-kit-laura-hard-04-b601fc0708bc4522930427eca7d4168c.jpeg)
Credit: www.thespruce.com
Cutting And Shaping The Edges
Cutting and shaping the edges of a curved garden border requires precision and patience. The right techniques can make a significant difference in the appearance and longevity of your garden.
Manual Edging Methods
Manual edging methods involve using hand tools to cut and shape the edges of your garden border. This approach is suitable for small to medium-sized gardens and can be a cost-effective option.
- Use a garden spade to create a straight edge along the length of the border
- Mark the curved shape of the border using a string or a hose
- Use a half-moon edging tool to cut along the marked shape
Using Edging Shears Effectively
Edging shears are a specialized tool designed for cutting and shaping garden edges. Using edging shears effectively requires some practice and technique.
| Tip | Description |
|---|---|
| Hold the shears at a 45-degree angle | This helps to prevent the shears from digging into the soil |
| Use a gentle sawing motion | This helps to prevent the shears from slipping or binding |
| Keep the shears clean and sharp | This helps to prevent the shears from getting stuck or dull |
Trimming Excess Soil
Trimming excess soil is an essential step in maintaining a clean and tidy garden border. This helps to prevent weeds from growing and keeps the border looking its best.
- Use a garden edger or a half-moon edging tool to trim excess soil
- Remove any weeds or debris from the border
- Use a rake to smooth out the soil and create a neat finish
Installing Edging Materials
Adding edging to a curved garden border gives it a neat, finished look. It also helps keep soil and mulch in place. You can use different materials like plastic, metal, or wood.
This guide covers how to place plastic or metal edging, secure wooden borders, and handle uneven ground.
Placing Plastic Or Metal Edging
Plastic and metal edging are flexible and work well on curves. Follow these steps to install them correctly.
- Mark the curve with a garden hose or rope.
- Dig a shallow trench along the marked line. Make it deep enough for the edging.
- Place the edging into the trench, bending it gently to follow the curve.
- Secure the edging with spikes or stakes every few feet.
- Backfill the trench with soil and press it down firmly.
Securing Wooden Borders
Wooden borders give a natural look but need good support. Use these tips to keep them in place.
- Choose rot-resistant wood like cedar or treated lumber.
- Cut the wood to match the garden curve.
- Dig a trench and set the wood boards in it.
- Drive stakes behind the boards every 2 to 3 feet.
- Attach the boards to the stakes with nails or screws.
Dealing With Uneven Ground
Uneven ground can make edging look crooked or unstable. Use this table to help level the area before installing edging.
| Problem | Solution |
|---|---|
| Soil higher on one side | Remove excess soil to even out the surface |
| Soil lower on one side | Add soil or sand to raise the area |
| Rocks or roots in trench | Clear obstacles before setting edging |
| Soft or loose soil | Compact soil with a tamper or foot pressure |
Finishing Touches
Adding final details to your curved garden border improves its look. These steps help keep the border neat and lasting.
Focus on protecting soil and defining edges with simple methods. This makes your garden more attractive and easier to maintain.
Adding Mulch Or Stones
Mulch or stones protect soil and reduce weeds along your garden border. Choose materials that match your garden style.
- Spread a 2-3 inch layer of mulch or stones evenly
- Keep mulch away from plant stems to avoid rot
- Replenish mulch or stones yearly to maintain coverage
- Use natural mulch like bark or leaf compost for organic gardens
Watering And Compacting Soil
Water the soil after edging to help it settle. Then, compact the soil gently to keep edges firm and clear.
| Action | Purpose |
|---|---|
| Water soil deeply | Settle soil around border |
| Use hand tamper | Compact soil without damage |
| Check for loose spots | Prevent soil erosion |
Maintaining Clean Edges
Keep your curved border looking fresh by cleaning edges regularly. This prevents grass and weeds from crossing into your garden.
Try these tips to maintain edges:
- Trim grass along the border weekly
- Use a small hand shovel to remove weeds
- Redefine edges with a spade every few months
- Apply fresh mulch or stones as needed
Common Mistakes To Avoid
Edging a curved garden border takes care and attention. Many gardeners make simple mistakes that hurt the final look.
Knowing these mistakes helps you keep your garden edges neat and smooth for a long time.
Over-cutting Curves
Cutting too deep or too wide on curves can ruin the garden border shape. It makes the edge look uneven and rough.
Take your time and follow the curve gently. Use smaller cuts to keep the shape clean and smooth.
- Use a sharp edging tool for precise cuts
- Make shallow cuts first, then deepen if needed
- Follow the natural curve of the border slowly
- Avoid rushing to finish the job
Ignoring Soil Moisture
Cutting edges when the soil is too dry or too wet causes problems. Dry soil crumbles and wet soil clumps.
Ideal soil moisture makes cutting easier and cleaner. Check the soil before you start edging.
- Water soil a day before edging if it is dry
- Wait for soil to dry a bit if it is too wet
- Test soil by squeezing it; it should be moist but firm
Skipping Regular Maintenance
Edging once and forgetting it makes borders messy fast. Grass and weeds grow over edges quickly.
Regular trimming keeps the border neat and healthy. Set a schedule to maintain your garden edges.
- Trim edges every few weeks during growing season
- Remove weeds along the border regularly
- Check for damage or uneven spots to fix early
Frequently Asked Questions
How Do I Start Edging A Curved Garden Border?
Begin by marking the curve with a garden hose or string. This helps create a smooth, consistent edge to follow when digging or cutting.
What Tools Are Best For Edging Curved Garden Borders?
Use a half-moon edger, spade, or sharp garden knife. These tools allow precise shaping along curves for neat, clean garden edges.
How Often Should I Edge My Garden Borders?
Edge your garden borders at least twice a year. Regular edging keeps curves sharp and prevents grass from encroaching into flower beds.
Can I Use Plastic Edging For Curved Garden Borders?
Yes, flexible plastic edging works well for curves. It’s easy to shape and install, providing a clean, durable border.
Conclusion
Edging a curved garden border adds neatness and charm to your yard. Take your time shaping the curves carefully. Use simple tools and follow the garden’s natural lines. Keep the edges clean by trimming regularly. This small task makes your garden look tidy and cared for.
Enjoy the beauty of smooth, flowing borders around your plants. A well-edged garden invites relaxation and pride. Try these steps today and see the difference yourself. Your garden will thank you with its fresh, polished look.
