
Your natural gas grill is your go-to for delicious meals and memorable gatherings. But if you want it to keep performing at its best, cleaning it regularly is a must.
Imagine firing up your grill only to find uneven flames or leftover food stuck to the grates—that’s frustrating, right? In this guide, you’ll discover simple, effective steps to clean your natural gas grill quickly and safely. By following these tips, you’ll enjoy better-tasting food, longer grill life, and stress-free cookouts every time.
Keep reading to unlock the secrets of a sparkling clean grill that’s ready whenever you are!
Prepare The Grill
Preparing your natural gas grill before cleaning is essential for safety and efficiency. Proper preparation makes the cleaning process easier and helps prevent accidents. It involves shutting off the gas, detaching the propane tank, and removing key parts for thorough cleaning.
Turn Off Gas Supply
Always start by turning off the gas supply at the main valve. This stops the flow of gas to the grill. Double-check that no flames or burners are on before moving forward. Safety first.
Disconnect Propane Tank
Next, carefully disconnect the propane tank from the grill. Make sure the tank valve is fully closed. Detach the hose or regulator slowly to avoid gas leaks. Store the tank in a safe, ventilated area away from heat.
Remove Grill Grates And Components
Take out the grill grates, burner covers, and other removable parts. These pieces often collect the most grease and food residue. Removing them allows for a more detailed clean. Soak parts in warm, soapy water to loosen dirt before scrubbing.
Clean Grill Grates
Cleaning grill grates is key to a great grilling experience. Dirty grates cause food to stick and affect taste. Regular cleaning removes grease, burnt bits, and rust. This keeps the grill safe and extends its life.
Soak In Warm Soapy Water
Fill a large container or sink with warm water. Add a few drops of dish soap. Place the grill grates in the water. Let them soak for 15 to 30 minutes. This softens stuck-on food and grease.
Scrub With Grill Brush
Use a stiff grill brush to clean the grates. Scrub all sides to remove debris and buildup. Focus on the corners and edges where grime hides. Apply firm pressure but avoid damaging the grates.
Rinse And Dry Thoroughly
Rinse the grates under clean water to remove soap. Check for any leftover residue and scrub again if needed. Dry the grates well with a towel or air dry. This prevents rust and keeps the grill ready for use.
Clean Burner Tubes
Burner tubes should be cleaned regularly to remove grease and debris. Use a brush or pipe cleaner to clear blockages for even flames. This keeps your natural gas grill working safely and efficiently.
Cleaning burner tubes on your natural gas grill is essential. It ensures even cooking and prevents flare-ups. Regular cleaning keeps your grill in top shape. Let’s explore how to clean them effectively.Remove Debris And Blockages
First, turn off the gas supply. Safety first! Remove the grill grates. Check for visible debris or blockages in the burner tubes. Use a soft cloth to wipe away loose particles.Use Pipe Cleaner Or Soft Brush
Gently insert a pipe cleaner into the burner holes. This helps remove any stuck particles. A soft brush works well too. Move it in a back-and-forth motion. This clears any obstructions effectively.Inspect For Damage
Look closely for any signs of rust or wear. Damaged tubes can cause uneven heating. Replace any tubes that show significant damage. Regular inspections help maintain grill performance.
Credit: canoe.com
Clean Interior And Exterior
Keeping your natural gas grill clean inside and out not only improves its performance but also extends its lifespan. Dirt and grease buildup can affect the flavor of your food and even cause flare-ups. Let’s look at how to tackle both the interior and exterior parts effectively.
Scrape Off Grease And Residue
Start by removing the grill grates and burner covers. Use a sturdy grill scraper or a putty knife to scrape away any grease and burnt residue stuck inside the grill. Don’t rush—stubborn spots need extra attention to prevent future flare-ups.
Pay close attention to the bottom of the grill where grease collects. You might find a thick layer that’s easy to overlook but crucial to clean. Have a disposable container ready to catch debris and avoid mess.
Wipe Down Surfaces
After scraping, wipe down all interior surfaces with a damp cloth or sponge. Warm, soapy water works well for cutting through grease. Make sure to clean under the burners and inside the lid where smoke and oils accumulate.
Don’t forget the exterior! Use a mild detergent and a soft cloth to wipe the outside surfaces. This prevents dirt from building up and keeps your grill looking fresh and inviting for your next cookout.
Polish Stainless Steel Parts
If your grill has stainless steel components, polishing them will restore their shine and protect against rust. Use a stainless steel cleaner or a mixture of vinegar and water applied with a microfiber cloth. Buff in the direction of the metal grain to avoid scratches.
Have you noticed how a polished grill invites you to cook more often? It’s not just about looks—it shows you care about your equipment and your food’s quality. Taking these small extra steps makes a big difference.
Check And Clean Drip Pan
The drip pan catches grease and food particles from your grill. It helps keep the grill clean and prevents flare-ups. Checking and cleaning the drip pan regularly keeps your grill safe and working well. Follow these simple steps to clean the drip pan properly.
Remove Old Grease
First, take out the drip pan carefully. It may be hot, so use gloves or wait until cool. Dispose of all the old grease and food scraps. Use a paper towel or scraper to remove stuck-on residue. Removing grease prevents bad smells and fire risks.
Wash And Dry Pan
Fill a sink or bucket with warm water and mild dish soap. Soak the drip pan for 10 to 15 minutes. Use a sponge or brush to scrub away any leftover grease. Rinse the pan well with clean water. Let the drip pan air dry or wipe it with a clean cloth. Make sure it is completely dry before placing it back.

Credit: maidbright.com
Reassemble And Test Grill
After cleaning your natural gas grill, reassembling and testing it ensures safe and efficient use. This process restores all parts to their proper place. It also helps catch any issues before cooking again.
Reattach Components
Begin by putting all grill parts back carefully. Place burners, heat shields, and cooking grates in their spots. Make sure everything fits securely. Loose parts can cause uneven heat or safety hazards.
Reconnect Gas Supply
Attach the gas hose firmly to the grill. Check for a tight connection to prevent leaks. Turn the gas valve on slowly to allow flow. Never rush this step to avoid gas buildup.
Perform Safety Check And Test Flames
Look for gas leaks by applying soapy water to connections. Watch for bubbles that indicate leaks. If no bubbles appear, use the igniter to light the grill. Confirm all burners ignite with steady blue flames. Uneven or yellow flames need adjustment before use.
Maintenance Tips
Maintaining your natural gas grill keeps it safe and working well. Regular care stops rust and buildup. It also extends the grill’s life. Follow these simple tips to keep your grill ready for every cookout.
Clean After Each Use
Wipe down the grill grates with a grill brush or cloth. Remove food scraps and grease to prevent buildup. Turn the grill on high for a few minutes to burn off residue. This keeps the grill hygienic and ready for next time.
Cover Grill When Not In Use
Use a grill cover to protect it from rain, dust, and dirt. Covers stop rust and damage from weather. Make sure the grill is cool before covering to avoid moisture buildup. Store the grill in a dry, shaded place if possible.
Schedule Deep Clean Regularly
Set a routine for deep cleaning every few months. Remove and clean the grates, burners, and drip pan thoroughly. Check for gas leaks and clogged holes. Use warm soapy water and a soft brush for cleaning parts. This keeps your grill safe and efficient.
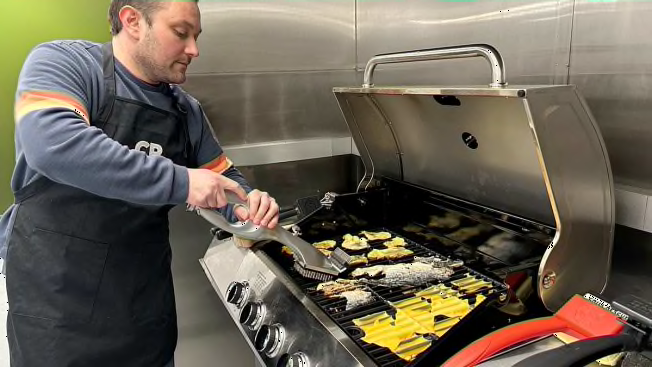
Credit: www.consumerreports.org
Frequently Asked Questions
How Often Should I Clean My Natural Gas Grill?
Clean your grill after every 10-15 uses or at least once a month. Regular cleaning prevents grease buildup and ensures better cooking performance.
What Tools Are Needed To Clean A Natural Gas Grill?
You need a grill brush, soapy water, sponge, scraper, and a cloth. These tools help remove debris and grease effectively without damaging the grill.
Can I Use Soap To Clean Grill Grates Safely?
Yes, mild dish soap mixed with warm water is safe for grill grates. Avoid harsh chemicals to prevent residue and maintain food safety.
How Do I Clean Clogged Gas Burners On A Grill?
Turn off the gas and remove burners carefully. Use a soft brush or compressed air to clear debris from burner holes.
Conclusion
Cleaning your natural gas grill keeps it safe and working well. Regular care stops grease buildup and rust. Use simple tools and gentle cleaners for best results. Take time after each use to clean the grates and burners. This small effort extends your grill’s life.
Enjoy tasty meals without worrying about dirt or damage. Keep your grill ready for every cookout. Clean grill, happy grilling!
