
If you use a hose end sprayer, you know how important it is to keep it working smoothly. A clogged or dirty sprayer can ruin your gardening or cleaning tasks, wasting both time and money.
But cleaning it doesn’t have to be hard. In this guide, you’ll discover simple, step-by-step tips to get your sprayer spotless and ready to use again. Keep reading, and you’ll learn how easy it is to maintain your sprayer, so it lasts longer and works better every time you need it.

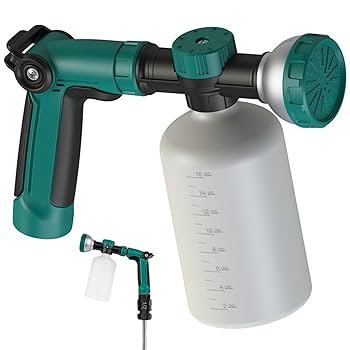
Credit: www.ilotchina.com
Tools Needed
Cleaning a hose end sprayer keeps it working well. You need a few simple tools. These help remove dirt and buildup.
Gather your tools before starting. This saves time and makes cleaning easier.
Protective Gloves
Wear gloves to protect your hands. Sprayers may have chemicals or dirt on them. Gloves keep your skin safe.
Clean Water Source
You need clean water to rinse the sprayer. Use a hose or bucket of fresh water. This helps wash away residues.
Soft Brush Or Cloth
A soft brush or cloth removes dirt gently. Avoid hard brushes that might damage the sprayer parts.
Mild Soap Or Detergent
Use mild soap to clean stubborn grime. Strong chemicals can harm the sprayer. Soap helps break down dirt safely.
Small Tools For Nozzles
- Toothpick or small wire
- Needle or pin
- Compressed air can (optional)
These tools clear clogs in tiny nozzle holes. Use them carefully to avoid damage.
Container For Soaking
| Container Type | Purpose |
| Plastic tub | Hold sprayer parts in cleaning solution |
| Bucket | Rinse parts after soaking |
| Small bowl | Soak nozzles separately |

Credit: www.youtube.com
Disassemble The Sprayer
Cleaning a hose end sprayer starts with taking it apart. This helps you reach all the dirty parts inside.
Disassembling the sprayer is simple if you follow the right steps. It also prevents damage during cleaning.
Remove The Sprayer From The Hose
First, twist the sprayer off the hose. Turn it counterclockwise until it comes loose.
Be careful not to pull too hard. This can damage the hose or sprayer threads.
Unscrew The Nozzle
Next, find the nozzle part at the front of the sprayer. Turn it counterclockwise to remove it.
The nozzle can have small holes that get clogged. Removing it helps clean those holes well.
Take Off The Trigger Handle
Locate the trigger handle on the sprayer body. Look for a pin or screw holding it in place.
Remove the pin or screw carefully. Then pull the trigger handle off the sprayer.
Separate Internal Parts
Open the sprayer body to access the internal parts. These may include valves and seals.
- Gently pull apart any snap-on pieces.
- Unscrew any internal parts if needed.
- Keep all parts organized for reassembly.
Cleaning inside these parts removes buildup that blocks water flow.
Rinse With Water
Cleaning a hose end sprayer is important to keep it working well. Rinsing with water is an easy way to remove leftover chemicals.
Using clean water helps clear out the sprayer parts. This stops clogs and keeps the sprayer ready for next use.
Take apart the sprayer parts carefully. Remove the nozzle, filter, and any other removable pieces.
This makes it easier to rinse each part well and clean out all the leftover spray solution.
Rinse Each Part Thoroughly
Use clean water to rinse every part of the sprayer. Hold parts under running water or soak them in a bucket.
- Rinse the nozzle to clear any holes
- Flush the filter to remove debris
- Clean the hose connection points
Flush The Hose And Sprayer
Attach the sprayer to the hose again. Turn on the water to flush clean water through the sprayer system.
This removes any chemicals still inside the hose and sprayer tube.
Dry The Parts Before Storage
Shake off excess water from all parts. Let them air dry fully before putting the sprayer away.
Dry parts prevent rust and keep the sprayer ready for the next use.
Soak In Cleaning Solution
Cleaning a hose end sprayer keeps it working well. Soaking parts in a cleaning solution removes dirt and buildup.
Use the right cleaning solution and follow safe steps. Soaking helps clear clogs and extends sprayer life.
Prepare The Cleaning Solution
Choose a cleaning solution based on the sprayer use. A mix of warm water and mild detergent works well for most cases.
- Fill a bucket with warm water
- Add a small amount of mild detergent
- Stir the solution gently
- Wear gloves to protect your hands
Disassemble The Sprayer Parts
Take the sprayer apart carefully. Remove the nozzle, filter, and other removable parts to soak separately.
This helps clean every piece thoroughly and prevents damage during soaking.
Soak The Parts Properly
Place all sprayer parts into the cleaning solution. Let them soak for at least 30 minutes to loosen dirt and residue.
- Do not soak rubber seals longer than 1 hour
- Use a soft brush to scrub parts after soaking
- Rinse thoroughly with clean water
- Dry parts completely before reassembly
Scrub The Nozzle
Cleaning the nozzle of a hose end sprayer is important. It helps keep the spray even and stops clogging.
Scrubbing removes dirt and buildup that block the nozzle holes. This makes your sprayer work better.
Gather Cleaning Supplies
Start by collecting the right tools. You need a small brush, warm water, and mild soap.
- Soft toothbrush or small scrub brush
- Warm water
- Mild dish soap
- Clean cloth or towel
Remove The Nozzle
Carefully take the nozzle off the sprayer. Check the user manual if you are unsure how.
Removing the nozzle allows you to clean it deeply without damaging other parts.
Soak And Scrub The Nozzle
Mix warm water with a little soap in a bowl. Soak the nozzle for 10 minutes to loosen dirt.
Use the small brush to scrub the nozzle gently. Focus on the small holes and edges.
- Dip brush in soapy water
- Scrub nozzle holes carefully
- Clean around the edges and threads
- Rinse with clean water after scrubbing
Dry And Reattach The Nozzle
Use a clean towel to dry the nozzle completely. Make sure no water stays inside the holes.
Put the nozzle back on the sprayer tightly. Your sprayer is now ready to use again.

Credit: www.amazon.ca
Clear Clogged Holes
Hose end sprayers can get clogged. This stops them from working well. Clearing clogged holes helps them spray evenly.
Keeping the sprayer clean ensures a smooth flow of liquid. It makes gardening tasks easier and more efficient.
Identify Clogged Holes
Check the sprayer for clogged holes. Look closely at the nozzle. Clogs often hide in small holes.
Use a flashlight to see better. This helps you spot any blockages quickly.
Tools You Need
Gather the right tools before cleaning. A small needle or pin works well. You might also need a toothbrush.
- Small needle or pin
- Toothbrush
- Warm water
- Cleaning solution
Clear The Clogs
Insert the needle into the holes. Gently push out any dirt or debris. Be careful not to damage the nozzle.
Use the toothbrush to scrub the nozzle. This helps remove stubborn blockages.
Rinse And Test
Rinse the sprayer with warm water. This clears away any remaining dirt. Test the sprayer to see if it sprays evenly.
If the spray is still uneven, repeat the cleaning process. Ensure all holes are clear.
Reassemble The Sprayer
After cleaning your hose end sprayer, it’s essential to put it back together correctly. This ensures it works efficiently and prevents leaks.
Reassembling the sprayer is simple if you follow the right steps. Here’s how you can do it effectively.
Gather All Parts
Make sure you have all the parts before starting. Missing parts can cause the sprayer to malfunction.
- Nozzle
- Trigger handle
- Container
- O-rings
- Filters
Check The O-rings
Inspect the O-rings for any wear or damage. Replace if necessary to prevent leaks.
| O-ring Type | Condition |
| Rubber | Check for cracks |
| Silicone | Ensure elasticity |
Reattach The Nozzle
Screw the nozzle back onto the trigger handle. Tighten it securely but avoid over-tightening as it may damage the threads.
Secure The Container
Attach the container to the sprayer. Ensure it is tightly sealed to prevent leaks during use.
Test For Proper Function
After cleaning your hose end sprayer, it is important to test if it works correctly.
Testing ensures the sprayer sprays evenly and there are no leaks or clogs.
Check Spray Pattern
Attach the sprayer to the hose and turn on the water slowly. Watch the spray pattern carefully.
The spray should be even without gaps or bursts. Uneven spraying means the nozzle may be blocked.
Look For Leaks
Inspect the connection points for any water leaks. Leaks reduce sprayer efficiency and waste water.
- Check the nozzle connection
- Examine the hose attachment
- Look at any seals or washers
Test Water Pressure
Water pressure affects sprayer performance. Too low pressure causes weak spray; too high can damage parts.
| Water Pressure | Expected Result |
| Low | Weak or no spray |
| Medium | Strong, even spray |
| High | Possible leaks or damage |
Adjust Settings If Needed
If the sprayer does not work well, adjust the nozzle or pressure. Clean the nozzle again if clogged.
Tip:Always test outside on a safe surface to avoid damage from spray.
Preventive Maintenance Tips
Keeping your hose end sprayer clean helps it last longer. Proper maintenance stops clogs and leaks. Regular care keeps the sprayer working well every time.
Follow simple tips to clean and care for your sprayer. This guide shows easy steps to keep it in good shape.
Rinse After Each Use
Flush the sprayer with clean water after every use. This removes leftover chemicals and dirt inside the nozzle and hose.
Check For Clogs
Inspect the nozzle regularly. Clear any blockages with a soft brush or toothpick. Avoid using sharp tools that can damage the sprayer.
Store Properly
Keep the sprayer in a dry place away from direct sunlight. Protect it from freezing temperatures to avoid cracks and leaks.
Use Mild Cleaning Solutions
- Mix warm water with a little dish soap
- Soak the sprayer parts for 10 minutes
- Rinse thoroughly with clean water
- Dry completely before storing
Inspect Seals And Hoses
| Part | Signs of Wear | Action |
| Seals | Cracks or stiffness | Replace immediately |
| Hoses | Leaks or holes | Patch or replace |
| Nozzle | Uneven spray | Clean or replace |
Frequently Asked Questions
How Often Should I Clean A Hose End Sprayer?
Clean your hose end sprayer after every use. Regular cleaning prevents clogs and buildup. This ensures efficient spraying and extends its lifespan.
What Materials Do I Need To Clean A Hose End Sprayer?
You need warm water, mild soap, a soft brush, and a cloth. Avoid harsh chemicals to prevent damage. These materials effectively remove dirt and residue.
Can Vinegar Be Used To Clean A Hose End Sprayer?
Yes, vinegar effectively removes mineral deposits and buildup. Soak sprayer parts in vinegar for 15-30 minutes. Rinse thoroughly with water before reassembling.
How Do I Unclog A Hose End Sprayer Nozzle?
Remove the nozzle and soak it in warm, soapy water. Use a soft brush or toothpick to clear debris. Rinse and test spray before use.
Conclusion
Cleaning a hose end sprayer keeps it working well. Regular care stops clogs and leaks. Use simple steps to rinse and scrub the parts. This helps the sprayer last longer. Clean tools make your gardening easier and safer. Spend a few minutes after each use to keep it ready.
A clean sprayer gives better spray and saves water. Easy maintenance protects your investment and helps plants grow. Simple habits bring big benefits. Keep your sprayer clean, and enjoy better results every time.
