
If you use a handheld sprayer, you know how important it is to keep it clean. A dirty sprayer can clog nozzles, reduce spray quality, and even damage your plants or surfaces.
But cleaning it might feel like a hassle. What if you could do it quickly and easily, so your sprayer works like new every time? In this guide, you’ll discover simple steps to clean your handheld sprayer without stress. Keep reading, and you’ll save time, avoid common mistakes, and get the best results from your sprayer every time you use it.
Prepare Your Sprayer
Cleaning your handheld sprayer keeps it working well and safe. Proper preparation makes the cleaning easier.
Start by getting all needed supplies and emptying any leftover solution. Then, take apart the sprayer carefully.
Gather Cleaning Supplies
- Protective gloves
- Bucket of clean water
- Mild soap or detergent
- Soft brush or cloth
- Wrench or pliers (if needed for disassembly)
- Old towels or rags
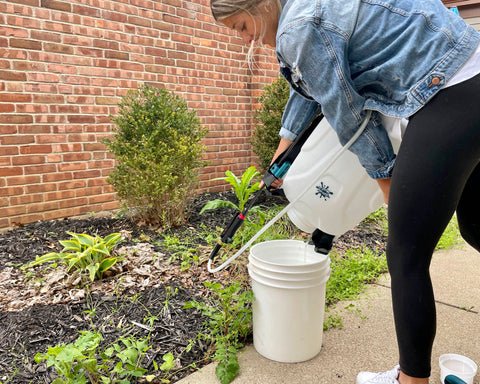
Empty Remaining Solution
Remove all leftover liquid from the sprayer tank. Spray it out in a safe area away from plants and people.
| Action | Reason |
| Pour leftover solution into a safe container | Prevent spills and environmental harm |
| Spray out the tank until empty | Clear out residue inside sprayer |
| Rinse tank with clean water | Remove leftover chemicals |
Disassemble Parts
Take the sprayer apart carefully. Separate the nozzle, hose, and tank to clean each part fully.
Tips for disassembly:
- Check the user manual for guidance
- Use tools gently to avoid damage
- Keep small parts in a safe place
- Wear gloves to protect your hands

Credit: www.wagnerspraytech.com
Rinse And Flush
Cleaning a handheld sprayer keeps it working well for a long time. Rinsing and flushing remove leftover chemicals and dirt inside the sprayer.
Follow these simple steps to rinse and flush your sprayer safely and thoroughly.
Flush With Water
Fill the sprayer tank with clean water. Pump the water through the nozzle to flush out any leftover liquid.
Repeat this process until the water runs clear. This helps remove any chemical residue inside the sprayer.
Use Mild Detergent
Add a small amount of mild detergent to the sprayer tank filled with water. Pump the mixture through the sprayer to clean the inside parts.
Detergent breaks down tough dirt and chemicals. After using detergent, flush the sprayer again with clean water.
Clear Nozzles And Tubes
Remove the nozzle and tube from the sprayer. Rinse them under running water to clear any blockages or buildup.
- Use a small brush or toothpick to clean nozzle holes.
- Check tubes for cracks or clogs.
- Dry parts before reassembling the sprayer.
Deep Clean Components
Cleaning your handheld sprayer keeps it working well. Deep cleaning removes buildup inside parts.
This guide shows how to clean nozzles, filters, and the tank.
Soak Nozzles
Remove the nozzles from the sprayer. Place them in warm water mixed with mild soap. Let them soak for 30 minutes.
Soaking softens dirt and clogs. After soaking, use a soft brush to clear any blocked holes.
Clean Filters
Filters stop debris from reaching the nozzle. Check your sprayer’s manual to find the filter location.
- Remove the filter carefully.
- Rinse it under clean water.
- Use a soft brush if dirt is stuck.
- Dry the filter before putting it back.
Scrub The Tank
Cleaning the tank stops old chemicals from mixing with new ones. Follow these steps:
| Step | Action |
|---|---|
| 1 | Empty the tank completely. |
| 2 | Fill it with warm soapy water. |
| 3 | Use a soft brush to scrub inside. |
| 4 | Rinse the tank well with clean water. |
| 5 | Let the tank air dry before use. |
Dry And Reassemble
Cleaning your handheld sprayer is not done until it is dry and put back together. Drying helps stop rust and damage. Reassembling makes sure your sprayer works well next time.
Follow these steps to dry and reassemble your sprayer safely and correctly.
Air Dry Parts
After rinsing the sprayer parts, leave them to air dry. Do not use towels or cloths. Air drying stops dirt and lint from sticking to the parts.
Place the parts on a clean surface in a dry place. Let the parts dry fully before putting them back together.
- Use a clean tray or paper towels to hold parts
- Keep parts away from direct sunlight
- Allow at least 2-3 hours for drying
- Check that no water remains inside small tubes or nozzles
Check For Damage
Look closely at each sprayer part for any cracks or breaks. Damaged parts can cause leaks or stop the sprayer from working right.
Replace any damaged parts before reassembling. Use original parts for the best fit and safety.
- Check the nozzle for clogs or cracks
- Inspect the hose for holes or tears
- Look at seals and gaskets for wear or breaks
- Test the trigger for smooth movement
Reassemble Sprayer
Put the sprayer back together carefully. Follow the order you took the parts apart. Make sure each piece fits tightly and clicks into place.
Tighten any screws or fittings by hand. Avoid using tools that can break parts. Test the sprayer after reassembly to check it works well.
- Start with the nozzle and wand
- Attach the hose and seals next
- Connect the trigger and pump mechanism
- Tighten all connections securely but gently
- Fill with water and test spray before use
Maintenance Tips
Keeping your handheld sprayer clean helps it work better and last longer. Regular care prevents damage and saves money on repairs.
Follow simple maintenance tips to keep your sprayer in good condition. These steps are easy and quick to do.
Regular Cleaning Schedule
Clean your handheld sprayer after each use. This stops residue from building up inside. Use warm water and mild soap to rinse all parts.
Disassemble the sprayer if possible. Clean the nozzle, tank, and hose well. Let parts dry before storing.
- Rinse tank with water after every use
- Soak nozzles in warm soapy water weekly
- Check and clean filters monthly
Proper Storage
Store your sprayer in a dry, cool place. Avoid direct sunlight and freezing temperatures. This protects parts from damage.
Keep the sprayer upright. Make sure it is empty and dry before storing. Cover it to keep dust and dirt away.
- Empty sprayer after cleaning
- Store indoors away from heat
- Keep sprayer covered or in a bag
Avoiding Clogs
Clogs reduce sprayer performance. Prevent clogs by filtering liquids before filling. Strain thick or dirty fluids.
Clean the nozzle and hose often. Use a small brush or needle to clear blocked holes. Avoid letting chemicals dry inside the sprayer.
- Filter liquids before use
- Flush sprayer with clean water after use
- Use tools to clear nozzle clogs

Credit: www.petratools.com

Credit: www.walmart.com
Frequently Asked Questions
How Often Should I Clean My Handheld Sprayer?
Clean your handheld sprayer after every use. This prevents residue buildup and clogs. Regular cleaning extends the sprayer’s life and maintains performance.
What Materials Do I Need To Clean A Handheld Sprayer?
You need water, mild soap, a soft brush, and a clean cloth. For stubborn residue, use vinegar or a specialized cleaner. Avoid harsh chemicals to protect sprayer parts.
Can I Use Household Cleaners To Clean My Sprayer?
Yes, mild household cleaners like dish soap work well. Avoid bleach or strong acids that can damage seals. Always rinse thoroughly after cleaning to remove any residue.
How Do I Unclog A Handheld Sprayer Nozzle?
Remove the nozzle and soak it in warm soapy water. Use a soft brush or toothpick to clear debris. Rinse well and reassemble the sprayer before use.
Conclusion
Cleaning a handheld sprayer keeps it working well and lasts longer. Rinse all parts with water after use. Remove any leftover chemicals to avoid clogs. Dry the sprayer before storing it. Regular cleaning saves time and money in the future.
A clean sprayer makes your tasks easier and safer. Follow these simple steps to keep your sprayer ready to use anytime. Easy care means better results every time you spray.
