
Are you tired of uneven spraying results when tackling yard work or garden tasks? If you’ve ever wondered why some areas get drenched while others remain untouched, it’s time to learn how to calibrate your backpack sprayer.
Proper calibration is the secret to achieving consistent coverage, saving you time, money, and effort. Imagine the satisfaction of knowing every spray counts, every drop is used efficiently, and your plants or lawn are treated with precision. This guide will show you how to transform your spraying technique, ensuring you get the most out of your equipment.
Keep reading to discover the simple steps that will make your spraying tasks more effective and rewarding.
Why Calibration Matters
Calibrating a backpack sprayer helps you apply the right amount of liquid. It ensures the sprayer works properly and delivers even coverage.
Without calibration, you may waste chemicals or miss spots. Calibration saves money and protects plants and people.
Impact On Application Accuracy
Calibration lets you control how much spray comes out. This controls the amount of chemical applied to plants or soil.
Accurate application means better results. Plants get the right dose, not too much or too little.
Reducing Chemical Waste
Calibration stops you from using extra chemicals you don’t need. This saves money and protects the environment.
Using chemicals carefully lowers pollution and prevents harmful runoff into water sources.
Enhancing Safety
Calibrating keeps chemical use within safe limits. This protects you, others, and nearby plants and animals.
Proper calibration reduces health risks from overexposure to chemicals. It also prevents damage to crops and soil.
Tools Needed For Calibration
Calibrating a backpack sprayer needs the right tools for accuracy. These tools help measure and control the spray output.
Using proper tools makes the calibration process easier and safer. Below are the main tools you will need.
Measuring Container
A measuring container is essential to collect and measure the sprayed liquid. It must have clear volume markings for accuracy.
- Choose a container with liters or gallons marked
- Use one that is easy to handle and pour from
- Make sure it is clean and free from residues
Stopwatch Or Timer
A stopwatch or timer helps track how long the sprayer runs during calibration. This timing is vital to calculate flow rate.
| Tool | Purpose |
| Stopwatch | Measures spray time in seconds |
| Timer | Counts down or up during spraying |
Protective Gear
Protective gear keeps you safe from chemicals and spray mist. Always wear it during calibration and spraying tasks.
- Gloves to protect your hands
- Goggles or safety glasses for eye protection
- A mask or respirator to avoid inhaling spray
- Long sleeves and pants to cover skin
Preparing The Sprayer
Calibrating a backpack sprayer starts with proper preparation. This ensures accurate spraying and helps avoid mistakes.
Before calibration, you need to clean and check the sprayer carefully. Then fill it correctly to get the best results.
Cleaning The Nozzle
Clean the nozzle to remove dirt or old chemicals. A clean nozzle sprays evenly and prevents clogging.
- Remove the nozzle from the sprayer.
- Rinse it under running water.
- Use a soft brush to clear any blockages.
- Check for damage or wear on the nozzle tip.
- Reattach the nozzle securely before use.
Checking For Leaks
Leaks waste chemicals and reduce spray pressure. Check all parts to keep your sprayer working well.
| Sprayer Part | What to Check |
| Tank Lid | Seal is tight and undamaged |
| Hose | No cracks or holes |
| Connections | All fittings are secure |
| Trigger Valve | Operates smoothly with no leaks |
Filling With Water
Use clean water to fill the sprayer for calibration. This avoids damage and gives clear measurement results.
- Place the sprayer on a flat surface.
- Open the tank lid carefully.
- Fill the tank with clean water to the recommended level.
- Close the lid tightly to prevent spills.
- Pressurize the sprayer as usual before testing.

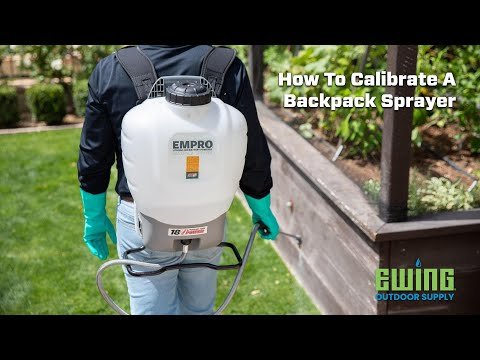
Credit: www.youtube.com
Measuring Output Rate
Calibrating a backpack sprayer starts with measuring its output rate. This helps apply the right amount of liquid over an area.
You will learn how to collect spray, time it, and calculate the flow rate. These steps ensure accurate spraying.
Spraying Into The Container
First, spray the liquid into a clean container instead of the field. This lets you measure how much liquid comes out in a set time.
- Use a container with clear volume markings.
- Hold the sprayer nozzle at the usual height and angle.
- Spray steadily to fill the container.
- Stop once you have enough liquid to measure.
Timing The Spray
Next, use a stopwatch or timer to record how long you spray into the container. Accurate timing helps calculate flow rate.
- Start the timer as you begin spraying.
- Spray at a steady pace for a set time, like 30 seconds.
- Stop spraying when the timer ends.
- Note the total time in seconds.
Calculating Flow Rate
Use the volume collected and the spray time to find the flow rate. This tells you how many liters or gallons the sprayer releases per minute.
| Volume Collected (Liters) | Spray Time (Seconds) | Flow Rate (Liters per Minute) |
|---|---|---|
| 0.5 | 30 | 1.0 |
| 0.75 | 45 | 1.0 |
| 1.0 | 60 | 1.0 |
Adjusting The Sprayer Settings
Calibrating a backpack sprayer helps ensure even coverage. Adjusting the sprayer settings controls how much liquid is applied. Proper settings save chemicals and protect plants.
Focus on nozzle size, pressure, and walking speed. Each affects spray output and accuracy. Adjust these to match your spraying needs.
Changing Nozzle Size
Nozzle size controls spray pattern and droplet size. Smaller nozzles create finer sprays but cover less area. Larger nozzles cover more ground but use more liquid.
- Use a small nozzle for precise spraying on small plants.
- Choose a medium nozzle for general garden use.
- Select a large nozzle for wide areas and fast coverage.
Modifying Pressure
Pressure affects the flow rate and spray distance. Higher pressure increases flow but can cause drift. Lower pressure reduces flow and spray reach.
| Pressure Level (psi) | Effect on Spray |
| 20 – 30 | Gentle spray, less drift |
| 30 – 40 | Moderate spray, good coverage |
| 40 – 50 | Strong spray, wider reach |
Altering Walking Speed
Walking speed changes how much liquid is applied per area. Walking too fast reduces coverage. Walking too slow wastes chemicals.
- Walk slowly for thick or dense areas.
- Walk at a steady, moderate pace for even coverage.
- Adjust speed based on nozzle size and pressure settings.
Credit: extension.msstate.edu
Calculating Spray Volume Per Area
Calibrating a backpack sprayer helps apply the right amount of spray. Calculating the spray volume per area is key. This ensures even coverage and avoids waste.
To find the correct volume, measure the spray width, determine how fast you move, and compute the coverage rate. These steps make calibration accurate.
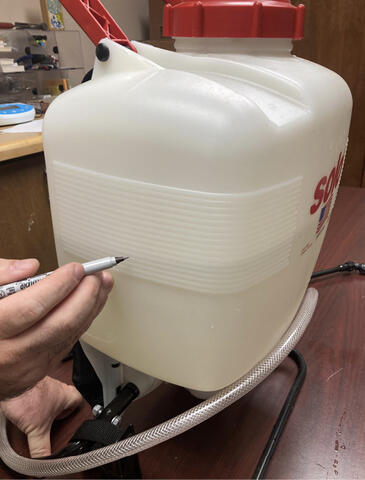
Measuring Spray Width
Spray width is the distance the spray covers on the ground. To measure it, spray water on a flat surface and mark the wet area edges. Use a tape measure to find the width in feet or meters.
Determining Travel Speed
Travel speed is how fast you walk while spraying. To find this, measure a set distance, like 25 feet or 7.5 meters. Walk that distance at your spraying pace and time yourself with a stopwatch.
- Mark a start and end point for the distance.
- Start your stopwatch at the start point.
- Walk to the end point at spraying speed.
- Stop the stopwatch at the end point.
- Record the time in seconds.
Computing Coverage Rate
Coverage rate is how much area you cover per minute. Use the spray width and travel speed to calculate it. This helps find the spray volume per area.
| Formula | Explanation |
| Coverage Rate = (Spray Width × Travel Speed) ÷ 60 | Spray width in feet × speed in feet per second, divided by 60 seconds |
| Example: 3 ft × 2.5 ft/s ÷ 60 = 0.125 ft²/s | Covers 0.125 square feet per second |
Final Testing And Verification
After calibrating your backpack sprayer, you need to test it. Testing ensures the sprayer delivers the right amount of liquid. This step is important to avoid waste and ensure effective spraying.
Verification confirms that all settings are correct. It shows if you need any last changes before full use. Follow these steps carefully for best results.
Performing A Test Run
Fill the sprayer with water for a safe test. Spray a small, marked area to see coverage. Check the spray pattern and flow rate closely. Note any uneven spraying or blockages.
- Wear safety gear before testing
- Choose a flat, open area for the test
- Spray for a set time, like 30 seconds
- Measure the amount sprayed
- Watch for leaks or irregular spray
Recording Results
Write down the amount of liquid sprayed and the time used. Note the spray pattern and any issues found. Keep these records for reference and adjustments.
| Test Area | Spray Time (seconds) | Liquid Used (ml) | Spray Pattern Quality | Notes |
| Plot 1 | 30 | 500 | Even | No leaks |
| Plot 2 | 30 | 480 | Patchy | Clog in nozzle |
Making Final Adjustments
Use the test data to adjust the sprayer settings. Fix or clean any clogged parts. Change the pressure or nozzle if needed. Repeat the test run if you make changes.
- Tighten loose connections
- Clean or replace clogged nozzles
- Adjust pressure settings
- Check hose for cracks or holes
- Test again after changes
Maintenance Tips For Accuracy
Keeping your backpack sprayer accurate needs regular care. Small issues can cause large errors in spraying.
These tips focus on easy maintenance steps. They help keep your sprayer working well and precise.
Regular Nozzle Cleaning
Clogged nozzles reduce spray accuracy. Clean them often to keep the spray pattern even and correct.
- Remove the nozzle tip carefully.
- Soak it in warm soapy water for 10 minutes.
- Use a soft brush to clear any dirt or debris.
- Rinse with clean water before reinstalling.
- Check for wear or damage and replace if needed.
Storing Properly
Proper storage protects your sprayer parts. It stops damage and keeps the sprayer ready to use.
| Storage Tip | Why It Matters |
| Empty the tank fully | Prevents chemical build-up and corrosion |
| Clean all parts before storing | Stops dirt from clogging nozzles |
| Store in a dry, cool place | Avoids damage from heat and moisture |
| Keep sprayer upright | Prevents leaks and pressure loss |
| Cover the sprayer | Protects from dust and sunlight |
Routine Calibration Checks
Check calibration often to keep spray amounts right. Small changes in pressure or nozzle wear affect output.
- Fill the tank with water.
- Spray a set area for a set time (e.g., 1 minute).
- Measure how much water is used.
- Compare with the sprayer’s recommended output.
- Adjust pressure or nozzle if needed.
- Repeat until the output matches the target.
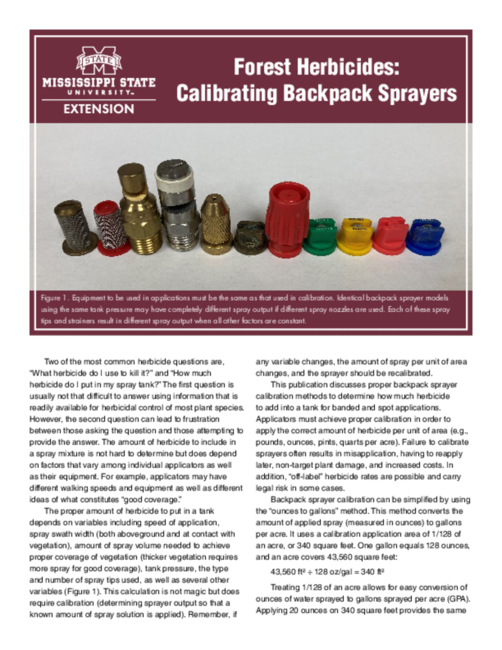
Credit: extension.msstate.edu
Frequently Asked Questions
How Often Should I Calibrate A Backpack Sprayer?
Calibrate your backpack sprayer before each use or at least monthly. Regular calibration ensures accurate spray application and prevents over or under-application of chemicals, saving time and resources.
What Tools Do I Need To Calibrate A Backpack Sprayer?
You need a measuring container, stopwatch, calculator, and the sprayer itself. These tools help measure spray output and calculate the correct application rate accurately and efficiently.
How Do I Measure Spray Output During Calibration?
Spray into a container for a set time, usually 1 minute. Measure the collected liquid volume to determine the sprayer’s output rate, which is essential for precise calibration.
Why Is Backpack Sprayer Calibration Important?
Calibration ensures correct chemical application, protecting plants and the environment. It helps avoid waste, reduces costs, and improves treatment effectiveness by delivering the right amount of product.
Conclusion
Calibrating a backpack sprayer ensures you apply the right amount of liquid. This saves product and protects plants. Regular checks keep your sprayer working well. Follow simple steps to measure and adjust carefully. Taking time to calibrate helps avoid mistakes and waste.
Clean your equipment after use for longer life. Accurate spraying makes your work easier and more effective. Keep these tips in mind for best results every time.

