
Are you ready to enjoy mouth-watering grilled food right in your backyard? Assembling your charcoal grill doesn’t have to be complicated or frustrating.
With the right steps, you can have your grill set up quickly and start cooking delicious meals in no time. In this guide, you’ll discover simple, clear instructions that make putting together your charcoal grill easy and even enjoyable. Keep reading—you’re just a few steps away from becoming the grill master you’ve always wanted to be!
Preparing For Assembly
Preparing for assembly is a crucial step that sets the tone for a smooth grilling experience. Taking time to get ready can save you from frustration and mistakes later. It’s not just about having everything on hand but also about understanding the task ahead and setting up the right environment.
Gathering Tools And Parts
Before you start, make sure you have all the necessary tools and parts laid out clearly. Most charcoal grills require basic tools like screwdrivers, wrenches, and sometimes pliers. Check the package carefully to ensure no small parts like screws, bolts, or washers are missing.
Organize everything on a clean surface. This prevents losing tiny pieces and helps you see what you’re working with. Have you ever started a project only to realize halfway through that a crucial part is missing? Avoid that by double-checking now.
Choosing The Right Location
Pick a flat, stable surface with plenty of space to move around. Assembly can get tricky if you’re cramped or working on uneven ground. Outdoor areas like patios or decks usually work best, but avoid windy spots that could blow away lightweight parts or instruction sheets.
Consider nearby power sources if you need electric tools. Also, think about where you’ll place the grill once assembled. Is it close enough to your cooking area? Safe from flammable materials? Your choice here impacts not just assembly but long-term use and safety.
Reading The Manual
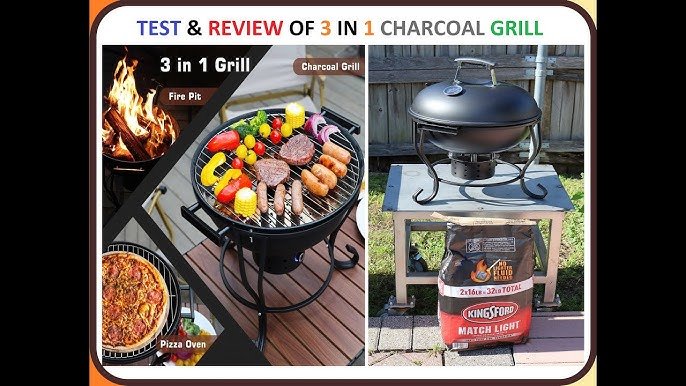
Take time to read the manual thoroughly before touching any tools. It might seem tedious, but the manual is your roadmap to avoid errors. Different grill models have unique parts and assembly sequences that you don’t want to mix up.
Look for diagrams and step-by-step instructions. Highlight or mark tricky parts that might need extra attention. Have you noticed how some instructions skip details that turn out to be important? Being prepared means you won’t have to backtrack or guess what comes next.
Credit: www.consumerreports.org
Setting Up The Grill Base
Setting up the grill base is the first crucial step in assembling your charcoal grill. A stable base ensures safety and ease of use. Take your time to secure each part properly for a solid foundation.
Attaching The Legs
Start by identifying the grill legs and their mounting points. Align each leg with the holes on the grill base. Use the provided screws and a screwdriver to tighten the legs firmly. Make sure each leg is straight and secure. This prevents wobbling during grilling.
Securing The Wheels
Locate the wheels and the axle rod. Slide the axle through the wheel holes on the legs. Fix the wheels in place using the nuts or clips included. Check that the wheels spin freely but stay firmly attached. This makes moving the grill easier without losing balance.
Stabilizing The Frame
Find the cross supports or braces for the frame. Attach these between the legs using bolts or screws. Tighten all fasteners to ensure no part moves. The frame should feel solid and balanced once secured. A steady frame keeps the grill safe during use.
Installing The Charcoal Bowl
Installing the charcoal bowl is a key part of assembling your grill. This component holds the charcoal and must be secure for safe grilling. Proper installation ensures even heat and prevents accidents. Follow these simple steps to set up the charcoal bowl correctly.
Positioning The Bowl
Place the charcoal bowl inside the grill frame. Align it with the designated slots or supports. Make sure the bowl sits evenly and does not tilt. Proper positioning helps with airflow and heat distribution.
Fastening With Screws
Use the screws provided in your grill kit to attach the bowl. Insert each screw through the holes in the bowl and into the frame. Tighten the screws firmly but avoid over-tightening to prevent damage. Check that all screws are secure and hold the bowl tightly in place.
Checking For Stability
Once fastened, gently shake the charcoal bowl. It should not wobble or move. A stable bowl keeps charcoal contained and safe during cooking. Adjust or tighten screws if you notice any instability. A steady charcoal bowl means safer grilling and better performance.

Credit: www.amazon.com
Assembling The Grill Grate
Assembling the grill grate is a key part of setting up your charcoal grill. The grate holds the food above the heat source, so it must be stable and secure. Proper assembly ensures even cooking and easy cleanup.
Placing The Grate Supports
Start by locating the grate supports inside the grill bowl. These supports hold the cooking grate in place. Position them evenly around the inside edge of the grill. Make sure they are secure and level. This stability prevents the grate from shifting during cooking.
Fitting The Cooking Grate
Lift the cooking grate and align it with the supports. Place the grate carefully on the supports. It should fit snugly without wobbling. Check that the grate covers the entire cooking area. This ensures maximum cooking space for your food.
Adjusting For Height
Some grills allow you to adjust the grate height. Raising or lowering the grate controls cooking temperature. Higher placement means gentler heat, lower means more direct heat. Use this feature to match your cooking style. Adjust the height before adding charcoal for safety.
Attaching The Lid And Handles
Attach the lid securely to the grill body using the provided screws or bolts. Then, fix the handles on both the lid and the grill for easy lifting and moving. Ensure all parts are tight and stable before use.
Attaching the lid and handles to your charcoal grill is a vital step in ensuring functionality and ease of use. A secure lid and sturdy handles not only make your grilling experience more enjoyable but also safer. Whether you’re a seasoned grill master or a newbie, mastering this process can enhance your grilling skills.Mounting The Lid Hinges
Begin by identifying the hinge brackets on your grill. These are typically located at the back of the grill base. Align the lid hinges with these brackets. It’s like matching puzzle pieces—once aligned, insert the screws provided through the holes in the hinges and into the brackets. Tighten these screws securely using a screwdriver. Remember, a loose lid can cause uneven cooking or even pose a safety risk. Double-check for any wobble or movement. If the hinges feel unstable, tighten the screws again until the lid is firmly attached.Securing The Handles
Handles are your main touchpoint when using the grill, so they need to be attached securely. Position the handles on the designated spots on the lid. Most grills come with pre-drilled holes for easy attachment. Use the screws included in your grill package to fix the handles in place. Tighten them with a screwdriver, ensuring they do not wiggle. A firm grip is crucial for safety, especially when lifting a hot lid. Consider: How confident do you feel lifting a hot lid with loose handles? It’s worth taking the extra time to get it right.Ensuring Lid Fit
Once the lid and handles are securely attached, check how the lid fits over the grill body. A well-fitted lid should sit snugly without gaps. This ensures efficient heat retention for even cooking. Test the lid by lifting it a few times to ensure it opens and closes smoothly. If you notice any resistance or misalignment, adjust the hinges or screws as necessary. A perfect lid fit is not just about aesthetics; it’s about achieving the best grilling results. In the world of grilling, every detail matters. By ensuring your lid and handles are properly attached, you’re setting the stage for countless successful barbecues. What’s your next grilling adventure?Adding Air Vents And Dampers
Adding air vents and dampers to your charcoal grill is crucial for controlling the temperature and smoke inside the cooking chamber. These components regulate airflow, allowing you to maintain steady heat for perfectly grilled food. Without proper venting, your grill can become too hot or too smoky, which affects the flavor and cooking time.
Installing Bottom Vents
The bottom vents are your grill’s primary source of oxygen. Start by locating the vent openings on the lower section of the grill body. Usually, these vents slide open or have rotating plates that you can adjust.
Secure the vents using the screws or clips provided with your grill. Make sure they move freely without wobbling, as tight control over airflow depends on smooth operation. If the vents are too loose, you might lose control over the temperature.
Think about how much air your grill needs during different cooking stages. More air means hotter coals, so being able to precisely adjust these vents will help you avoid flare-ups or undercooked food.
Fixing Top Dampers
Top dampers control how much smoke and heat escape from the grill. Position them on the lid or chimney area where you can easily reach while cooking. Attach the dampers firmly, ensuring they rotate or slide without resistance.
Check that the dampers can fully open and close—this lets you seal the grill when needed or release excess heat. A stuck damper can trap smoke or cause uneven cooking.
Don’t underestimate the value of a well-functioning top damper. It lets you shape the smoke flavor by controlling how long the smoke stays in contact with your food.
Testing Airflow Control
Once installed, test how the vents and dampers work together to control airflow. Light a small batch of charcoal and observe how adjusting the bottom vents affects the fire’s intensity. Open the top damper gradually and notice how the smoke and heat respond.
Try different combinations of vent openings to find the sweet spot where your grill maintains a stable temperature. This hands-on testing saves you frustration during your first cooking session.
Ask yourself: Are you able to keep the fire going without constantly adding fuel? Is the smoke thick or thin? These observations guide you in mastering your grill’s airflow for better results every time.
Final Checks And Safety Tips
Before firing up your charcoal grill for the first time, it’s crucial to perform some final checks and follow safety tips. This ensures your grill works perfectly and helps prevent accidents. A well-assembled and clean grill not only cooks better but also lasts longer.
Tightening All Screws
Go over every screw and bolt on your grill. Even if you feel like you tightened them during assembly, give them another round. Loose screws can cause parts to wobble or fall off while grilling, which is dangerous.
Use the correct tools and apply steady pressure. If you notice any stripped threads, replace the screw to keep everything secure. Have you ever had a grill collapse unexpectedly? That’s often due to loose hardware.
Inspecting For Sharp Edges
Run your hands carefully along all metal surfaces to check for sharp edges or burrs. These can cause cuts or snag your clothes. If you find any, use sandpaper or a metal file to smooth them out.
Pay close attention to corners and the inside of the grill lid where metal sheets meet. Being proactive here saves you from painful injuries later. How safe do you feel handling your grill right now?
Cleaning Before First Use
Even brand-new grills can have dust, grease, or residues from manufacturing. Wipe down all surfaces with warm soapy water and rinse thoroughly. Dry completely before lighting the charcoal.
Next, run a short burn without food to burn off any remaining residues. This step improves the taste of your food and keeps it healthy. Do you want the best flavor from your first barbecue? Cleaning is key.

Credit: www.youtube.com
Frequently Asked Questions
How Long Does It Take To Assemble A Charcoal Grill?
Assembling a charcoal grill typically takes 30 to 60 minutes. Time varies based on grill size and complexity. Following the manufacturer’s instructions speeds up the process. Having basic tools ready also helps ensure smooth assembly without delays.
What Tools Are Needed To Assemble A Charcoal Grill?
Basic tools like a screwdriver, wrench, and pliers are usually required. Some grills may include necessary tools in the package. Check the instruction manual for specific tool recommendations before starting assembly. Proper tools make the process easier and safer.
How Do I Ensure My Charcoal Grill Is Stable?
Attach all legs and support brackets firmly during assembly. Tighten screws and bolts securely using proper tools. Place the grill on a flat, level surface to prevent wobbling. Stability ensures safe grilling and prevents accidents during use.
Can I Assemble The Charcoal Grill Alone?
Yes, most charcoal grills can be assembled solo with patience. Following step-by-step instructions carefully is key. However, having a helper can speed up the process and ease handling heavy parts. Safety should always be a priority during assembly.
Conclusion
Assembling a charcoal grill is easier than it seems. Follow each step with care and patience. Double-check all parts fit securely and safely. Soon, you will enjoy cooking outdoors with friends and family. Keep your grill clean and stored properly after use.
This helps it last longer and work well. Now, you are ready to fire up your grill and enjoy tasty meals. Happy grilling!
