

Are you tired of struggling with your string trimmer because the handle just doesn’t feel right? A poorly adjusted handle can make your trimming job harder, slower, and even uncomfortable.
But what if you could fix that in just a few simple steps? Learning how to adjust your string trimmer handle properly will give you better control, reduce fatigue, and make your yard work much easier. Keep reading, and you’ll discover exactly how to make your trimmer fit you perfectly—so you can get back to enjoying a neat, beautiful lawn without the hassle.
Credit: www.walmart.com
Choosing The Right Handle
String trimmer handles come in several types. The most common are loop handles, bicycle handles, and D-shaped handles. Loop handles are light and good for small jobs. Bicycle handles provide better control for heavy work. D-shaped handles offer comfort and easy grip.
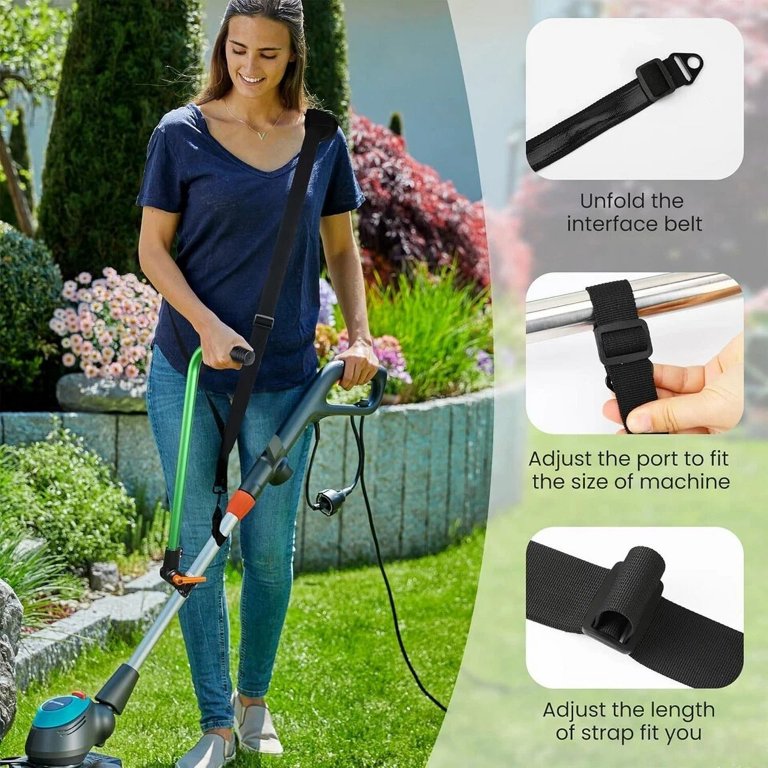
Adjustable handles help you find the best positionfor your arms and back. They reduce fatigueand make trimming easier. You can change the handle height and angle to fit your body. This helps avoid pain and improves balancewhile working.
| Handle Type | Best For | Benefits |
|---|---|---|
| Loop Handle | Small jobs | Lightweight, easy to use |
| Bicycle Handle | Heavy trimming | Better control, stable grip |
| D-shaped Handle | Comfort grip | Ergonomic, reduces hand strain |
Tools Needed For Adjustment
Adjusting a string trimmer handle needs some basic tools. A screwdriveris essential for loosening and tightening screws. Often, a wrenchor adjustable spanneris needed to adjust bolts. Sometimes, a hex keyor Allen wrenchis used for specific screws on the handle.
Wearing safety gearis important. Use glovesto protect your hands from sharp parts. Safety glasseskeep your eyes safe from dust and debris. A long-sleeve shirtcan protect your arms during the adjustment.
Preparing The Trimmer
Turn offthe string trimmer before adjusting the handle. Unplug it from the power source if it is electric. This step is very important for safety.
Use a clean cloth to wipe the handle area. Remove any dirt or grass stuck around the handle. This cleaning helps the handle move smoothlywhen adjusting.
Credit: www.walmart.com
Adjusting The Handle Position
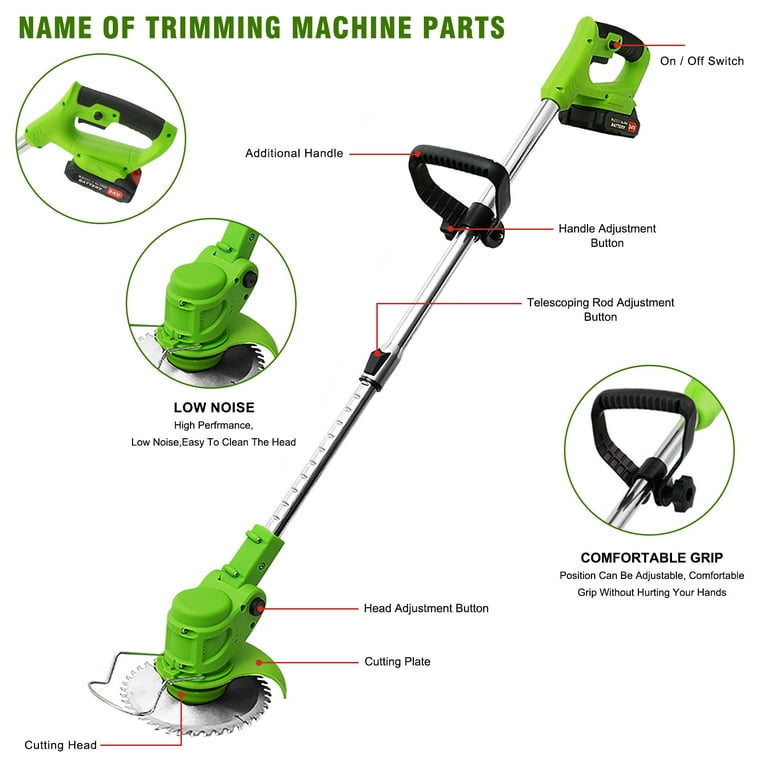
Adjust the handle by loosening its clamp and sliding it to a comfortable position. Tighten the clamp securely to keep the handle steady. This ensures better control and reduces fatigue while trimming.
Loosening The Handle Clamp
First, find the handle clamp on your string trimmer. Use a screwdriver or wrench to loosen the clamp. This makes the handle easy to move. Make sure the clamp is loose enough for adjustments.
Setting The Handle Angle
Move the handle to the best angle for comfort. The handle should feel good in your hands. Adjust the angle until it feels right. Your arms should be relaxed while holding it.
Securing The Handle Firmly
Tighten the handle clamp firmly. Make sure it’s not too tight or too loose. Check if the handle stays in place. If it moves, tighten it a bit more. Ensure the handle doesn’t wiggle while using the trimmer.
Testing For Comfort And Control
Adjust the string trimmer handle to fit your grip and height for better comfort. Test different positions to find the best control while trimming. Small changes can reduce strain and improve your trimming experience.
Grip And Reach Check
Hold the trimmer handle firmly. The grip should feel comfortableand not too tight. Your hand should reach the handle easily without stretching. Check if your fingers can wrap around the handle fully. Adjust the handle so it matches your arm length. A proper grip helps reduce fatigueduring use.
Balance And Weight Distribution
Lift the trimmer and feel its weight. It should be balanced, not heavy on one side. The handle should help carry the weight evenly. This makes the tool easier to control and less tiring. Adjust the handle position to find the best balance. A well-balanced trimmer improves precisionand safety.

Credit: www.amazon.com
Maintenance Tips For Handles
Regular inspection keeps the string trimmer handle safe and easy to use. Check the handle for cracks, loose parts, or wear. Tighten any screws or bolts that feel loose. Look for rust or dirt that may cause problems.
Lubrication helps the handle move smoothly. Apply a small amount of oil to the moving parts. This stops them from sticking or making noise. Avoid using too much oil to prevent dirt build-up.
Keep tightening the handle parts to avoid wobbling during use. A firm handle gives better control and comfort. Check these points often to keep your trimmer working well.
Frequently Asked Questions
How Do I Adjust My String Trimmer Handle For Comfort?
To adjust your string trimmer handle, loosen the handle clamp. Slide the handle to the desired position. Tighten the clamp securely. This improves grip and reduces fatigue during use.
Can Adjusting The Handle Improve Trimmer Control?
Yes, adjusting the handle aligns it with your natural grip. This enhances maneuverability and precision. Proper handle positioning prevents strain and allows better trimming results.
What Tools Are Needed To Adjust The Handle?
Typically, a screwdriver or Allen wrench is needed. These tools loosen and tighten the handle clamp bolts. Check your trimmer’s manual for specific tool requirements.
How Often Should I Adjust My String Trimmer Handle?
Adjust your handle when switching users or after long use. Regular adjustments maintain comfort and control. Inspect the handle position before each trimming session.
Conclusion
Adjusting your string trimmer handle makes trimming easier and safer. A well-set handle reduces strain on your arms and back. Take time to find the right position for comfort. Small changes can improve control and cutting accuracy. Regularly check the handle to keep it steady and secure.
This simple step helps your trimmer work better every time. Keep your yard neat with less effort and more comfort. Easy to adjust, the handle can boost your trimming experience. Try it today and feel the difference while you work.

