
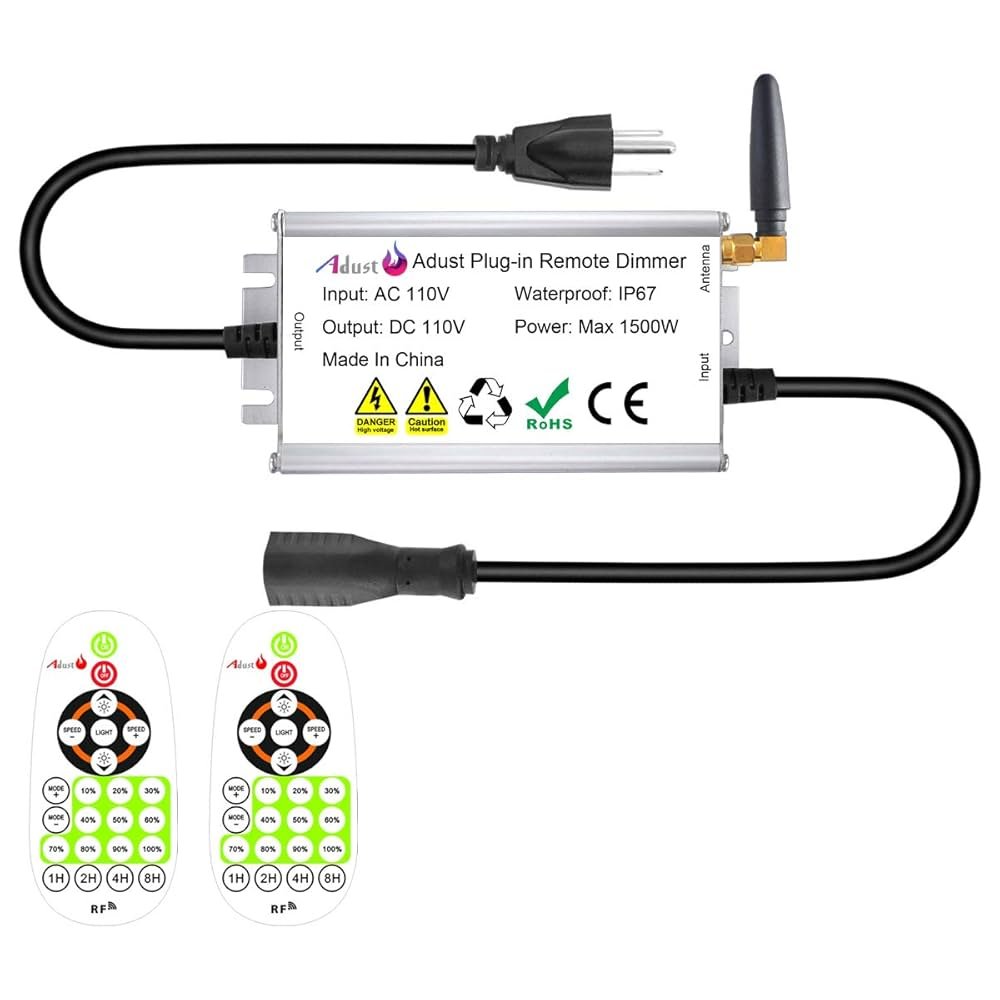
Are you looking to create the perfect mood for your outdoor space? Adding dimmers to your outdoor string lights is a simple way to control brightness and set just the right atmosphere.
Imagine turning your bright, harsh lights into a soft, inviting glow with just a twist. In this guide, you’ll learn exactly how to add dimmers to your outdoor string lights, making your backyard gatherings more comfortable and stylish. Keep reading, and you’ll discover easy steps that anyone can follow to transform your outdoor lighting instantly.

Credit: www.amazon.com
Choosing The Right Dimmer
Choosing the right dimmer for outdoor string lights is key to creating the perfect ambiance. It controls the brightness and helps save energy. Not all dimmers work with every type of string light. Weather resistance is also important to keep the dimmer safe and functional outdoors.
Types Of Dimmers
There are several dimmer types available for outdoor lighting:
- Rotary Dimmers:Easy to use with a turn knob to adjust brightness.
- Slide Dimmers:Use a sliding control for smooth dimming levels.
- Touch Dimmers:Activated by tapping, offering modern convenience.
- Smart Dimmers:Controlled via apps or voice commands for remote use.
Choose a dimmer that matches your style and how you want to control the lights.
Compatibility With String Lights
Check the dimmer’s compatibility with your string lights before buying. LED string lights need a dimmer designed specifically for LED bulbs. Using the wrong dimmer can cause flickering or damage the lights.
Look for dimmers labeled for LED or multi-type bulbs. Confirm the voltage matches your string lights. Some dimmers work only with incandescent bulbs and are not suitable for LED.
Weatherproof Features
Outdoor dimmers must withstand rain, dust, and temperature changes. Choose dimmers with an IP rating of at least IP44. This rating means the dimmer is protected against splashing water.
Sealed covers and rubber gaskets help keep moisture out. Place the dimmer in a sheltered spot for extra protection. Weatherproof dimmers last longer and keep your lights working safely.

Credit: www.amazon.com
Essential Tools And Materials
Adding dimmers to your outdoor string lights can transform your space instantly. To get it right, you need the right tools and materials. Skipping this step can make the installation frustrating or even unsafe.
Dimmer Switch Options
Not all dimmers work with outdoor string lights. You’ll want a dimmer specifically designed for outdoor use and compatible with your light type—LED, incandescent, or other.
Consider a plug-in dimmerif you prefer a no-wiring solution. These are simple to use and install but may not offer the same control as wired dimmers.
Wired dimmer switches, on the other hand, provide a cleaner look and better integration with your home’s electrical system. Make sure the dimmer’s wattage rating matches or exceeds the total wattage of your lights.
Necessary Tools For Installation
- Screwdrivers:Both flathead and Phillips for securing switch plates and wiring terminals.
- Wire strippers:Essential for exposing the wires to connect the dimmer switch safely.
- Voltage tester:To confirm power is off before handling any electrical connections.
- Drill with bits:Useful if mounting the dimmer switch outdoors on a wall or post.
- Wire nuts or connectors:To secure wire connections firmly and avoid shorts.
Having these tools ready saves time and reduces the chance of mistakes. You don’t want to pause your project halfway because you’re missing a screwdriver.
Safety Equipment
- Insulated gloves:Protect your hands from electrical shocks and sharp wire ends.
- Safety goggles:Shield your eyes from debris when drilling or cutting wires.
- Non-conductive ladder:If you need to reach high places, make sure your ladder won’t conduct electricity.
- Work light:Good lighting helps you see small wire markings and connections clearly, reducing errors.
Have you ever underestimated the importance of safety gear and regretted it later? Taking a few precautions can save you from serious injuries and costly repairs.
Preparing Your Outdoor Space
Preparing your outdoor space is essential before adding dimmers to your string lights. This step ensures a smooth installation and a safer setup. Proper preparation helps you understand your lighting needs and avoid common issues. Follow these guidelines to get your area ready.
Assessing The Lighting Layout
Start by examining where your string lights will hang. Measure the length and note where power outlets are located. Check for any existing fixtures that may affect placement. Plan how the dimmer will fit into the setup. Visualize the lighting effect you want to create. This helps you choose the right dimmer and wiring path.
Ensuring Safety Precautions
Electricity and outdoor settings need extra caution. Turn off the power before starting any work. Use outdoor-rated dimmers and extension cords. Avoid placing wires near water or sharp edges. Wear gloves and use insulated tools for protection. Double-check that your dimmer matches your light’s voltage and wattage. Safety prevents accidents and prolongs your setup’s life.
Clearing The Installation Area
Remove any obstacles where you will install the dimmer and lights. Trim branches and clear debris that may block access. Clean the surface where the dimmer will mount. A tidy area makes installation easier and faster. Ensure stable footing if you need a ladder. A clean, open space reduces the risk of damage or injury.

Credit: www.amazon.com
Installing The Dimmer
Installing a dimmer for outdoor string lights allows control over brightness and mood. This process involves a few simple steps. Proper installation ensures safe and smooth operation of your lighting setup.
Connecting The Dimmer To The Power Source
Start by turning off the power to the outlet or circuit. Locate the power source where the string lights plug in. Connect the dimmer’s input wires to the power source wires. Match black to black (live), white to white (neutral), and green or bare wire to ground. Use wire nuts to secure connections tightly. Wrap connections with electrical tape for added safety. Make sure no wires are exposed. Turn power back on only after all connections are secure.
Attaching The Dimmer To String Lights
Find the point where the string lights connect to the power source. Cut the string light’s power cord at a suitable place if needed. Connect the dimmer’s output wires to the string light’s power wires. Match wire colors as before for live, neutral, and ground. Secure these connections with wire nuts and electrical tape. Place the dimmer in a weatherproof box or enclosure. Ensure the enclosure is rated for outdoor use. Mount the enclosure near the power source or on a wall for easy access.
Testing The Dimmer Functionality
Turn on the power to the dimmer and string lights. Use the dimmer control to adjust the light brightness. Check for smooth dimming without flickering or buzzing sounds. Ensure the lights can reach full brightness and dim completely. If the lights behave oddly, turn off power and check connections again. Confirm the dimmer is compatible with your string lights type. Proper testing guarantees safe and reliable dimmer operation outdoors.
Enhancing Ambiance With Dimmer Settings
Adding dimmers to your outdoor string lights gives you full control over the atmosphere you want to create. It’s not just about turning lights on or off—it’s about setting the perfect brightness to match your mood or occasion. With dimmer settings, you can easily shift from lively gatherings to quiet, relaxing evenings in your outdoor space.
Adjusting Light Levels
You can fine-tune your string lights to any brightness you prefer. Whether you want a soft glow for a cozy dinner or brighter light for a backyard party, a dimmer lets you do that effortlessly. This flexibility means you don’t need multiple lighting setups; one set of string lights with a dimmer can handle it all.
Creating Mood Lighting
Mood lighting transforms your outdoor area into a personal retreat. Lower light levels can make your space feel intimate and inviting, perfect for conversations or unwinding after a long day. Have you noticed how changing light affects your mood? Using dimmers lets you craft the exact ambiance you want, enhancing every moment outdoors.
Optimizing Energy Efficiency
Dimming your outdoor lights also cuts down on energy use. Running lights at a lower brightness consumes less electricity, which can reduce your utility bills. Besides saving money, you’re also being more environmentally friendly by using only the light you need.
Maintaining And Troubleshooting
Maintaining your outdoor string lights with dimmers ensures long-lasting performance. Troubleshooting common problems helps keep the lights bright and the ambiance perfect. Regular care prevents damage and saves time on repairs.
Routine Maintenance Tips
- Check connections for corrosion or dirt regularly.
- Clean dimmer switches and light bulbs with a dry cloth.
- Inspect wires for cracks or wear before each use.
- Store lights in a dry place when not in use.
- Replace bulbs promptly to avoid overloading other bulbs.
- Test dimmer settings to ensure smooth brightness control.
Common Issues And Solutions
- Lights flicker:Tighten loose connections or replace faulty bulbs.
- Dimmer not working:Check power source and reset the dimmer switch.
- Lights too dim or too bright:Adjust the dimmer knob slowly to find the right level.
- Lights won’t turn on:Confirm all plugs are secure and circuit breakers are on.
- Overheating dimmer:Ensure dimmer matches the wattage of your string lights.
When To Seek Professional Help
Call an electrician if you notice exposed wires or sparks. Avoid fixing electrical issues without proper knowledge. Professionals can ensure safety and correct installation. Persistent dimmer problems may require expert diagnosis. Always prioritize safety over DIY fixes.
Frequently Asked Questions
Can I Use Any Dimmer Switch For Outdoor String Lights?
No, use a dimmer switch rated for outdoor use and compatible with LED or incandescent bulbs. Check the voltage and wattage limits to ensure safety and functionality. Outdoor-rated dimmers resist moisture and temperature changes, extending the lifespan of your lights.
How Do I Install A Dimmer On Outdoor String Lights?
First, turn off the power supply. Connect the dimmer switch between the power source and string lights. Follow manufacturer instructions carefully. Use waterproof connectors and secure wiring to prevent exposure to rain or moisture.
Will Dimmers Save Energy With Outdoor String Lights?
Yes, dimmers reduce electricity use by lowering light intensity. This decreases energy consumption and extends bulb life. Adjusting brightness helps create ambiance while cutting costs, making dimmers an eco-friendly and economical choice for outdoor lighting.
Are Dimmers Compatible With Led Outdoor String Lights?
Most LED-compatible dimmers work well with outdoor string lights. Ensure your dimmer specifically supports LED bulbs to avoid flickering or damage. Using the right dimmer maximizes LED efficiency and allows smooth brightness control.
Conclusion
Adding dimmers to outdoor string lights lets you control brightness easily. You can set the mood for any event or quiet night. It saves energy by using only the light you need. The process is simple and does not require special tools.
Just follow safety steps and enjoy your new lighting setup. Bright or dim, your outdoor space looks great anytime. Try it and see the difference yourself!

