
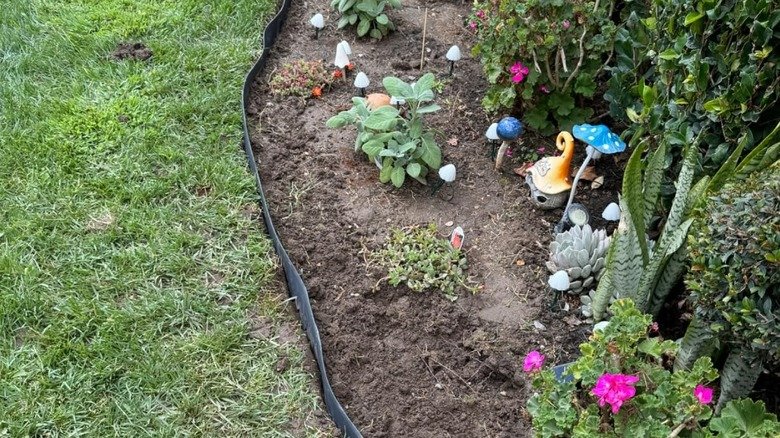
Are you tired of your lawn looking messy around the edges? Installing DIY lawn edging is one of the simplest ways to give your yard a clean, polished look.
But how do you make sure it’s done right without spending a fortune or hiring a pro? In this guide, you’ll discover the best way to install lawn edging that saves you time, effort, and money. Keep reading, and you’ll learn easy steps that anyone can follow to transform your outdoor space into something you’ll be proud of.
Credit: www.housedigest.com
Choosing Lawn Edging Materials
Picking the right lawn edging material helps keep your garden neat. It also makes your yard look tidy and cared for.
Different materials suit different needs. Think about style, cost, and how long the edging will last.
Plastic Edging Benefits
Plastic edging is light and easy to install. It resists rust and won’t break easily in cold weather.
This type of edging bends well, so it fits curved garden shapes. It comes in many colors and styles to match your lawn.
- Flexible for curves and corners
- Resistant to rust and weather
- Low cost and easy to find
- Requires little maintenance
Metal Edging Options
Metal edging is strong and lasts a long time. It gives a clean, modern look to your garden borders.
Steel and aluminum are common metals used. Steel is very tough but may need rust protection. Aluminum is lighter and resists rust better.
- Durable and long-lasting
- Creates sharp, clean edges
- Steel may need rust treatment
- Aluminum resists rust naturally
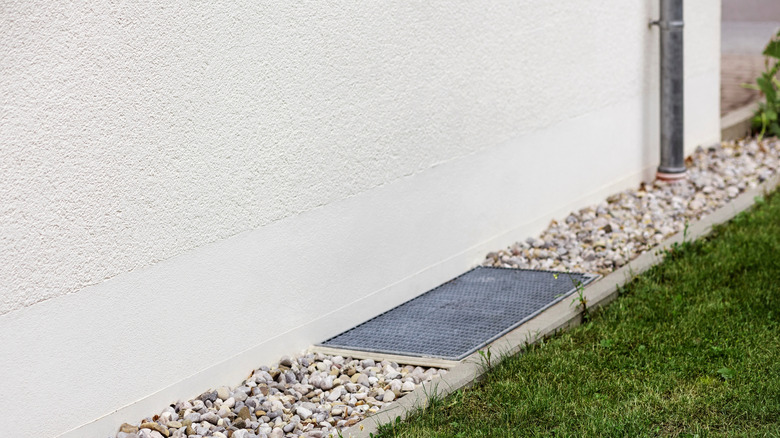
Natural Stone And Brick Choices
Stone and brick give a classic and natural look. They add weight to hold soil and mulch in place well.
These materials last many years but need more work to install. They fit well in traditional and formal garden styles.
- Strong and heavy for stability
- Natural look blends with plants
- Long-lasting with little wear
- Installation needs more effort
Wood Edging Styles
Wood edging gives a warm, natural feel to your lawn. It is easy to cut and shape for different borders.
Different woods like cedar and pine are popular. Cedar lasts longer outside without rotting. Wood needs treatment to protect it from weather.
- Natural and warm appearance
- Easy to cut and install
- Cedar resists rot well
- Needs regular maintenance
Credit: www.housedigest.com
Planning Your Lawn Edging Layout
Planning your lawn edging layout is important for a neat garden look. It helps you decide where the edges should go.
Good planning saves time and materials during installation. It also ensures the lawn edging fits your yard well.
Marking The Edging Path
Start by marking the path where you want the edging. Use a garden hose or string to lay out the shape.
Walk around the yard and adjust the line until you like the look. This helps you see the final shape before digging.
- Use a garden hose to create curves easily
- Mark straight edges with string or stakes
- Check the line from different angles
Measuring And Mapping
Measure the length of the marked path to know how much edging you need. Use a tape measure for accuracy.
Draw a simple map of your yard showing the edging layout. Include measurements to guide your installation.
- Note lengths of straight and curved sections
- Mark corners and changes in direction
- Keep the map handy during installation
Considering Yard Features
Look at trees, flower beds, and walkways near the edging path. Make sure the edging fits around these features.
Plan for drainage and avoid blocking water flow. Check for underground pipes or cables before digging.
- Leave space around tree roots
- Shape edging to protect flower beds
- Check local utility lines before digging
- Keep walkways clear and accessible
Tools And Supplies Needed
Installing DIY lawn edging is easier with the right tools and supplies. Having everything ready saves time and effort.
This guide lists the essential tools and safety gear you need. Follow these tips for a smooth installation.
Essential Tools List
You need basic tools to install lawn edging properly. These tools help you measure, cut, and secure the edging.
- Measuring tape to mark the lawn edge length
- Garden spade or edging shovel for digging trenches
- Rubber mallet to tap edging pieces into place
- Utility knife or saw for cutting edging materials
- Gloves to protect your hands while working
- String line and stakes to keep edges straight
- Level to ensure the edging is even
- Wheelbarrow or bucket to move soil and debris
Safety Gear Recommendations
Safety gear protects you during lawn edging installation. Use these items to avoid injuries and stay safe.
- Work gloves to protect hands from cuts and blisters
- Safety glasses to shield eyes from dirt and debris
- Closed-toe shoes to protect feet from sharp tools
- Knee pads if you need to kneel for long periods
- Hat and sunscreen for sun protection during outdoor work
Credit: www.housedigest.com
Preparing The Yard For Edging
Before installing DIY lawn edging, prepare the yard well. This helps the edging stay strong and look neat.
Preparation includes clearing, leveling, and digging a trench for the edging material.
Clearing Debris And Grass
Remove rocks, sticks, and old plants from the area. Clear away grass where the edging will go.
This makes the ground smooth and ready for the edging material. Use a rake or shovel to clear the space.
- Pick up rocks and sticks by hand.
- Cut or pull out grass along the edge.
- Rake the area to remove small debris.
Leveling The Ground
Make the ground flat where the edging will sit. Check for bumps or holes and fix them.
Use a shovel to move soil and a rake to smooth the surface. A level helps check the flatness.
- Fill holes with soil.
- Remove bumps or high spots.
- Rake to smooth the surface evenly.
- Use a level tool to check flatness.
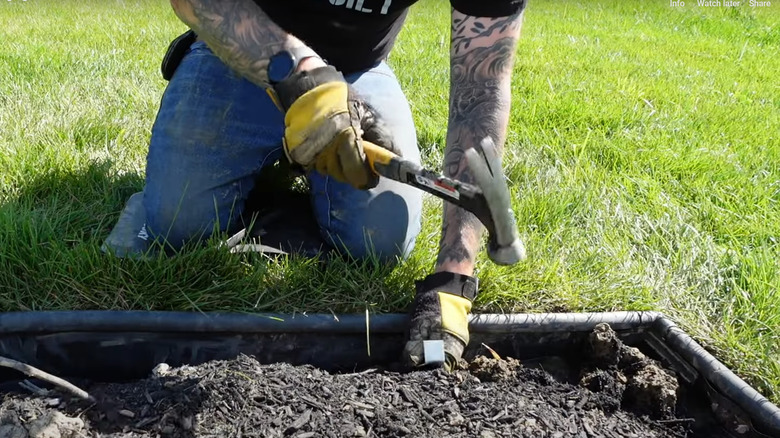
Creating A Trench
Dig a shallow trench along the edge line. The trench holds the lawn edging firmly in place.
The depth depends on the edging type, usually 3 to 6 inches deep. Make the trench wide enough for the edging.
- Mark the edge line with string or spray paint.
- Dig a trench 3 to 6 inches deep.
- Make the trench as wide as the edging.
- Remove loose soil from the trench.
Installing The Lawn Edging
Installing lawn edging can help keep your garden tidy and neat. The process involves placing the edging, securing it, and joining sections smoothly.
Using the right method makes your lawn edging last longer and look better.
Placing The Edging Material
Start by laying out the edging material along the desired border. Make sure the edge follows the shape of your garden or lawn.
Clear any grass or weeds from the area where the edging will go. Dig a shallow trench if needed to fit the edging securely.
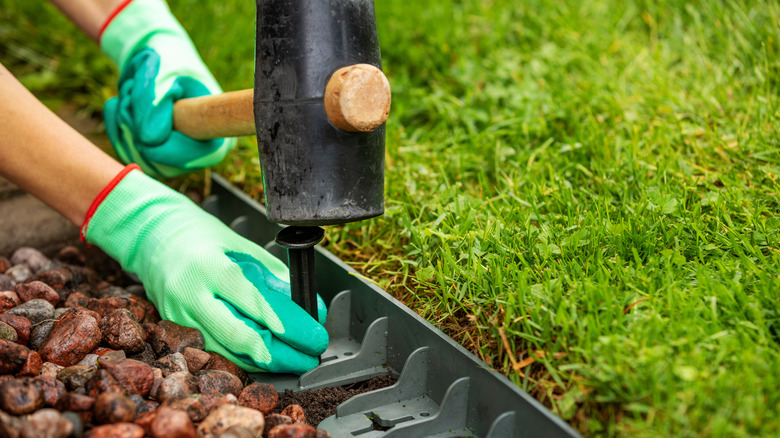
Securing Edging In Place
Secure the edging so it stays firm and straight. Use stakes or pins that come with the edging or buy extra if needed.
- Push stakes into the ground at regular intervals, about every 12 to 18 inches.
- Make sure the edging is flush with the soil surface.
- Check that the edging does not wobble or move when pressed.
- Trim any excess material for a clean look.
Joining Edging Sections
When joining two pieces of edging, align them carefully to avoid gaps or overlaps. Use connectors or fasteners designed for your edging type.
| Joining Method | Description |
|---|---|
| Interlocking Tabs | Slide tabs into slots for a tight fit. |
| Butt Joint with Stakes | Place ends together and secure with stakes. |
| Connector Clips | Use clips to lock sections firmly. |
Finishing Touches And Maintenance
Completing your DIY lawn edging can make your garden look tidy. Proper maintenance keeps it neat and long-lasting.
Finishing touches add elegance to your lawn. Regular upkeep ensures your hard work lasts for seasons.
Backfilling And Compacting Soil
After placing your edging, fill the gaps with soil. This secures the edging in place and prevents shifting.
Press the soil firmly using your hands or a tamper. Compacting the soil helps in stabilizing the edging effectively.
- Check for any gaps after backfilling
- Ensure the soil is level with the ground
- Use a garden tool to firm the soil
Adding Mulch Or Decorative Elements
Mulch adds a finished look to your lawn edging. It also helps retain soil moisture and reduce weeds.
Decorative stones or plants can enhance the garden’s appearance. Choose elements that complement your garden’s style.
- Spread mulch evenly around the edging
- Consider decorative stones for a polished look
- Use plants for a natural border
Regular Upkeep Tips
Regular maintenance keeps your edging looking fresh. Simple tasks can prolong the life of your garden borders.
Check for any loose sections and fix them promptly. This prevents larger problems later.
- Inspect edging monthly for shifts
- Remove weeds that grow near the edges
- Reapply mulch annually to maintain appearance
Frequently Asked Questions
What Materials Are Best For Diy Lawn Edging?
For DIY lawn edging, use materials like plastic, metal, stone, or wood. Choose based on durability, budget, and garden style. Plastic is flexible and affordable, metal offers strength, stone provides natural beauty, and wood adds rustic charm. Select what suits your lawn’s needs best.
How Do I Prepare The Ground For Lawn Edging?
Start by marking your desired edging line with a garden hose or string. Then, dig a trench about 3-4 inches deep and 2-4 inches wide. Remove roots and debris to create a clean, level base. This ensures your edging stays secure and looks neat.
Can I Install Lawn Edging Without Professional Tools?
Yes, you can install lawn edging with basic tools like a shovel, hammer, and measuring tape. Most DIY edging methods require simple hand tools, making it easy and affordable. Choose flexible materials to simplify installation and avoid heavy equipment.
How Long Does Diy Lawn Edging Installation Take?
Installation time varies by material and lawn size but typically takes 1-3 hours. Plastic or flexible edging installs faster, while stone or brick may take longer. Planning and preparation help speed up the process and ensure a clean finish.
Conclusion
Installing DIY lawn edging can improve your yard’s look quickly. Choose the right materials and tools for best results. Mark your lawn edges clearly before digging. Place the edging firmly and secure it well. Regularly check and maintain the edging to keep it neat.
A clean lawn edge makes your garden stand out. Simple steps lead to a beautiful, organized outdoor space. Try these tips and enjoy a tidy lawn every day.
