
If you want your leaf vacuum to work smoothly and last longer, knowing how to lubricate its parts is a must. Without proper care, your machine can become noisy, slow, or even break down.
But don’t worry—this guide will show you simple steps to keep your leaf vacuum running like new. By following these easy tips, you’ll save time, avoid costly repairs, and enjoy a hassle-free cleanup every fall. Ready to learn how to protect your investment and get the best performance?
Let’s dive in.
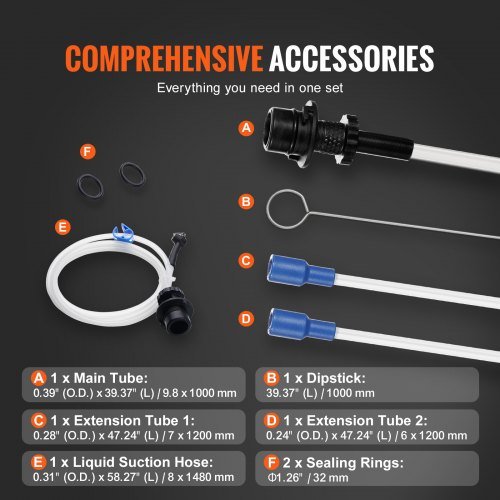
Credit: www.vevor.com
Tools And Materials Needed
Lubricating leaf vacuum parts keeps the machine working smoothly. You need the right tools and materials to do the job well.
Gather everything before you start. This saves time and prevents mistakes during maintenance.
Types Of Lubricants
Choosing the correct lubricant helps protect moving parts from wear and rust. Different parts may require different types of lubricants.
- Multi-purpose oil: Good for general lubrication and rust prevention.
- Grease: Best for parts that need thick, long-lasting lubrication.
- Silicone spray: Ideal for plastic and rubber parts to avoid cracking.
- Dry lubricant: Useful when you want to avoid attracting dust and dirt.
Essential Cleaning Supplies
| Supply | Purpose |
| Clean rags | Wipe off old grease and dirt |
| Brushes | Remove debris from hard-to-reach places |
| Compressed air | Blow out dust and particles |
| Gloves | Protect hands from chemicals and dirt |
| Safety glasses | Protect eyes during cleaning |
Credit: www.vevor.com
Safety Precautions
Lubricating leaf vacuum parts is important for good work. It keeps the machine running smooth. Safety is the first thing to think about.
Before you start, follow these safety rules. They help stop accidents and injuries. Read each part carefully.
Disconnecting Power
Always turn off the leaf vacuum before you do any work. Unplug it or remove the battery to stop it from starting by mistake.
- Switch off the machine using the main power button.
- Unplug the power cord from the outlet.
- Remove the battery if it has one.
- Wait a few minutes to be sure all parts stopped moving.
Wearing Protective Gear
Wear the right safety gear before you start lubrication. This protects your body from oil, dirt, and sharp parts.
| Protective Gear | Purpose |
| Gloves | Protect hands from grease and cuts |
| Safety Glasses | Shield eyes from dust and oil splashes |
| Long Sleeves | Cover arms from scratches and dirt |
| Mask | Prevent breathing in dust and fumes |
Identifying Parts To Lubricate
Lubricating your leaf vacuum parts keeps the machine running smoothly. It reduces wear and prevents rust. Knowing which parts need lubrication is important for maintenance.
Focus on areas that move or rub against each other. These spots need regular oiling or greasing. Let’s look at the key parts to check.
Moving Joints And Bearings
Moving joints and bearings allow parts to rotate or pivot. These areas often face friction and can wear out fast without lubrication. Check the joints where handles or levers connect. Bearings inside the wheels and blade shafts also need oil or grease.
Blades And Shafts
Blades cut or collect leaves and spin on shafts. The shafts hold the blades in place. Both need to be clean and lubricated. This prevents rust and keeps the blades turning freely.
- Remove debris from blades before oiling
- Apply lubricant to the blade shaft regularly
- Use a light machine oil for smooth spinning
- Check blade sharpness while maintaining them
Wheels And Axles
Wheels help move the leaf vacuum easily. Axles connect the wheels to the frame. These parts also face friction. Lubricate the axles to keep wheels rolling smoothly. This reduces strain on the motor and frame.
| Part | Why Lubricate | Type of Lubricant |
| Moving Joints | Reduce friction and wear | Grease or light oil |
| Bearings | Ensure smooth rotation | Grease |
| Blades | Prevent rust and keep sharp | Light machine oil |
| Shafts | Allow blades to spin freely | Light oil |
| Wheels | Easy movement and less strain | Grease or oil on axles |
| Axles | Reduce friction for wheels | Grease |
Cleaning Parts Before Lubrication
Keeping your leaf vacuum in top shape is important. Proper cleaning before lubrication helps it run smoothly.
This guide will show you how to clean your leaf vacuum parts. Follow the steps to ensure effective lubrication.
Removing Debris And Dirt
Debris and dirt can clog your leaf vacuum. Removing them ensures better performance.
- Turn off and unplug the vacuum.
- Disassemble parts carefully.
- Use a soft brush to remove surface dirt.
- Wipe with a damp cloth for stubborn grime.
- Ensure all debris is cleared before proceeding.
Drying Components Properly
Dry components to prevent rust and ensure lubrication sticks. This step is crucial for maintaining your vacuum.
Proper drying is key to a well-lubricated and efficient leaf vacuum.
Applying Lubricant Correctly
Lubricating leaf vacuum parts keeps the machine running smoothly. Proper lubrication reduces wear and tear. It also prevents parts from rusting or sticking.
Applying lubricant correctly is important. Too much or too little can cause problems. Use the right technique for best results.
Amount And Frequency
Use only a small amount of lubricant on each part. Excess lubricant can attract dirt and dust. Too little lubrication may not protect the parts well.
Lubricate your leaf vacuum regularly. Check the owner’s manual for recommended schedules. Usually, lubrication is needed after every 10 hours of use or monthly.
- Apply a thin layer on moving parts
- Do not soak parts with lubricant
- Clean parts before applying lubricant
- Follow the machine’s maintenance guide
Techniques For Hard-to-reach Areas
Some parts are hard to reach and need special care. Use tools like small brushes or oil applicators to reach tight spots. This helps ensure all parts get lubricated.
Spray lubricants with a thin nozzle can also help reach narrow areas. Avoid over-spraying, which can cause mess or damage. Move parts gently to spread lubricant evenly.
- Use a small brush for precision
- Apply lubricant with a spray nozzle
- Wipe off excess lubricant carefully
- Move parts to distribute lubricant well
Reassembling And Testing
After lubricating your leaf vacuum parts, you need to put everything back together carefully. This helps your machine work smoothly and last longer.
Once assembled, testing the vacuum ensures all parts move correctly and the machine runs well.
Ensuring Proper Fit
Check each part before attaching it. Make sure parts line up and fit without force. Loose or tight parts can cause damage or poor performance.
Tighten screws and bolts evenly. Use the correct tools to avoid stripping or breaking parts.
- Align parts carefully to their original positions
- Check seals and gaskets for damage
- Hand-tighten screws first, then secure firmly
- Do not over-tighten to prevent cracks
Running A Performance Check
Start your leaf vacuum in a safe area. Listen for unusual sounds or vibrations. These may show parts are not fitted well.
Test the suction and movement. The vacuum should work smoothly without stopping or slowing down.
- Run the vacuum for a few minutes
- Check if all parts move freely
- Watch for leaks or loose parts
- Stop the machine if you hear grinding or rattling
- Fix issues before using the vacuum outside
Maintenance Tips For Longevity
Leaf vacuums need regular care to work well. Lubrication helps parts move smoothly and last longer.
Following a routine maintenance schedule can prevent wear and tear. Proper storage also plays a key role in maintaining the equipment.
Regular Lubrication Schedule
Set a schedule for lubricating your leaf vacuum. Regular lubrication ensures parts are in top shape.
Always use the right type of lubricant for your machine. Check the manual for guidance.
- Lubricate moving parts every 20 hours of use
- Check for leaks after each use
- Clean parts before applying new lubricant
Storage Recommendations
Storing your leaf vacuum correctly prevents damage. Keep it in a dry place to avoid rust.
Cover the machine to protect it from dust. Remove any leaves or debris before storing.
- Store in a cool, dry place
- Use a dust cover to protect the machine
- Inspect the vacuum before storing for the season
Credit: www.vevor.com
Frequently Asked Questions
How Often Should I Lubricate Leaf Vacuum Parts?
Lubricate leaf vacuum parts after every 10 hours of use or at least once a season. Regular lubrication prevents wear and extends machine life.
What Type Of Lubricant Is Best For Leaf Vacuums?
Use lightweight machine oil or silicone spray for leaf vacuum parts. These lubricants reduce friction and protect metal components effectively.
Which Leaf Vacuum Parts Need Lubrication?
Focus on moving parts like bearings, wheels, and the impeller shaft. Proper lubrication ensures smooth operation and prevents rust and damage.
Can I Use Wd-40 For Leaf Vacuum Lubrication?
WD-40 is a water-displacing spray, not a lubricant. Use it to clean parts but apply proper oil afterward for effective lubrication.
Conclusion
Keeping your leaf vacuum parts well-lubricated helps them work smoothly. Regular oiling stops rust and wear on moving pieces. It also makes the machine last longer and run better. Use the right lubricant and follow the steps carefully. Small efforts now can save big repairs later.
Take time to check and oil parts before each use. Your leaf vacuum will thank you with good performance every season. Simple care makes a big difference in how well it works.
