

Are you looking to give your lawn a clean, polished look that lasts? Installing stone lawn edging is a simple way to create clear boundaries between your grass and garden beds.
Not only does it make your yard look neat, but it also helps prevent grass from creeping into flower beds. In this guide, you’ll learn step-by-step how to install stone edging yourself, saving money and adding value to your home.
Keep reading, and you’ll discover easy tips that anyone can follow to transform your outdoor space quickly and effectively.
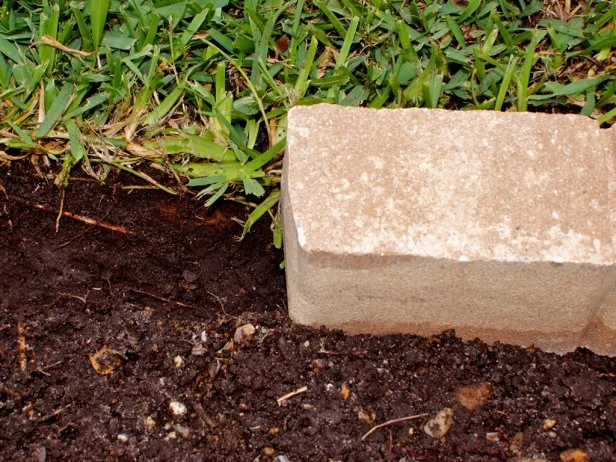
Credit: www.hgtv.com
Choosing The Right Stone Edging
Stone lawn edging adds a natural look to your garden borders. Choosing the right stone helps define your space clearly.
Pick stones that fit your garden style and size. This makes the edging both functional and attractive.
Types Of Stone Edging
There are many stone edging types you can use. Each type creates a different look and feel for your lawn.
Popular types include natural stone, cut stone, and flagstone. Some stones stack while others lay flat.
- Natural Stone:Rough and organic shapes for a rustic look.
- Cut Stone:Smooth edges and uniform shapes for a clean border.
- Flagstone:Large, flat stones good for wide edging.
- Fieldstone:Rounded stones from fields, giving a casual style.
Sizing And Shape Options
Stone edges come in many sizes and shapes. Choose sizes that fit your lawn’s scale and the look you want.
Small stones suit tight spaces. Large stones work well for wide borders and paths.
- Small Stones:Easy to handle and fit curved borders.
- Medium Stones:Balance between size and coverage.
- Large Stones:Create bold and strong edges.
- Shapes:Rounded, rectangular, or irregular shapes affect style and fit.
Selecting Stones For Your Garden Style
Match stone types with your garden style for harmony. Stones can highlight or soften your garden look.
Use rough stones in wild gardens. Smooth stones fit formal gardens better.
- Rustic Gardens:Natural and irregular stones.
- Modern Gardens:Sleek, cut stones with clean lines.
- Cottage Gardens:Mixed shapes and colors for charm.
- Formal Gardens:Uniform stones in straight lines.
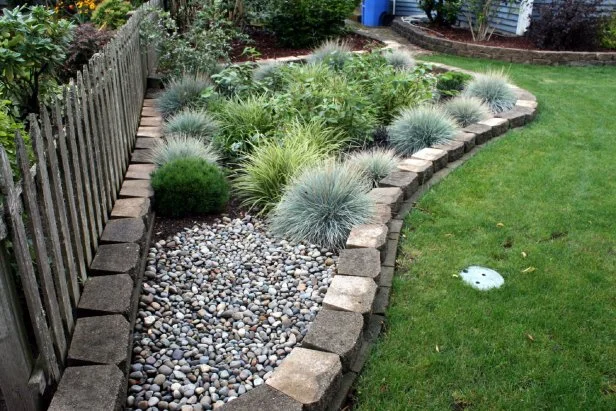
Credit: www.hgtv.com
Preparing The Lawn Border
Setting a stone lawn edging requires careful preparation. This helps ensure the edging looks neat and lasts longer.
Start by planning your border carefully. The right preparation makes installation easier and cleaner.
Marking The Edging Line
Mark the exact spot where you want the stone edging. Use a rope or garden hose to create a smooth line.
Check the line from different angles to make sure it looks even and follows the lawn’s shape.
Clearing The Area
Remove grass, weeds, and rocks from the marked line. This clears space for the stones and prevents future problems.
- Cut grass close to the soil along the line
- Dig out roots and debris
- Level the soil for a flat base
Gathering Necessary Tools
Collect the tools you will need before you start. Having everything ready saves time and effort.
| Tool | Purpose |
| Garden Hose or Rope | Mark edging line |
| Spade or Shovel | Clear and level soil |
| Gloves | Protect hands |
| Wheelbarrow | Move stones and soil |
| Rake | Smooth soil surface |
Laying The Foundation
Laying a strong foundation is key to stone lawn edging. It keeps stones in place and stops shifting.
This guide explains how to prepare the base for your stone edging. Follow these steps for best results.
Digging The Trench
Start by marking where your edging will go. Use a string or spray paint for a straight line.
Dig a trench along the marked line. Make it about 6 inches deep and 4 to 6 inches wide.
- Clear the area of grass and roots
- Keep the trench edges straight and even
- Make sure the trench follows your desired shape
Adding A Base Layer
Pour a 2 to 3 inch layer of crushed stone or gravel into the trench. This helps drainage and stability.
Spread the gravel evenly across the trench floor. Avoid big clumps or uneven spots.
- Use crushed stone for better compaction
- Avoid rounded stones that don’t lock well
- Keep the base layer consistent in thickness
Leveling And Compacting The Base
Use a flat board or level to check the base layer. It should be smooth and even all along the trench.
Compact the base by pressing it down firmly. A hand tamper or heavy object works well for this.
- Compact in small sections for best results
- Check level often to avoid slopes
- Re-add gravel if any low spots appear
:max_bytes(150000):strip_icc()/spr-easyflex-no-dig-landscape-edging-kit-laura-hard-04-b601fc0708bc4522930427eca7d4168c.jpeg)
Credit: www.thespruce.com
Installing The Stone Edging
Installing stone lawn edging creates a neat border for your garden or lawn. It helps keep soil and mulch in place while adding a natural look. Follow simple steps to place and secure the stones properly.
This guide covers how to place stones, adjust them, and fix them firmly in place.
Placing Stones In Position
Start by laying out the stones along the edge where you want the border. Arrange them close together to form a continuous line. Make sure the stones follow the shape of your lawn or garden bed.
- Clear the area of grass and debris.
- Place the largest stones at corners or curves.
- Fit smaller stones in straight sections.
- Keep stones level with the ground surface.
- Leave small gaps for natural drainage.
Adjusting For Fit And Alignment
Check the stone placement for a smooth, even line. Adjust stones by shifting or rotating them to close gaps. Use a rubber mallet to tap stones gently for a snug fit.
| Adjustment Tip | Purpose |
| Shift stones closer | Close gaps and prevent soil escape |
| Rotate uneven stones | Improve alignment and surface level |
| Tap stones with mallet | Secure fit without damage |
Securing Stones In Place
Once the stones are aligned, secure them to keep the border stable. Dig a shallow trench beneath the stones and fill it with sand or gravel for a solid base.
Follow these steps to fix the stones firmly:
- Dig a 2–3 inch trench along the stone line.
- Fill the trench with a layer of sand or gravel.
- Place each stone back on the base, pressing down firmly.
- Fill gaps between stones with soil or small gravel.
- Water the area to help settle the base.
Finishing Touches
Finishing touches make your stone lawn edging look polished. These details enhance the appearance and keep it stable.
Pay attention to filling gaps, tamping, and regular maintenance. Each step ensures durability and beauty for your garden.
Filling Gaps With Soil Or Gravel
Fill any gaps between stones with soil or gravel. This secures the stones and prevents weed growth.
Use a small shovel or trowel for precise filling. Choose materials that match your garden’s style.
- Soil blends naturally with the garden
- Gravel provides a clean, decorative look
- Fill evenly to avoid water pooling
Tamping And Stabilizing
After filling gaps, tamp the soil or gravel. This step stabilizes the stones and keeps them in place.
Use a hand tamper or the back of a shovel. Apply gentle pressure to avoid damaging the stones.
- Tamp evenly across all stones
- Check for loose stones and adjust
- Ensure a level surface for safety
Maintaining Your Stone Border
Regular maintenance keeps your stone border looking new. Check for any shifted stones or weeds growing through.
Inspect the border after heavy rain or wind. Make repairs promptly to prevent bigger issues.
- Remove weeds regularly
- Re-tamp any loose areas
- Replace damaged stones quickly
Troubleshooting Common Issues
Installing stone lawn edging can bring some challenges. Fixing problems early keeps your garden neat.
Learn how to handle uneven stones, stone shifting, and drainage problems below.
Dealing With Uneven Stones
Uneven stones make your edging look messy. Check the ground before placing stones.
If stones are uneven after installation, lift them carefully. Add or remove soil under stones.
- Use a rubber mallet to tap stones level.
- Fill gaps with sand or fine gravel.
- Check height with a level tool.
- Adjust stones until they sit evenly.
Preventing Stone Shifting
Stones can move over time from pressure or weather. Secure them to stop shifting.
| Cause | Solution |
| Loose base soil | Compact soil before placing stones |
| Heavy foot traffic | Use larger stones or add stakes |
| Frost heaving | Install stones below frost line |
| Improper edging height | Keep stones slightly above ground level |
Handling Drainage Problems
Poor drainage can cause water to pool near your edging. Fix this to protect stones.
Try these tips to improve drainage:
- Dig a shallow trench under the stones for water flow.
- Use gravel or sand base to help drainage.
- Ensure ground slopes away from edging.
- Check for clogged drains nearby.
Frequently Asked Questions
What Tools Are Needed To Install Stone Lawn Edging?
You need a shovel, garden gloves, a rubber mallet, a level, and a tape measure. These tools help you dig, place, and secure the stones correctly.
How Deep Should Stone Lawn Edging Be Installed?
Stone edging should be buried about 4 to 6 inches deep. This depth ensures stability and prevents stones from shifting over time.
Can Stone Lawn Edging Prevent Grass From Spreading?
Yes, stone edging creates a clear barrier that blocks grass roots. It helps maintain a tidy separation between lawn and garden beds.
How Do I Maintain Stone Lawn Edging?
Regularly clean debris and check for shifting stones. Reposition any stones that move and remove weeds growing between them to keep edging neat.
Conclusion
Stone lawn edging adds a clean, neat look to your garden. It keeps grass and plants in place. Installing it takes some effort but is simple to do. Follow the steps carefully for best results. Choose stones that fit your style and space.
Take your time to place each stone evenly. This small project can improve your lawn’s appearance a lot. Enjoy your tidy, beautiful garden edge every day. Give your yard a fresh, natural border that lasts.

