
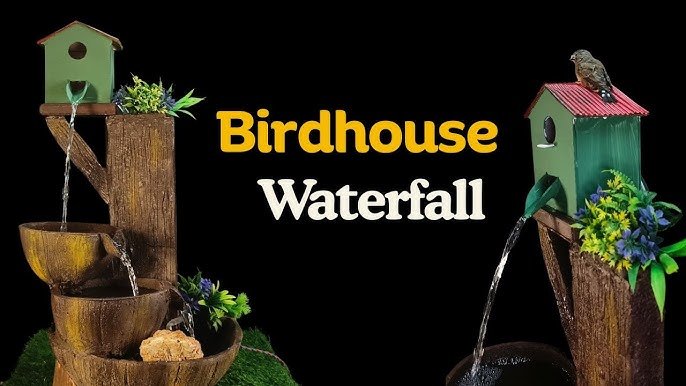
Are you looking to add a touch of charm and calm to your outdoor space? A DIY rustic fountain could be exactly what your garden or patio needs.
Imagine the soothing sound of flowing water combined with the warm, natural look of rustic materials—all made by your own hands. In this guide, you’ll discover simple steps to create a beautiful, budget-friendly fountain that stands out and invites relaxation.
Keep reading, and you’ll soon have a unique piece that reflects your style and brings peaceful energy to your home.
Materials Needed
Creating a DIY rustic fountain needs a few simple materials. Gather them before starting to avoid delays. Each item helps build a charming, functional fountain for your outdoor space. Most materials are easy to find at local stores or online.
Water Pump
A small, submersible water pump moves water through the fountain. Choose one with adjustable flow to control water speed. Look for pumps designed for outdoor use to avoid damage.
Container Or Basin
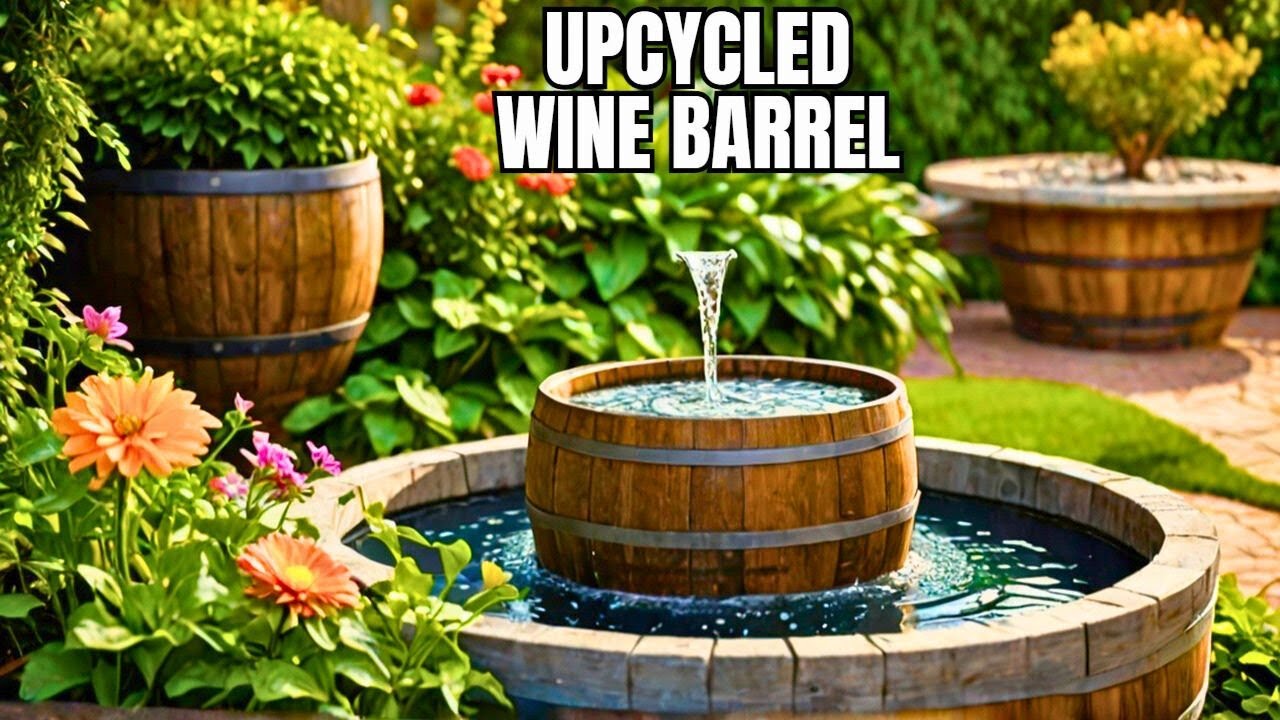
This holds the water and forms the fountain base. Use a rustic container like a wooden barrel, stone basin, or metal tub. Ensure it is waterproof and sturdy enough to hold water safely.
Tubing
Flexible tubing connects the pump to the fountain’s top. Clear or black tubing works best. Measure the length needed to reach from the pump to the fountain outlet.
Rustic Decorative Elements
Choose natural materials like stones, driftwood, or clay pots. These create the rustic look. Pick items that fit your style and fit well in the fountain design.
Waterproof Sealant
Seal gaps and joints to stop leaks. Use waterproof silicone or outdoor sealant. Apply it carefully around tubing and container edges for a tight seal.
Power Source
The pump needs electricity to run. Use a nearby outdoor outlet with a GFCI safety feature. Extension cords should be rated for outdoor use and weatherproof.
Optional: Led Lights
Add LED lights to highlight water flow at night. Solar-powered or low-voltage lights work well. Install them around or inside the fountain for a cozy glow.
Choosing The Right Location
Choosing the right location for your DIY rustic fountain is key. It affects the fountain’s look and how well it works. A good spot makes your garden or patio more peaceful and pretty. Think about space, sunlight, and nearby plants. These details help the fountain last longer and stay clean.
Consider Sunlight And Shade
Sunlight affects water quality and plant health near the fountain. Place the fountain where it gets some sun but also some shade. Too much sun can cause algae growth in the water. Partial shade keeps water fresher and cooler.
Check For Stable Ground
The fountain needs a flat, steady surface. Uneven ground can cause water to spill or the fountain to tip. Look for a solid spot with no chance of sinking or shifting. Concrete, stone, or packed soil work well.
Think About Visibility And Access
Pick a spot where you can see and enjoy the fountain easily. It should be near a walkway or seating area. Also, make sure you can reach it for cleaning and refilling water. Good access keeps your fountain looking great.
Avoid Nearby Trees And Plants
Keep the fountain away from large trees and plants that shed leaves. Falling debris can dirty the water and clog the pump. Place the fountain a few feet from trees to reduce maintenance.
Design Ideas For Rustic Fountains
Designing a rustic fountain is about blending charm with nature’s simplicity. The style is warm, inviting, and full of character. Rustic fountains bring a peaceful, timeless feel to any garden or patio space.
Choosing the right design elements can make your fountain stand out. Natural materials and old-fashioned items add unique touches. These ideas help create a fountain that feels both cozy and authentic.
Using Natural Elements
Natural materials fit perfectly in rustic fountain designs. Stones, wood, and plants create a calm, earthy look. Use river rocks or stacked stones to build the fountain base. Driftwood or reclaimed wood makes a beautiful frame or spout.
- Moss or small ferns add soft greenery around the fountain.
- Clay pots or terracotta pieces blend well with rough textures.
- Water flowing over natural stones adds soothing sounds.
These elements make the fountain look like part of the landscape. Nature’s colors and shapes bring warmth without needing bright colors.
Incorporating Vintage Items
Old objects give rustic fountains a story and history. Use vintage items like old metal buckets, watering cans, or wash tubs. These can hold water or act as unique fountain basins. Rusted tools or antique pipes add interesting details.
- Repurpose an old birdbath or wheelbarrow as a fountain base.
- Use vintage ceramic pitchers as water spouts.
- Old wooden crates or barrels create layered fountain designs.
These items bring a nostalgic feel. They connect the fountain to past times and simpler living. Vintage pieces add character without needing complex work.

Credit: www.2thesunnyside.com
Building The Base
Building a sturdy and level base is crucial for your DIY rustic fountain. This foundation supports the entire structure, ensuring stability and proper water flow. If the base isn’t solid, you might face leaks, tilting, or even damage down the line.
Preparing The Ground
Start by clearing the area where your fountain will sit. Remove grass, rocks, and debris to create a flat surface. I found that compacting the soil with a hand tamper made a huge difference—it prevents sinking over time.
Next, lay down a layer of sand or gravel about 2 to 3 inches thick. This helps with drainage and keeps moisture away from the base materials. Have you checked if your chosen spot has a slight slope? Water should flow away from your home, not toward it.
Assembling The Structure
Once the ground is ready, it’s time to build the base frame. Use sturdy wood or stone depending on your rustic style. I used reclaimed wood because it added character and was surprisingly durable.
Make sure the frame is square and level—this affects how your fountain flows. Use a carpenter’s level and measure twice before fixing anything. Secure the pieces with outdoor screws or nails so they resist weather damage.
- Double-check the corners for right angles.
- Reinforce joints with brackets if needed.
- Seal wood surfaces with waterproof sealant to extend lifespan.
Building the base carefully sets you up for success. Have you thought about how the base design might affect your fountain’s overall look and feel? Sometimes, a simple frame can become a striking feature on its own.
Installing The Water Pump
Installing the water pump is a crucial part of building your DIY rustic fountain. The pump controls the water flow, creating that soothing sound and movement you want. Getting this step right ensures your fountain runs smoothly and lasts longer.
Selecting The Pump
Choosing the right pump depends on the size of your fountain and the height you want the water to reach. A pump that’s too weak won’t create the desired water flow, while an overly powerful one can cause splashing and waste energy.
Look for pumps labeled with their flow rate (usually in gallons per hour, GPH). For most small to medium rustic fountains, a pump between 100-400 GPH works well. If your fountain has multiple tiers or a higher water throw, go for a stronger pump within that range.
Consider a submersible pump for easy installation and quiet operation. Some pumps also come with adjustable flow controls—these allow you to fine-tune the water pressure without swapping out equipment.
Proper Pump Placement
Where you place the pump affects both function and appearance. The pump should be fully submerged in water to avoid damage but hidden to maintain your fountain’s rustic charm.
Position the pump near the base of the fountain, close to the water reservoir. This reduces the length of tubing needed, which helps maintain water pressure and minimizes leaks.
Make sure the pump sits on a flat, stable surface inside the fountain basin. Use a small platform or bricks if needed to keep it steady. Also, check that the intake is clear of debris to prevent clogging.
Have you thought about how easy it will be to access the pump for maintenance? Leave enough room to reach the pump without dismantling your entire fountain.

Credit: www.youtube.com
Creating The Water Flow
Creating the water flow is key to making your DIY rustic fountain come alive. Water movement brings soothing sounds and a peaceful vibe. It also keeps the water fresh and clean. Setting up the water flow correctly ensures your fountain works smoothly and looks beautiful.
Ensuring Continuous Circulation
Continuous water circulation stops the water from becoming stale. Use a small pump designed for fountains. Place the pump in the bottom basin, fully submerged. Connect the pump to a power source with a waterproof cable. Check the pump regularly to keep it clean and free of debris.
Make sure the water flows back into the basin without splashing out. Use tubing or channels to guide the water smoothly. Test the flow to confirm there are no blockages or leaks.
Adjusting Water Pressure
Water pressure controls how fast the water moves through the fountain. Too much pressure causes splashing and noise. Too little pressure makes the water trickle quietly or stop.
Adjust the pump’s flow rate to find the right balance. Many pumps have a dial or switch for easy control. Observe the water flow and fine-tune the pressure until it looks natural and calming.
Keep the pressure steady for the best fountain experience. Regularly check the pump settings and water level to maintain smooth flow.
Adding Decorative Features
Adding decorative features gives your DIY rustic fountain a unique charm. It enhances the overall look and creates a calming atmosphere. Small touches can make the fountain blend beautifully with your garden or patio. Use simple ideas to bring life and warmth to your project.
Incorporating Plants
Plants add natural beauty and freshness around the fountain. Choose plants that thrive near water and in your climate. Use a mix of textures and colors for visual interest. Place small pots or plant directly in the soil near the base. Consider these plant types:
- Ferns for lush green leaves
- Succulents for low maintenance and unique shapes
- Water-loving plants like ivy or moss
- Flowering plants for seasonal color
Arrange plants at different heights to create depth. Keep the area tidy to prevent overgrowth. Plants soften the hard lines of stone or wood.
Lighting Options
Lighting adds magic and extends fountain use into the evening. Soft lights highlight water movement and rustic textures. Choose energy-efficient options to save power. Here are some lighting ideas:
- Solar-powered LED spotlights around the base
- Submersible LED lights inside the water basin
- String lights draped nearby for a cozy glow
- Lanterns placed on surrounding surfaces
Experiment with warm white bulbs for a natural feel. Ensure lights are weatherproof and safe near water. Proper lighting creates a relaxing mood and draws attention to your fountain.
Maintenance Tips
Maintaining your DIY rustic fountain keeps it beautiful and running smoothly. Proper care prevents damage and extends its life. Simple habits can save you time and money later. Follow these tips to enjoy a lovely fountain year-round.
Regular Cleaning
Clean your fountain at least once a month. Remove leaves, dirt, and algae from the water and surfaces. Use a soft brush or cloth to scrub gently. Avoid harsh chemicals; mild soap works best. Rinse well to keep water clear and fresh. Check the pump for debris and clean it regularly. This helps maintain good water flow and prevents clogs.
Winter Care
Protect your fountain during cold months to avoid cracks. Drain all water before the first freeze. Store the pump indoors to prevent damage. Cover the fountain with a waterproof tarp or moving blanket. This stops ice buildup and keeps it safe. If you live in a mild climate, running the fountain on low can prevent freezing. Always inspect for any damage before restarting in spring.
Credit: www.youtube.com
Frequently Asked Questions
What Materials Are Needed For A Diy Rustic Fountain?
You need wood, a water pump, waterproof sealant, tubing, and a basin. Optional items include stones and paint for decoration. Choose weather-resistant materials for outdoor durability.
How Do I Waterproof A Rustic Wooden Fountain?
Apply a high-quality waterproof sealant to all wooden surfaces. Ensure even coverage and allow it to dry fully. This prevents water damage and extends the fountain’s lifespan.
Can I Build A Rustic Fountain Without Plumbing Skills?
Yes, a rustic fountain uses a recirculating pump system. It requires no plumbing and is easy to install. Simply connect the pump to a power source and water reservoir.
How Often Should I Maintain My Diy Rustic Fountain?
Clean the pump and basin monthly to prevent clogs and algae buildup. Check the water level regularly and refill as needed. Proper maintenance ensures smooth operation and longevity.
Conclusion
Creating a DIY rustic fountain adds charm to any outdoor space. It brings a peaceful sound and a natural look. You can build it step by step with simple tools and materials. This project saves money and allows personal creativity.
Enjoy the calming water flow and the cozy feel it creates. Start your rustic fountain today and watch your garden come alive. Small efforts make big differences in home decor. Let nature’s beauty shine right in your backyard.

