
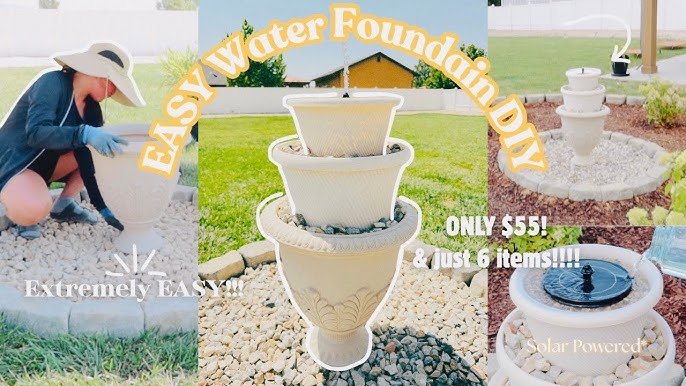
Imagine adding a beautiful, soothing fountain to your garden without increasing your electricity bill. Sounds great, right?
Setting up a solar powered fountain lets you enjoy the calming sound of flowing water while saving energy. If you’ve ever thought about creating a peaceful outdoor space that’s eco-friendly and easy to maintain, this guide is for you. Keep reading, and you’ll discover simple steps to bring your solar fountain to life quickly and effortlessly.
Your garden—and your wallet—will thank you.
Choosing The Right Solar Fountain Kit
Choosing the right solar fountain kit is key to creating a beautiful and efficient water feature. The perfect kit fits your space, style, and water needs. It also ensures the fountain runs smoothly using solar power. Understanding the options helps you pick the best one for your garden or patio.
Focus on the type, size, and materials to get a fountain that lasts and looks great. These factors affect how well the fountain works and how easy it is to maintain. Keep your outdoor area lively and fresh with the ideal solar fountain kit.
Understanding Different Types
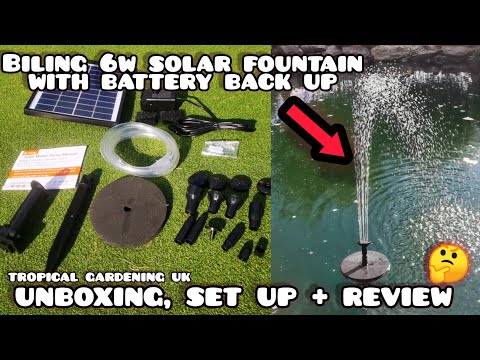
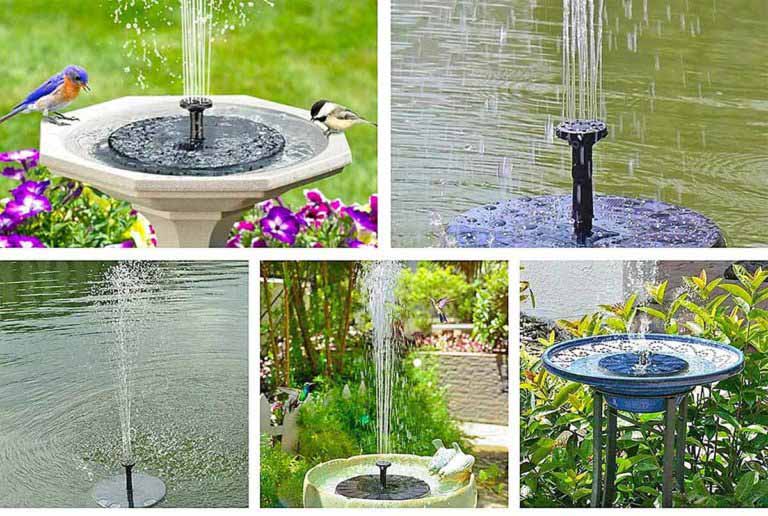
Solar fountain kits come in various types. Some use direct solar power, running only in sunlight. Others have a battery to store energy for night use. Choose between floating fountains for ponds and pump kits for birdbaths or small pools.
Each type suits different water setups. Floating fountains add movement to ponds, while pump kits fit smaller containers. Consider your water source and how you want the fountain to operate.
Selecting The Appropriate Size
Pick a size that matches your water feature. Small kits work well for birdbaths and tabletop fountains. Larger kits create dramatic effects in bigger ponds or pools. Size affects the water flow and the fountain’s reach.
Check the fountain’s pump capacity, measured in gallons per hour (GPH). Higher GPH means stronger water flow. Match this to your fountain’s dimensions for best results. Avoid kits too small or too big for your space.
Considering Material And Design
Materials affect durability and appearance. Plastic kits are lightweight and affordable but less durable. Metal or ceramic kits offer better strength and style. Choose materials that withstand outdoor weather.
Design matters for aesthetics and function. Some fountains have decorative features like lights or statues. Others focus on simple, clean water flow. Pick a design that fits your garden’s theme and your personal taste.
Credit: m.youtube.com
Selecting The Perfect Location
Choosing the right spot for your solar powered fountain is key. The location affects how well the fountain works and how long it lasts. Picking a good place means your fountain gets enough sun, fits well in your space, and stays easy to care for. Let’s explore the main things to check before setting up your fountain.
Assessing Sunlight Exposure
Solar fountains need plenty of sunlight to run smoothly. Find a spot with direct sun for most of the day. Avoid places shaded by trees, buildings, or walls. Morning and afternoon sun is important. Keep in mind, less sun means weaker fountain flow or stops.
Evaluating Space And Surroundings
Pick an area that fits the fountain size and style. Think about the ground surface—flat and stable is best. Watch for plants or decorations that might block the fountain or solar panel. Keep enough room for water splashes and fountain movement. Check how the fountain looks in the space to keep your garden or yard pretty.
Ensuring Accessibility For Maintenance
Easy access helps keep the fountain clean and working well. Choose a spot you can reach without trouble. Check if the fountain can be lifted or moved for cleaning. Make sure you can easily reach the solar panel to adjust or clean it. Regular care keeps the fountain running longer and looking great.
Preparing The Ground Or Surface
Preparing the ground or surface is a crucial step when setting up your solar powered fountain. It ensures that your fountain remains stable and functions efficiently. Taking the time to properly prepare the area prevents future issues like tilting or water spillage.
Clearing And Leveling The Area
Start by removing any debris, rocks, or plants where you plan to place your fountain. A clean surface makes installation easier and keeps the fountain steady.
Next, check if the ground is flat. Uneven surfaces can cause the fountain to wobble or water to spill out. Use a simple spirit level or even a small board to test the flatness.
If the ground isn’t level, add or remove soil to balance it out. You might find it helpful to compact the soil gently to avoid future sinking. Have you noticed how even slight tilts can affect the flow of water in your fountain?
Installing A Stable Base
A stable base supports the fountain and protects it from shifting. You can use materials like paving stones, bricks, or a concrete slab depending on your setup.
Place your chosen base material on the leveled ground. Arrange bricks or stones tightly to eliminate gaps that could cause instability.
For added security, consider laying a layer of sand or fine gravel beneath the base. This helps with drainage and keeps the base from shifting over time.
Remember, a strong foundation means your solar fountain will stay beautiful and functional for years. What kind of base do you think will suit your garden’s style best?
Installing The Solar Panel
Installing the solar panel is a key part of setting up your solar powered fountain. It captures sunlight and turns it into energy to power the pump. Proper installation ensures the panel collects enough sunlight for smooth fountain operation. Careful placement and secure mounting help maintain performance over time.
Positioning For Maximum Sunlight
Place the solar panel where sunlight hits directly. Avoid shadows from trees, buildings, or other objects. South-facing spots often get the most sun during the day. Tilt the panel at an angle matching your location’s latitude for best results. Check the spot at different times to confirm consistent sunlight.
Securing The Panel In Place
Use brackets, stakes, or stands to fix the panel securely. Ensure it won’t move or fall during wind or rain. Tighten all screws and fasteners firmly. If placing on the ground, use ground stakes to prevent shifting. For rooftops, use appropriate mounts designed for solar panels.
Assembling The Fountain Components
Assembling the fountain components is where your solar-powered fountain starts to take shape. It’s crucial to handle each piece carefully to ensure smooth operation. Paying attention to the details here can save you a lot of frustration later on.
Connecting The Pump And Tubing
Begin by attaching the tubing to the pump’s outlet securely. The tubing must fit snugly to prevent leaks or loss of water pressure. If the tubing feels loose, try using a small hose clamp for a tighter connection.
Make sure the tubing length is enough to reach your fountain head without kinking or bending sharply. Sharp bends can reduce water flow, affecting your fountain’s performance. Test the connection by gently pulling on the tubing to confirm it’s firmly attached.
Attaching Fountain Heads
Next, select the fountain head that suits your desired water pattern and snap or screw it onto the tubing’s open end. Different heads create various effects, so choose one that fits your style and the size of your water feature.
Check that the fountain head is secure and aligned straight. Misalignment can cause water to spray unevenly or waste solar power. Have a bucket of water ready to test how the water flows once everything is connected—adjust as needed until you get the perfect spray.
Credit: www.hygger-online.com
Filling And Testing The Fountain
Filling and testing your solar powered fountain is a crucial part of the setup process. This step ensures your fountain runs smoothly and efficiently under the sun. Careful attention here can save you time and frustration later on.
Adding Water To The Reservoir
Start by pouring clean, fresh water into the fountain’s reservoir. Avoid using hard water, as minerals can clog the pump over time. Fill it slowly to prevent spilling and check for any leaks around the container.
Keep the water level above the pump intake to avoid dry running, which can damage the motor. If your fountain has a filter, rinse it before placing it back to maintain water clarity. You might want to use distilled water if local tap water is very hard or contains impurities.
Checking For Proper Water Flow
Once filled, place your fountain in direct sunlight and switch on the solar panel. Observe how the water flows from the spout—steady and consistent flow means your setup is correct. If the flow is weak or irregular, check for blockages in the pump or tubing.
Sometimes air bubbles can get trapped inside the system, so gently tapping the pump or tilting the fountain can help release them. Consider if the solar panel is angled correctly; even a slight adjustment can improve performance. Have you noticed how small changes in placement impact your fountain’s flow? Testing different spots might reveal the best position for maximum sunlight.
Maintenance Tips For Longevity
Keeping your solar powered fountain running smoothly requires regular care. Maintenance isn’t just about fixing problems; it’s about preventing them and extending the life of your fountain. With a little attention, you can enjoy the peaceful sound of flowing water for years.
Cleaning And Debris Removal
Leaves, dirt, and algae can quickly clog your fountain and reduce its efficiency. Take a few minutes each week to remove visible debris from the water and the pump area. If you notice algae buildup, gently scrub the surfaces with a soft brush and mild soap to keep everything clean.
Make sure to check the solar panel as well. Dust and dirt can block sunlight, lowering the power output. Wiping the panel with a damp cloth regularly ensures your fountain gets the energy it needs to run smoothly.
Winterizing The Fountain
Cold weather can damage your fountain if water freezes inside the pump or tubing. Before the first freeze, drain all the water and disconnect the solar panel. Store the pump and other removable parts indoors to protect them from ice damage.
If removing the fountain isn’t an option, consider using a fountain heater or insulating the pump area. This helps prevent freezing and keeps your fountain ready to flow as soon as spring arrives. Have you planned how you’ll protect your fountain this winter?

Credit: www.walmart.ca
Frequently Asked Questions
What Materials Are Needed For A Solar Powered Fountain?
You need a solar pump, fountain basin, solar panel, tubing, and connectors. These materials are essential for setup. Quality parts ensure efficient performance and durability.
How Do Solar Panels Power A Fountain?
Solar panels convert sunlight into electricity that runs the pump. This powers the fountain without external electricity. It’s eco-friendly and cost-effective.
Can Solar Fountains Work In Cloudy Weather?
Solar fountains may slow or stop in low sunlight. Most have batteries for short cloudy periods. Optimal sunlight ensures continuous operation.
How To Maintain A Solar Powered Fountain?
Clean the pump and solar panel regularly to prevent clogs. Remove debris and check connections. Proper maintenance extends the fountain’s lifespan and efficiency.
Conclusion
Setting up a solar powered fountain is simple and rewarding. It saves energy and adds beauty to your space. Choose the right pump and solar panel for best results. Place the fountain where sunlight is strong and steady. Regular cleaning keeps the fountain working well.
Enjoy the relaxing sound and eco-friendly design every day. Solar fountains bring nature and peace to any garden or patio. Give it a try and see the benefits yourself.

