
Are you ready to enjoy delicious grilled meals but don’t know how to put your propane grill together? Assembling a propane grill might seem tricky at first, but with the right steps, you can have it ready in no time.
Imagine firing up your grill smoothly and impressing your friends with perfectly cooked food. This guide will walk you through every step clearly and simply, so you won’t miss a thing. Keep reading, and you’ll be confident in setting up your propane grill quickly and safely.
Your next BBQ is about to get a whole lot better!
Tools Needed
Gathering the right tools makes assembling your propane grill easier. Having everything ready saves time and avoids frustration.
Most propane grills come with some tools, but extra ones may help. The tools listed below are common and simple to find.
Wrench Set
A wrench set helps tighten bolts and nuts securely. Adjustable wrenches are useful for different sizes.
Screwdrivers
Both flathead and Phillips screwdrivers are needed. They tighten screws on the grill’s body and parts.
Pliers
Pliers grip small parts firmly. Use them for bending or holding pieces during assembly.
Socket Set
Socket sets fit bolts better than wrenches. This tool speeds up tightening bolts on the grill frame.
Work Gloves
Gloves protect your hands from sharp edges and heat. They keep your grip steady while handling parts.
Instruction Manual
Keep the grill’s instruction manual close. It guides you through the assembly steps clearly.
- Wrench set
- Flathead and Phillips screwdrivers
- Pliers
- Socket set
- Work gloves
- Instruction manual
Unboxing And Organizing Parts
Unboxing and organizing the parts is the first step in assembling your propane grill. It sets the stage for a smooth build. Taking time here saves frustration later. Carefully open the box and check each item. Ensure all parts are present and undamaged. Organize components by type and size on a clean surface. This approach helps you find parts quickly during assembly.
Prepare Your Workspace
Choose a flat and spacious area for assembly. Clear the space of clutter and dirt. Good lighting helps you see small parts clearly. Lay down a protective sheet to avoid scratches. Keep tools like screwdrivers and wrenches nearby. This setup speeds up the process.
Check The Parts List
Locate the parts list in the instruction manual. Match each item in the box with the list. Note any missing or damaged parts before starting. This prevents delays and extra trips to the store. Keep the manual handy for reference.
Sort And Group Components
Group similar parts together on your workspace. Separate screws, bolts, and nuts by size and type. Place small parts in containers or trays to avoid loss. Arrange larger parts like grates and panels nearby. This method keeps everything organized and accessible.
Inspect Each Part
Look for scratches, dents, or defects on each piece. Check that moving parts operate smoothly. Verify that connectors and hoses are intact. Damaged parts can affect safety and performance. Report any issues before proceeding.
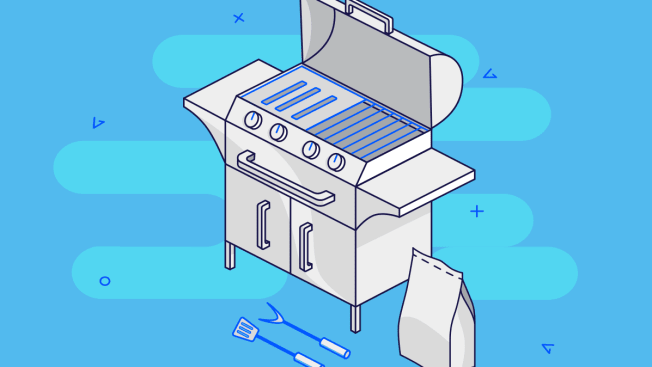
Assembling The Grill Body
Assembling the grill body is where your propane grill starts to take shape. This phase sets the foundation for a sturdy and functional grill. Paying close attention here ensures your grill will be safe and enjoyable to use.
Attaching The Legs
Start by locating the leg pieces and the screws or bolts included in your kit. Align each leg with the pre-drilled holes on the grill body. Using a wrench or screwdriver, secure the legs firmly but avoid overtightening to prevent damage.
Make sure the legs stand straight and level; uneven legs can cause instability when cooking. I once rushed this step and ended up with a wobbly grill that made flipping burgers frustrating. Checking stability before moving on saves you from that hassle.
Installing The Side Shelves
Side shelves add convenience by giving you extra space for utensils and plates. Identify the mounting points on the grill body and the brackets on the shelves. Attach each shelf with the provided screws, ensuring they are tightly fixed and level.
Think about how you will use these shelves—will you place heavy items or just light tools? This can influence how tightly you secure them. I found that slightly looser shelves can shake under heavy weight, so tighten them well for a solid grip.

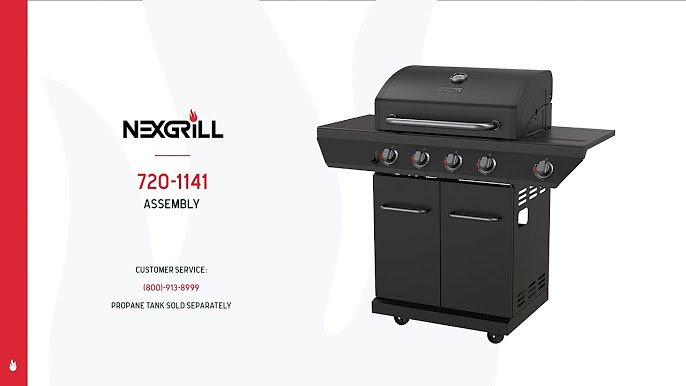
Credit: www.youtube.com
Connecting The Burner System
Connecting the burner system is crucial for your propane grill’s performance. It ensures even heat distribution and efficient cooking. Proper assembly of this system guarantees safety and enhances grilling experience.
Mounting The Burners
Start by locating the burner tubes. Align them with the designated holes in the grill’s firebox. Insert each burner tube carefully, ensuring they fit snugly. Use screws or clips provided to secure them in place. Double-check alignment for smooth gas flow. This step ensures efficient heat distribution.
Securing The Control Valves
Next, attach the control valves to the burner tubes. Align the valves with the openings on the front panel. Push them into place until they click securely. Use screws to tighten, if necessary. Ensure each valve turns smoothly. Properly secured valves control the flame and heat level. Test each knob for proper operation before proceeding.
Installing The Cooking Grates
Installing the cooking grates on your propane grill is a simple yet crucial step to ensure even cooking and proper heat distribution. These grates hold your food directly over the flame, so placing them correctly affects your grilling results. Taking a moment to position them carefully can make a big difference in your next barbecue.
Checking The Fit And Orientation
Before placing the grates, inspect them closely. Most cooking grates are designed to fit snugly inside the grill body, with notches or edges that line up with the grill’s frame.
Try placing the grates gently inside without forcing them. If they don’t sit flat or seem loose, flip them around or check for any packaging materials that might still be attached. A well-fitted grate won’t wobble when you press down on it.
Cleaning The Grates Before Use
Even if your grates look clean, wipe them down with a damp cloth or paper towel to remove any dust or residue from manufacturing. Some people prefer to season their grates by applying a thin coat of cooking oil before the first use; this helps prevent food from sticking.
Have you ever tried grilling without cleaning the grates first? It often leads to food sticking and uneven cooking. Taking this small step saves frustration later.
Placing The Grates Safely And Securely
Once you’re sure of the fit and cleanliness, lower the grates into position carefully. Avoid dropping them, as this can damage the grates or the grill. Align them so they rest firmly and don’t shift when you move the grill lid.
If your grill has multiple grates, place them one at a time, ensuring each fits tightly against the adjacent piece. This setup creates a stable cooking surface that supports heavier pots or pans without tipping.
Attaching The Propane Tank
Attaching the propane tank is a crucial step in assembling your grill. This connection powers your cooking and must be done carefully to ensure safety and proper operation. Taking your time here can prevent leaks and give you peace of mind every time you fire up the grill.
Connecting The Hose
Start by placing the propane tank upright on a flat surface near your grill. Check the hose and regulator for any visible damage before connecting.
Align the hose connector with the propane tank valve. Turn the connector clockwise by hand until it’s snug—avoid using tools as overtightening can damage the fitting.
Feel the difference when the connection is secure but not forced. Have you ever tried rushing this part only to discover a loose connection later? Taking your time here saves headaches.
Checking For Leaks
After connecting the hose, it’s critical to check for leaks. Mix a solution of equal parts water and dish soap in a spray bottle or bowl.
Spray or brush the solution on the connection points, including the hose and tank valve. Turn on the propane tank valve slowly.
If you see bubbles forming, that means gas is escaping—never ignore this sign. Tighten the connection slightly and retest. If bubbles persist, do not use the grill until a professional inspects it.
Performing The First Test
Performing the first test on your newly assembled propane grill is crucial to ensure safety and functionality. This step helps you confirm that all connections are secure and the grill operates smoothly. Taking your time here can prevent accidents and save frustration during your first cookout.
Igniting The Grill
Before lighting, double-check that the propane tank valve is open slowly to avoid sudden gas bursts. Stand back and use the grill’s ignition button or a long lighter to ignite the burners. If the grill doesn’t light immediately, turn off the gas, wait a few minutes to let any gas disperse, then try again.
Did you know that some grills have multiple ignition points? Testing each burner individually can help spot any issues early. Always keep a fire extinguisher nearby—better safe than sorry.
Adjusting Flame Levels
Once the grill is lit, observe the flame carefully. It should be steady and blue with slight yellow tips. High flames may indicate too much gas flow, while low or uneven flames suggest blockages or leaks.
Adjust the flame by turning the burner knobs slowly to find the ideal heat for your cooking style. Experiment with different flame levels to understand how your grill responds—this knowledge will improve your grilling skills over time.
Have you noticed how a small adjustment can change cooking times drastically? Paying close attention here helps you avoid undercooked or burnt food later on.
Safety Tips For Operation
Operating your propane grill safely is key to enjoying great meals without accidents. Understanding the right safety practices helps you protect yourself and those around you. Here are essential tips to keep your grilling experience safe and worry-free.
Check For Gas Leaks Before Use
Always inspect your propane connections before lighting the grill. Mix soap and water, then apply it to the hose and fittings. If you see bubbles forming, it means there’s a leak that needs fixing immediately.
Have you ever smelled gas but ignored it, thinking it was nothing? That small risk can lead to serious harm. Don’t skip this simple test every time you set up your grill.
Keep The Grill In A Well-ventilated Area
Grilling indoors or in enclosed spaces can trap dangerous gases. Always place your grill outside, away from walls, railings, and overhangs. Fresh air helps prevent carbon monoxide buildup and reduces fire risk.
Imagine how quickly a small flame could spread inside a tight space. Can your grilling spot handle an unexpected flare-up safely?
Use Proper Tools And Wear Protective Gear
Long-handled utensils keep you at a safe distance from the heat. Heat-resistant gloves protect your hands when adjusting vents or handling hot components. Avoid loose clothing that might catch fire.
Think about the last time you grabbed something hot without gloves—did you regret it? Taking these precautions saves you from painful burns.
Turn Off The Gas After Grilling
Always shut off the propane tank valve before disconnecting or storing the grill. This prevents gas leaks and accidental ignition. Double-check that all knobs on the grill are in the off position.
Leaving the gas on is an easy mistake but with serious consequences. Can you commit to this simple habit every time?
Keep A Fire Extinguisher Nearby
Grills can flare up unexpectedly, so have a fire extinguisher rated for grease fires close at hand. Know how to use it and never rely on water to put out grease flames. Safety equipment is your best defense against accidents.
Have you ever faced a small fire and felt unprepared? Being ready can make all the difference.
Maintenance And Cleaning
Regular cleaning keeps your propane grill working well and safe to use. Remove grease and food bits after each cook. Tighten bolts and check parts during maintenance to ensure proper assembly.
Maintaining and cleaning your propane grill is not just about extending its lifespan; it’s about ensuring your grilling experience remains top-notch. Regular maintenance can prevent unexpected flare-ups and ensure that your food tastes just right. Plus, a clean grill is a sign of a seasoned griller who knows their craft.Inspecting The Grill Grates
Start by giving the grill grates a thorough inspection. Look for any signs of rust or wear and tear. A quick scrub with a wire brush can work wonders, but if they’re beyond repair, consider replacing them.Checking The Burner Tubes
Burner tubes are the heart of your grill. Blockages here can lead to uneven cooking. Use a small brush to clean the burner tubes, ensuring no debris is obstructing the gas flow.Cleaning The Drip Tray
Don’t forget the drip tray! Grease buildup here can lead to flare-ups. Remove the tray and wash it with warm soapy water. Dry it thoroughly before placing it back.Exterior Cleaning
The outside of your grill deserves some love too. Use a gentle cleaner suitable for your grill’s material. Whether it’s stainless steel or another finish, keep it shining to impress your guests.Checking For Gas Leaks
Safety first! Regularly check for gas leaks. Mix a solution of soap and water and apply it to the gas connections. If bubbles form, tighten the connections and test again.Seasoning The Grates
After cleaning, consider seasoning the grates. Rub a light coat of oil on them before the next use. This prevents rust and keeps food from sticking.Storing The Grill Properly
If you’re not using your grill for an extended period, store it properly. Use a grill cover to protect it from the elements. Ensure the propane tank is disconnected and stored safely. Remember, a well-maintained grill is like a trusted companion, always ready for the next barbecue. How do you ensure your grill is always in top shape? Share your tips in the comments below!
Credit: www.youtube.com
Credit: www.consumerreports.org
Frequently Asked Questions
How Long Does It Take To Assemble A Propane Grill?
Assembling a propane grill typically takes 1 to 2 hours. It depends on your experience and the grill model. Carefully follow the instructions to avoid mistakes and ensure safety. Having all tools ready speeds up the process.
What Tools Are Needed To Assemble A Propane Grill?
You usually need a screwdriver, wrench, and pliers to assemble a propane grill. Some models may require Allen keys or adjustable wrenches. Check your grill’s manual for specific tool requirements before starting assembly.
How Do I Safely Connect The Propane Tank?
To safely connect the propane tank, ensure the grill valve is off. Attach the regulator to the tank’s valve by turning it clockwise. Check for leaks using soapy water; bubbles indicate a leak. Always follow safety guidelines in the manual.
Can I Assemble A Propane Grill Without Professional Help?
Yes, most propane grills come with clear instructions for DIY assembly. Take your time, follow steps carefully, and use proper tools. If unsure, watch tutorial videos or ask for assistance to avoid errors.
Conclusion
Assembling your propane grill is easier than it seems. Follow each step with care and patience. Take time to check all parts before starting. Use the right tools for safe assembly. Double-check connections to avoid gas leaks. Keep the manual handy for quick guidance.
Once assembled, clean the grill before first use. Regular maintenance keeps your grill working well. Enjoy cooking outdoors with your new grill. Simple steps lead to great grilling moments. Ready to fire up and enjoy?
