
Cooking meat to the perfect temperature can be tricky. You want it juicy, safe, and delicious every time.
That’s where a digital thermometer becomes your best kitchen tool. If you’ve ever wondered how to use a digital thermometer for meat the right way, you’re in the right place. This simple device can change your cooking game, helping you avoid undercooked or overdone meals.
Keep reading, and you’ll learn easy steps to get the perfect cook every time, impress your family, and feel confident in the kitchen.
Credit: canadabeef.ca
Choosing The Right Thermometer
Choosing the right digital thermometer is key to cooking meat safely and perfectly. A good thermometer ensures meat is cooked to the correct temperature. This helps avoid undercooking or overcooking. It also protects against foodborne illnesses. Selecting the best type and features simplifies the cooking process. Budget plays a role too, balancing cost and quality.
Types Of Digital Thermometers
- Instant-read thermometers:Provide quick temperature readings in seconds. Ideal for checking meat during cooking.
- Probe thermometers:Inserted into meat and stay during cooking. Good for slow roasts and grills.
- Infrared thermometers:Measure surface temperature without contact. Useful for quick checks but less accurate inside meat.
- Wireless thermometers:Connect to smartphones or devices. Allow remote monitoring of meat temperature.
Features To Look For
- Fast and accurate temperature readings
- Easy-to-read digital display
- Water-resistant or waterproof design
- Auto shut-off to save battery
- Wide temperature range suitable for various meats
- Backlight for use in low light
- Easy-to-clean probe
Budget Considerations
Thermometers come in a range of prices. Basic instant-read models are affordable and reliable. Higher-end models offer extra features. Wireless connectivity and longer probes add to cost. Choose a thermometer that fits your cooking style and budget. Investing in quality ensures accurate and safe cooking results.
Preparing For Accurate Readings
Preparing for accurate readings is essential before using a digital thermometer for meat. It ensures the temperature you get truly reflects the meat’s doneness. Taking time to prepare helps avoid mistakes and keeps food safe to eat.
Calibrating Your Thermometer
Calibrating the thermometer makes sure it shows the correct temperature. Start by placing the probe in ice water. The reading should be 32°F (0°C). If not, adjust the thermometer according to the manual. Regular calibration keeps your readings reliable.
Cleaning Before Use
Clean the thermometer probe before each use. Use warm water and soap or an alcohol wipe. This removes bacteria and prevents cross-contamination. Dry the probe with a clean cloth to avoid water affecting the reading.
Proper Placement Techniques
Insert the probe into the thickest part of the meat. Avoid touching bone or fat, which can give false readings. Make sure the probe goes deep enough to reach the center. Hold the thermometer steady until the temperature stops changing.
Measuring Meat Temperature
Measuring meat temperature is the key to cooking your meat perfectly every time. It ensures safety and helps you achieve the right doneness without guesswork. Using a digital thermometer correctly makes this process simple and precise.
Inserting The Probe Correctly
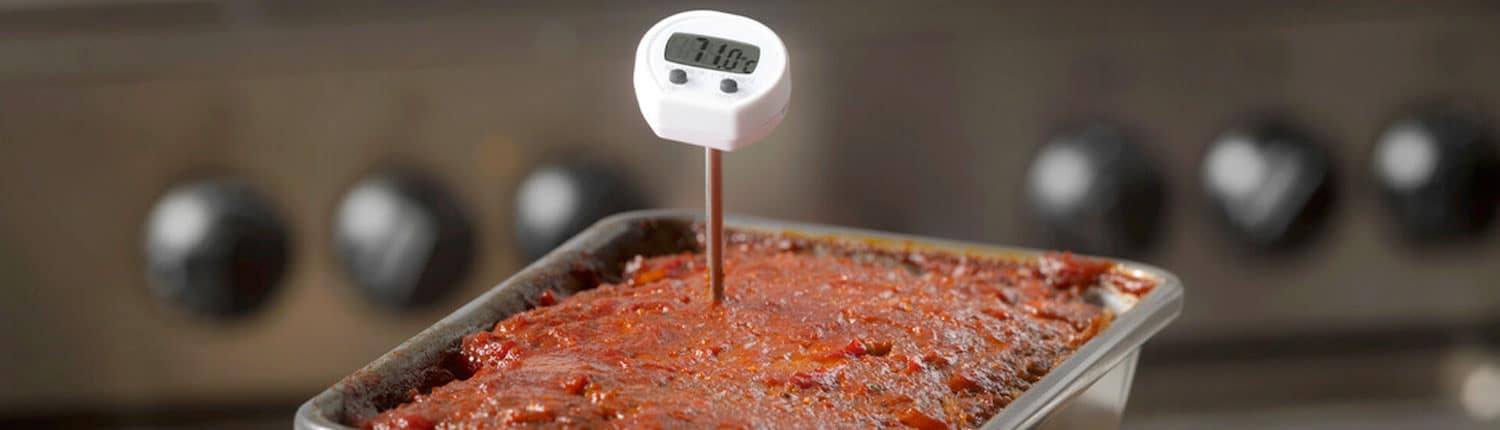
Insert the probe into the thickest part of the meat, avoiding bones and fat. Bones can give a false reading because they heat up faster, while fat takes longer to cook. Make sure the probe goes deep enough—at least 2 inches—to get an accurate temperature from the center.
Think about the last time you checked your roast’s temperature only to find it undercooked. This usually happens because the probe wasn’t placed correctly. Positioning matters more than you might realize.
Avoiding Common Mistakes
Don’t leave the thermometer in the oven unless it’s designed for that use; many digital thermometers are meant for quick checks only. Also, avoid touching the thermometer to the pan or grill surface, as this will skew the reading.
Always clean your probe before and after use. Cross-contamination can ruin your meal and health. Have you ever tasted meat that was unevenly cooked? Sometimes it’s due to inaccurate temperature readings caused by these simple errors.
Checking Multiple Spots
Meat doesn’t cook evenly, especially large cuts like turkey or brisket. Check the temperature in several places to ensure it’s cooked throughout.
- Check near the thickest part.
- Test closer to the thinner edges.
- Don’t forget about the center, which often takes longer to reach the right temperature.
Doing this helps you avoid overcooking some parts while undercooking others. Are you confident that your last roast was evenly cooked? Multiple checks can give you that peace of mind.

Credit: www.goodhousekeeping.com
Interpreting Temperature Readings
Reading the temperature on a digital meat thermometer is simple but important. It tells if the meat is safe to eat and how juicy it will be. Knowing what the numbers mean helps cook meat perfectly every time. This section explains how to understand those temperature readings and use them to get the best results.
Safe Temperature Guidelines
Each type of meat has a safe temperature to kill harmful bacteria. Use the thermometer to check the thickest part of the meat. Avoid touching bones or fat, as they show false readings. Here are common safe temperatures:
- Chicken and turkey: 165°F (74°C)
- Beef, pork, lamb (steaks and roasts): 145°F (63°C)
- Ground meats (beef, pork, lamb): 160°F (71°C)
- Fish: 145°F (63°C)
Follow these guidelines to prevent foodborne illness and ensure meat is fully cooked.
Resting Meat For Optimal Results
After cooking, let meat rest before cutting. Resting allows juices to spread evenly inside. The temperature also rises a few degrees during resting. This is called carryover cooking. Cover the meat loosely with foil to keep it warm. Rest times vary:
- Small cuts: 3-5 minutes
- Larger roasts: 10-20 minutes
Resting improves tenderness and flavor. Check temperature just before serving for best results.
Adjusting Cooking Time
Use the thermometer reading to decide if more cooking is needed. If the temperature is below safe levels, cook a bit longer. Check the temperature every few minutes to avoid overcooking. Different ovens and grills cook unevenly, so rely on the thermometer, not time alone. Adjust heat or cooking time based on the reading. This approach prevents dry or undercooked meat.
Maintaining Your Thermometer
Clean the thermometer probe with warm, soapy water after each use. Store it in a dry place to keep it working well. Avoid dropping or bending the probe to prevent damage.
Maintaining Your Thermometer Keeping your digital meat thermometer in top-notch condition ensures that every meal you prepare is cooked to perfection. Proper maintenance not only extends the life of your device but also ensures accurate temperature readings for your culinary creations. Let’s dive into the essential steps to keep your thermometer clean, safe, and ready for use.Cleaning After Use
After each use, it’s crucial to clean your digital thermometer to maintain hygiene and accuracy. Use a damp cloth with mild soap to wipe the probe. Avoid submerging the entire device in water to prevent damage. You can also use alcohol wipes to sanitize the probe, especially when switching between different types of meat. This step prevents cross-contamination and ensures food safety. Make it a habit to clean your thermometer right after use to prevent any residue from hardening.Storage Tips
Proper storage is key to prolonging the life of your thermometer. Store it in a dry, cool place to prevent moisture damage and battery corrosion. Some thermometers come with a protective case—use it to protect the probe from bending or breaking. If your thermometer doesn’t have a case, consider placing it in a kitchen drawer with other utensils. Ensure it is not pressing against sharp objects that might damage the probe. Keeping your thermometer in a consistent place will also make it easy to find when you need it.Battery Care
Digital thermometers rely on batteries, and proper care can extend their lifespan. Check the battery compartment regularly for signs of corrosion or leakage. Replace the battery as soon as you notice the display dimming or the readings becoming inconsistent. When not in use for extended periods, remove the battery to prevent leakage. This simple step can save you from a malfunctioning device the next time you’re ready to grill. Always have a spare battery on hand so you’re never caught off guard in the middle of a cooking session.Troubleshooting Common Issues
Troubleshooting common issues with your digital meat thermometer helps ensure accurate temperature readings. Problems may occur due to various reasons. Identifying the cause quickly keeps your cooking safe and precise.
Some issues are easy to fix at home. Others may require replacing the device. Knowing how to spot and address these problems improves your cooking experience.
Inconsistent Readings
Inconsistent temperature readings often mean the probe is dirty or damaged. Clean the probe with warm, soapy water before use. Avoid submerging the entire thermometer in water.
Check the probe placement inside the meat. Insert it into the thickest part, away from bones and fat. Moving the probe during reading can cause fluctuations.
Low battery power may also cause inconsistent results. Replace batteries regularly to maintain accuracy.
Device Malfunctions
Sometimes the thermometer may fail to turn on or show error messages. Reset the device by removing and reinserting the batteries. This can clear minor glitches.
Check for visible damage like cracks or loose parts. Moisture inside the device can cause malfunctions. Keep the thermometer dry and store it properly.
Refer to the user manual for specific error codes and solutions. Contact customer support if problems persist after basic troubleshooting.
When To Replace Your Thermometer
Replace the thermometer if it consistently gives wrong readings despite troubleshooting. A cracked or bent probe can affect accuracy and safety.
If the screen is unreadable or the buttons don’t respond, it’s time for a new device. Older models may lose calibration over time.
Buying a new thermometer ensures reliable results and peace of mind. Choose one with good reviews and proper features for your cooking needs.
Credit: www.yahoo.com
Frequently Asked Questions
How Do I Use A Digital Thermometer For Meat?
Insert the thermometer probe into the thickest part of the meat. Avoid bones and fat for an accurate reading. Wait until the temperature stabilizes before reading.
What Is The Ideal Temperature For Cooked Meat?
Different meats have different safe temperatures. For example, poultry should reach 165°F, beef 145°F, and pork 160°F for safe consumption.
How Do I Clean A Digital Meat Thermometer?
Clean the probe with warm soapy water after each use. Avoid immersing the entire device in water to protect its electronic parts.
Can I Use A Digital Thermometer For Frozen Meat?
Yes, but the thermometer only measures surface temperature. For best results, thaw meat slightly before testing to check doneness accurately.
Conclusion
Using a digital thermometer helps cook meat safely and perfectly. Insert it into the thickest part of the meat for an accurate reading. Wait a few seconds and check the temperature. This tool prevents undercooking or overcooking. It saves time and reduces food waste.
With practice, reading the thermometer becomes quick and easy. Enjoy tender, juicy meat every time you cook. Keep your family safe by checking meat temperatures regularly. Simple steps lead to better meals and happy guests.
