
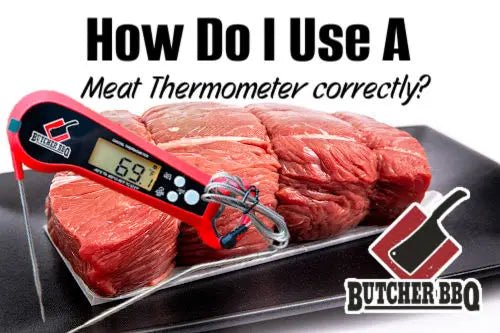
Are you tired of guessing if your meat is cooked just right? Using a temperature probe can change the way you cook forever.
It’s the secret tool that takes the guesswork out of cooking, helping you achieve perfect, juicy results every time. You’ll learn exactly how to use a temperature probe for meat, so you can impress your family and friends with meals cooked to perfection.
Keep reading, and discover the simple steps that will make your cooking more confident and your meat tastier than ever.
Choosing The Right Temperature Probe
Choosing the right temperature probe is key for perfectly cooked meat. It helps ensure your food is safe and tastes great. The right probe gives quick, accurate readings. This saves time and avoids guesswork in cooking.
Many types of probes suit different cooking styles and devices. Knowing the features and compatibility helps pick the best one. This makes your cooking easier and more reliable.
Types Of Temperature Probes
- Instant-read probes:Provide quick temperature readings. Ideal for checking meat doneness fast.
- Leave-in probes:Inserted into meat during cooking. Monitor temperature without opening the oven or grill.
- Wireless probes:Send temperature data to your phone or remote device. Great for multitasking.
- Digital probe thermometers:Show precise readings on a digital screen. Easy to read and use.
Features To Consider
- Accuracy:Choose probes with reliable and consistent readings.
- Response time:Fast response helps avoid overcooking.
- Durability:Look for heat-resistant and waterproof designs.
- Ease of use:Simple controls and clear displays improve experience.
- Probe length:Longer probes work better for large cuts of meat.
Compatibility With Cooking Devices
- Check if the probe works with your oven, grill, or smoker.
- Some probes connect via Bluetooth or Wi-Fi for remote monitoring.
- Wired probes suit traditional ovens and stovetops.
- Ensure the probe fits your cooking device’s temperature range.
- Look for probes with universal connectors for flexible use.

Credit: www.youtube.com
Preparing The Probe For Use
Preparing the temperature probe correctly ensures accurate meat cooking results. It protects food safety and maintains the probe’s durability. Proper prep includes cleaning, calibrating, and correct insertion. Each step matters for precise temperature readings and safe cooking.
Cleaning And Sanitizing
Always clean the probe before and after use. Use warm, soapy water to remove any residue. Wipe it with a clean cloth to dry. Sanitize with a food-safe solution or rubbing alcohol. This stops bacteria growth and cross-contamination. Never submerge the entire probe if it is not waterproof.
Calibrating The Probe
Calibration ensures the probe reads temperatures correctly. Use ice water or boiling water tests for accuracy. Insert the probe into ice water and wait for the reading. It should show 32°F (0°C). Adjust the probe if the reading is off. Repeat the test in boiling water at 212°F (100°C) for best results.
Inserting The Probe Correctly
Insert the probe into the thickest part of the meat. Avoid touching bones or fat, which can give wrong readings. Push the probe deep enough to reach the center. Hold the probe steady while cooking. Proper placement guarantees accurate temperature measurement and perfectly cooked meat.
Meat Temperature Guidelines
Knowing the right meat temperature is key for tasty and safe meals. Meat temperature guidelines help you cook meat perfectly. Using a temperature probe ensures you reach the correct heat inside the meat. This stops undercooking or overcooking. It also kills harmful bacteria. Follow these simple guidelines for the best results.
Safe Internal Temperatures
Cooking meat to a safe internal temperature is important. It kills germs that cause food poisoning. Use a temperature probe to check the thickest part of the meat. Avoid touching bone or fat. Here are the safe minimum temperatures:
- Chicken and turkey: 165°F (74°C)
- Ground beef and pork: 160°F (71°C)
- Beef, pork, lamb steaks, and roasts: 145°F (63°C)
- Fish: 145°F (63°C)
Temperature Targets For Different Meats
Different meats taste best at certain temperatures. A temperature probe helps hit these targets exactly. This keeps meat juicy and flavorful.
| Meat Type | Temperature | Texture |
|---|---|---|
| Beef (medium rare) | 135°F (57°C) | Warm red center |
| Beef (medium) | 145°F (63°C) | Pink center |
| Pork (medium) | 145°F (63°C) | Light pink center |
| Chicken | 165°F (74°C) | Fully cooked, no pink |
Resting Temperatures
Resting meat after cooking is important. The temperature rises a few degrees while resting. This helps juices spread inside the meat. Rest meat for 5 to 10 minutes before cutting. The temperature probe will show a slight rise during this time. This makes meat tender and juicy.
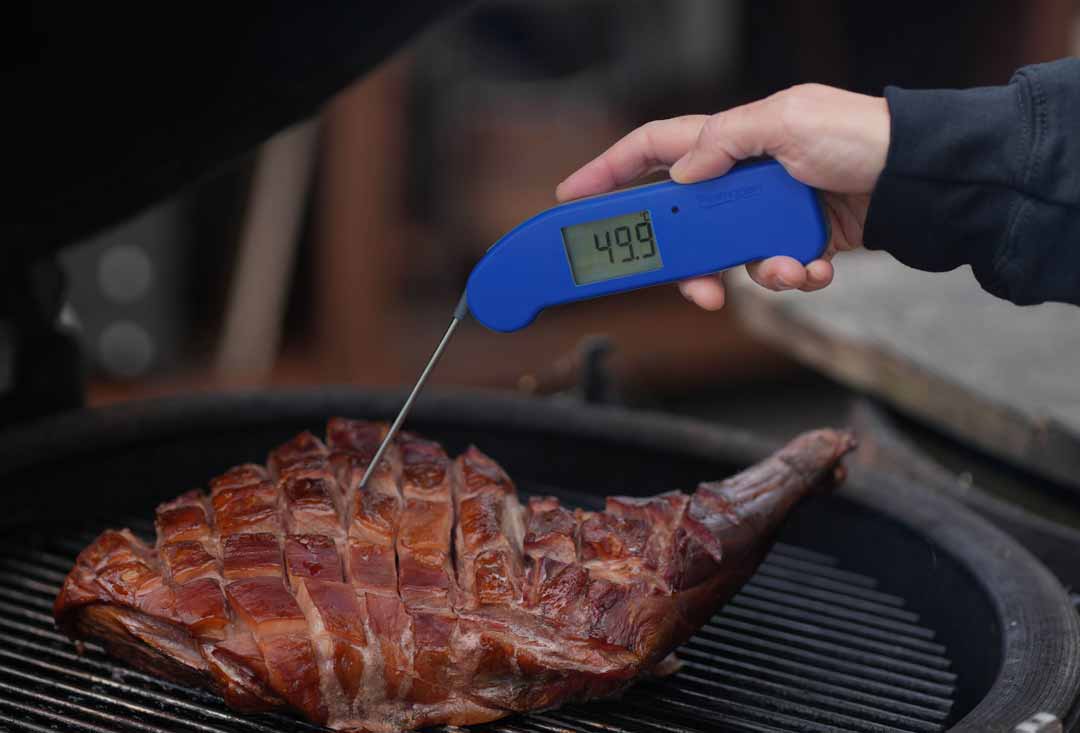
Credit: thermapen.co.uk
Using The Probe During Cooking
Insert the temperature probe into the thickest part of the meat to get an accurate reading. Monitor the temperature regularly to avoid overcooking or undercooking. Remove the meat once it reaches the desired temperature for safe and juicy results.
Using a temperature probe during cooking ensures perfectly cooked meat. It helps achieve the desired doneness without guessing. The probe provides real-time updates, ensuring precise control over cooking. This section will guide you through using the probe effectively while cooking meat.Monitoring Temperature In Real-time
Insert the probe into the thickest part of the meat. Make sure it does not touch bone or fat. This position gives the most accurate reading. Keep an eye on the temperature display. Real-time monitoring helps maintain consistent cooking.Avoiding Common Mistakes
Avoid placing the probe too close to bone. This can give a false reading. Also, do not let the probe touch the cooking surface. It will affect the temperature reading. Ensure the probe is firmly inserted for accurate results.Adjusting Cooking Time Based On Readings
Check the temperature as the meat cooks. Adjust the cooking time based on the probe’s reading. If the temperature rises quickly, reduce the heat. If it stalls, increase the heat slightly. This ensures the meat cooks evenly and reaches the perfect doneness.Advanced Tips For Perfect Results
Using a temperature probe correctly can elevate your cooking, especially with meat. Advanced tips ensure your meat cooks evenly and reaches the perfect doneness. These techniques help you avoid common mistakes and boost accuracy.
Using Multiple Probes
Place probes in different parts of large cuts. This shows temperature variations inside the meat. It helps prevent undercooked or overcooked spots. For example, insert one probe in the thickest part and another near the bone. This method gives a fuller picture of the cooking process.
Wireless And Smart Probes
Wireless probes offer freedom of movement while monitoring meat. You can check temperatures from another room using your phone. Smart probes often include preset temperatures for various meats. They send alerts when meat reaches the target temperature. This reduces the risk of overcooking and improves convenience.
Troubleshooting Inaccurate Readings
Clean the probe before and after use to avoid false readings. Avoid touching bones or fat with the probe, as these give wrong temperatures. Calibrate your probe regularly following the manufacturer’s instructions. If the temperature seems off, test it in boiling water (212°F or 100°C). Replace the probe if it consistently shows errors.
Cleaning And Maintaining Your Probe
Keeping your temperature probe clean and well-maintained ensures accurate readings every time. Dirt and grease can affect the sensor’s performance and may cause cross-contamination. Regular cleaning also helps avoid damage and prolongs the probe’s life.
Proper care is simple and only takes a few minutes after each use. Follow these tips to keep your probe in top shape.
Best Cleaning Practices
- Unplug the probe before cleaning to avoid damage.
- Use warm, soapy water and a soft cloth or sponge.
- Clean the metal tip and the cable carefully.
- Avoid soaking the entire probe, especially the connector.
- Rinse with clean water to remove soap residue.
- Dry thoroughly with a soft towel or air dry.
- Use a disinfectant wipe if you want extra cleanliness.
Storage Tips
- Store the probe in a dry place away from heat.
- Keep the probe in its protective case if available.
- Avoid bending or twisting the cable sharply.
- Do not leave the probe near strong magnets or electronic devices.
- Check the probe regularly for signs of wear or damage.
Extending Probe Lifespan
- Clean the probe immediately after each use.
- Handle the probe gently to avoid bending the tip.
- Do not expose the probe to extreme temperatures beyond its limits.
- Replace batteries or recalibrate the device as recommended.
- Keep the probe away from moisture when not in use.

Credit: www.youtube.com
Frequently Asked Questions
How Do I Insert A Temperature Probe Into Meat?
Insert the probe into the thickest part of the meat, avoiding bones and fat. This ensures accurate temperature readings for proper cooking.
What Is The Ideal Temperature For Cooking Meat?
Different meats have various safe temperatures. For example, poultry should reach 165°F, while beef varies between 130°F to 160°F depending on doneness.
Can I Leave The Temperature Probe In Meat While Cooking?
Yes, most probes are designed to stay in meat during cooking. This allows continuous temperature monitoring without opening the oven or grill.
How Do I Clean A Meat Temperature Probe Safely?
Clean the probe with warm, soapy water after each use. Avoid immersing the entire probe in water to protect the electronics.
Conclusion
Using a temperature probe helps cook meat safely and perfectly. It ensures the meat is juicy and not overcooked. Insert the probe in the thickest part for best results. Wait for the right temperature before taking the meat off heat.
This simple tool saves time and avoids guesswork. Enjoy tasty meals with less stress and better results every time. Keep practicing, and cooking meat will feel easy and fun.
