
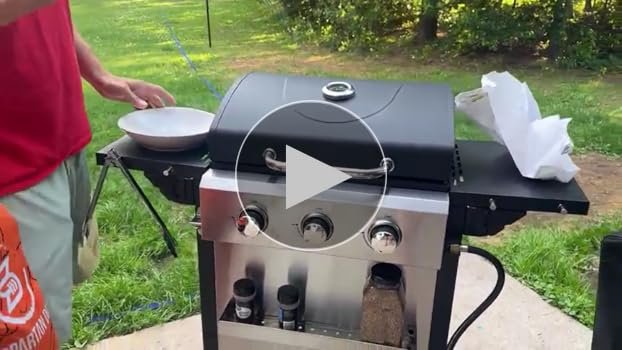
Are you ready to take your outdoor cooking to the next level? Using a 3-burner gas grill might seem tricky at first, but once you know the simple steps, it becomes your best friend for delicious meals.
Whether you’re grilling juicy steaks, tender veggies, or sizzling burgers, mastering your 3-burner grill will give you full control over heat and flavor. Keep reading, and you’ll discover easy tips and tricks that will make your next barbecue a tasty success—no guesswork, just great grilling.
Choosing The Right Grill
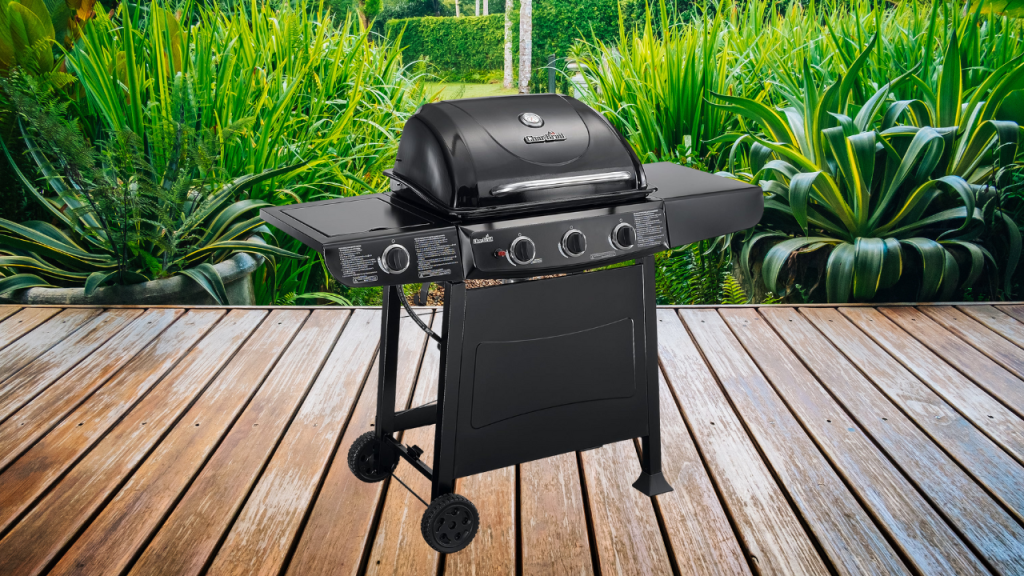
Choosing the right grill can make all the difference in your outdoor cooking experience. A 3-burner gas grill offers a balance of size, power, and versatility that fits many needs. But how do you decide if this grill matches your lifestyle and cooking style?
Benefits Of A 3-burner Gas Grill
A 3-burner gas grill gives you more control over cooking temperatures. You can create different heat zones, perfect for grilling multiple foods at once. This means you can sear a steak on high heat while gently warming vegetables on the side.
Its medium size fits well in most backyards without taking up too much space. You get enough cooking area for family meals or small gatherings without the hassle of a bulky grill. Plus, it heats up quickly, saving you time before the first bite.
Many people appreciate the fuel efficiency of a 3-burner model. It uses less propane than larger grills but still delivers strong performance. Have you noticed how easy it is to adjust the flame to match your recipe’s needs?
Key Features To Look For
- Material Quality:Look for stainless steel or cast aluminum for durability and rust resistance.
- Burner Power:Check the BTU rating; higher BTUs mean faster heating but consider efficiency too.
- Cooking Surface Size:Make sure it fits the types of meals you plan to prepare, whether it’s burgers or whole chickens.
- Temperature Controls:Precise knobs let you manage heat zones effectively, which is crucial for grilling different foods simultaneously.
- Additional Features:Side burners, warming racks, and built-in thermometers add convenience and improve cooking results.
Imagine grilling your favorite meal with clear temperature zones and a reliable ignition system. That’s the kind of practical benefit you want from a grill, not just flashy extras. What features would make your cooking easier and more enjoyable?
Setting Up Your Grill
Setting up your 3-burner gas grill is the first step to great outdoor cooking. Proper setup ensures safety and smooth operation. Follow the steps carefully to enjoy your grilling experience.
Assembling The Grill
Start by unpacking all parts and checking them against the manual. Find a clean, flat surface to work on. Attach the legs to the grill body securely. Install the side shelves and warming rack. Fix the burners and heat shields in place. Tighten all screws and bolts firmly. Make sure the grill lid opens and closes smoothly.
Connecting The Gas Supply
Use the hose and regulator that came with your grill. Attach the regulator to the propane tank valve. Connect the other end of the hose to the grill’s gas inlet. Tighten connections by hand, then use a wrench if needed. Open the propane tank valve slowly to avoid leaks. Always keep the tank upright and on a stable surface.
Safety Checks Before Use
- Check all connections for leaks using soapy water. Bubbles indicate a leak that needs fixing.
- Ensure the grill is placed outdoors in a well-ventilated area.
- Keep the grill away from walls, furniture, and flammable materials.
- Test the burners by turning them on one at a time.
- Make sure the flame is steady and blue, not yellow or flickering.
- Have a fire extinguisher nearby, just in case.
Igniting The Burners
Igniting the burners is the first and most important step in using a 3-burner gas grill. It sets the stage for cooking your food evenly and safely. Proper lighting ensures the grill heats up quickly and maintains the right temperature.
Each burner controls a section of the grill, allowing you to cook different foods at different heat levels. Understanding how to ignite these burners correctly helps you avoid gas leaks and flare-ups. Follow the steps carefully for a smooth start every time.
Step-by-step Lighting Process
- Open the grill lid to prevent gas buildup.
- Make sure the gas supply is turned on.
- Push and turn the control knob of one burner to the “light” position.
- Press the ignition button to create a spark.
- Watch for the burner to light; it should ignite within a few seconds.
- If the burner lights, keep the knob pressed for 10-15 seconds.
- Release the knob slowly and adjust the flame to your desired level.
- Repeat for the other burners as needed.
Troubleshooting Ignition Issues
- Check if the gas tank is empty or low; replace or refill it.
- Ensure the control knob is fully turned to the “light” position.
- Clean the burner ports if clogged with debris or grease.
- Verify the ignition button creates a spark; replace the battery if needed.
- Look for gas leaks by smelling for gas or using soapy water.
- If no spark appears, try lighting with a long match or lighter.
- Consult the grill’s manual for specific advice on your model.
Mastering Heat Zones
Understanding heat zones on a 3-burner gas grill is key to cooking food perfectly. Different foods need different temperatures. Heat zones help control this easily. You can use one side for high heat and the other for low heat. This way, you cook food evenly without burning it.
Learning to manage these zones saves fuel and time. It also gives you more control over how your food cooks. This section explains how to set direct and indirect heat zones. It also shows how to use all three burners for the best results.
Direct Vs Indirect Heat
Direct heat means cooking food right above the flame. It is very hot and cooks food fast. This method is good for steaks, burgers, and vegetables. It gives food a nice char and grill marks.
Indirect heat means cooking food next to the flame, not above it. The heat surrounds the food slowly. This method is best for bigger or tougher cuts. Think ribs, whole chicken, or roasts. It cooks food evenly without burning.
- Use direct heat for quick cooking.
- Use indirect heat for slow, even cooking.
- Switch between zones to finish food perfectly.
Using All Three Burners Efficiently
A 3-burner grill allows three heat zones. This setup lets you cook many foods at once. You can use one burner on high, one on medium, and one off or low.
| Burner | Heat Level | Use |
|---|---|---|
| Left | High | Direct heat for searing |
| Center | Medium | Indirect heat for cooking |
| Right | Off or Low | Keep food warm or slow cook |
This setup helps cook food faster and better. You can move food between zones as needed. Use the hot zone to start, then move to medium or low to finish. This stops food from burning and keeps it juicy.
Grilling Techniques
Mastering grilling techniques on your 3-burner gas grill can transform your cooking experience. It’s not just about turning on the burners and placing food on the grates. Knowing how to control heat, manage flare-ups, and use the right accessories makes a huge difference in flavor and texture.
Searing And Cooking Times
Searing locks in juices by cooking food quickly over high heat. Use one burner on high and the others on low or off to create heat zones. Place your steak or chicken on the hot side for 2-3 minutes per side, then move it to the cooler zone to finish cooking without burning.
Different foods need different cooking times. Thicker cuts take longer, so use a meat thermometer to check doneness. Have you ever overcooked a burger because you guessed the time? Timing matters just as much as heat control.
Managing Flare-ups
Flare-ups happen when fat drips onto the flames, causing sudden bursts of fire. Keep a spray bottle of water handy to quickly douse small flames. If flare-ups persist, move food to a cooler burner and close the lid to control oxygen flow.
Ignoring flare-ups can char your food and create unpleasant flavors. Have you noticed those blackened spots ruining an otherwise perfect steak? Managing flare-ups keeps your grilling results consistent and delicious.
Using Grill Accessories
Accessories like grill baskets, skewers, and a meat thermometer can make your grilling easier and more precise. A grill basket prevents small veggies from falling through grates, while skewers help cook kebabs evenly.
Don’t underestimate the power of a good grill brush to clean grates before each use. Clean grates mean better grill marks and less sticking. What accessories do you have in your grilling toolkit?

Credit: permasteel.life
Cleaning And Maintenance
Cleaning and maintaining a 3-burner gas grill ensures safety and longevity. Begin by turning off the gas supply. Remove grates and burners, scrubbing them with soapy water. Rinse and dry thoroughly before reassembling. Check for gas leaks regularly and store the grill in a dry place.
Maintaining your 3-burner gas grill can seem like a chore, but with a regular cleaning routine, it becomes a manageable part of your grilling experience. Proper cleaning not only extends the lifespan of your grill but also ensures that your food tastes great every time. Let’s dive into the essential cleaning and maintenance tasks to keep your grill in top shape.Daily Cleaning Tips
After each use, while the grill is still warm, take a few minutes to clean the grates. Use a grill brush to remove any food particles or residue. Wipe down the exterior with a damp cloth to remove grease and fingerprints. If you notice any stubborn spots, a mild dish soap solution can work wonders. Check the grease tray and empty it if needed. This simple task prevents flare-ups and keeps your grill running smoothly.Deep Cleaning Your Grill
Plan a deep cleaning session at least once a month. Start by disconnecting the gas and removing the grates and burner protectors. Soak the grates in warm soapy water for about 30 minutes. Scrub them thoroughly before rinsing and drying. Clean the burners with a soft brush, making sure to unclog any blocked holes. This ensures even heat distribution for your next cookout.Preventing Rust And Damage
Keep your grill covered when not in use to shield it from the elements. A high-quality grill cover is a small investment that pays off in rust prevention. Regularly inspect your grill for signs of wear and tear. Addressing minor issues early can prevent costly repairs down the line. Consider storing your grill in a sheltered area during harsh weather conditions. This extra step can significantly extend its lifespan and keep it looking new. What are your go-to grill maintenance tips? Share your thoughts and keep the conversation going!Safety Tips For Grilling
Grilling on a 3-burner gas grill can be a fantastic way to prepare meals, but safety should never take a backseat. Handling gas and fire requires your full attention to prevent accidents. Understanding a few key safety tips can make your grilling experience both enjoyable and secure.
Handling Gas Safely
Always check your gas connections before turning on the grill. A simple soap and water solution applied to hoses and fittings can reveal leaks by creating bubbles. If you notice any leaks, do not use the grill until the issue is fixed.
Make sure the propane tank valve is fully closed when not in use. Store tanks upright in a well-ventilated area, away from heat sources. Never store spare tanks inside your home or garage.
Turn on your burners only after opening the grill lid. This prevents gas from building up inside, which can cause dangerous flare-ups. Have you ever smelled gas before lighting the grill? If so, wait until the smell completely disappears before proceeding.
Fire Prevention Measures
Keep a spray bottle of water nearby to control minor flare-ups. It’s a quick way to manage small flames without dousing your food. However, for larger fires, have a fire extinguisher rated for grease fires on hand.
Clear the area around your grill of flammable materials such as paper towels, napkins, and dry leaves. Position your grill away from wooden decks or overhanging branches. Think about how close your grill is to your home and other structures before firing it up.
Clean your grill regularly to prevent grease buildup, which is a common cause of flare-ups. After each use, scrape off food residue and empty the grease tray. How often do you clean your grill? Making this a habit reduces the risk of dangerous grease fires.

Credit: permasteel.life
Troubleshooting Common Problems
Using a 3-burner gas grill can be a game-changer for your outdoor cooking, but sometimes things don’t go as planned. Troubleshooting common problems quickly ensures your grill is back to perfect performance without frustration. Let’s look at some typical issues and how you can fix them efficiently.
Uneven Heating
Ever noticed one burner cooking faster than the others? Uneven heating is a frequent problem that can ruin your meal’s consistency. Dirt or grease buildup on burners often blocks the flames, causing hot and cold spots.
Cleaning the burners with a wire brush regularly helps maintain even heat. Also, check that the grill grates are properly positioned, as misaligned grates can affect heat distribution. Have you ever tried rotating your food between burners to keep everything cooking evenly?
Gas Flow Issues
Gas flow problems often cause weak flames or the grill not lighting at all. This can happen if the propane tank is low or if the hose is kinked or clogged. Always inspect your gas connections before grilling.
Try turning the gas off and on again to reset the flow, and clear any dirt or spider webs blocking the hose or burners. If the flame sputters or goes out, check the regulator for damage. Do you keep a spare propane tank handy to avoid mid-cookout gas shortages?
Burner Malfunctions
Sometimes burners just won’t ignite or stay lit. This usually means the igniter is faulty or the burner ports are clogged. A quick fix is to clean the ports with a thin wire or pin to remove debris.
If the igniter button clicks but doesn’t spark, replacing the battery or the igniter unit might be necessary. Testing the burner by lighting it manually with a match can help you figure out if the issue is with the igniter or the burner itself. How often do you inspect your burners to catch problems before they interrupt your grilling?
Credit: www.pcvarge.com
Frequently Asked Questions
How Do I Ignite A 3-burner Gas Grill Safely?
To ignite, open the lid first to prevent gas buildup. Turn the burner knobs to ignite one by one. Use the built-in ignition button or a long lighter. Ensure the flame lights promptly, then adjust heat as needed.
What Is The Best Way To Control Heat On A 3-burner Grill?
Adjust each burner knob to create different heat zones. Use high heat for searing and low heat for slow cooking. Close the lid to retain heat and cook food evenly. Monitor temperature regularly with a grill thermometer for best results.
How Do I Clean A 3-burner Gas Grill Properly?
After grilling, brush grates with a grill brush while warm. Empty the drip tray to avoid flare-ups. Clean burners and remove debris regularly. Use mild soap and water for deep cleaning. Proper maintenance extends grill life and improves cooking performance.
Can I Use All Burners At Once On A 3-burner Gas Grill?
Yes, you can use all burners simultaneously for maximum heat. This works well for large meals or quick cooking. Adjust each burner to balance heat distribution. Using all burners also helps in achieving even cooking across the grill surface.
Conclusion
Using a 3-burner gas grill can make cooking outdoors fun and easy. Control each burner to cook different foods at once. Always keep safety in mind and clean your grill after use. Practice will help you cook better every time.
Enjoy tasty meals with friends and family. This grill adds convenience and flavor to your cooking. Try new recipes and explore grilling options. Your next barbecue can be simple and delicious. Keep experimenting and enjoy outdoor cooking more.
