
If you love smoking meat, you know how important it is to keep your smoker clean. A dirty smoker can affect the taste of your food and even shorten the life of your equipment.
But cleaning your smoker doesn’t have to be a hassle. With the right brush and a simple technique, you can have your smoker spotless in no time. In this guide, you’ll learn exactly how to clean your smoker with a brush, step by step.
Stick with me, and you’ll be ready to enjoy better flavors and a longer-lasting smoker every time you fire it up.
Choosing The Right Brush
Choosing the right brush is key to keeping your smoker clean and in good shape. The right brush makes cleaning easier and protects your smoker’s surfaces. Not all brushes work the same. Some are better for heavy dirt, others for delicate parts. Understanding what brush to pick saves time and effort.
Types Of Smoker Brushes
- Wire brushes: Strong and good for tough grime.
- Brass brushes: Gentler, ideal for coated surfaces.
- Nylon brushes: Safe for non-stick grates and light cleaning.
- Scraper brushes: Combine scraping and brushing for stubborn spots.
Material Matters
Brush material affects cleaning power and safety. Wire brushes clean well but can scratch or leave metal bits behind. Brass brushes are softer and less likely to damage surfaces. Nylon brushes avoid scratching but work best on light dirt. Choose material based on your smoker’s surface and dirt level.
Size And Shape Tips
- Pick a brush size that fits your smoker grates easily.
- Long handles protect your hands from heat.
- Brush heads with angled or curved shapes reach tight spots better.
- Compact brushes work well for corners and small areas.

Credit: www.smokedbbqsource.com
Preparing Your Smoker
Before you grab your brush and start scrubbing, preparing your smoker properly sets the stage for an efficient and safe cleaning session. Taking a few moments to cool, clear, and gather everything you need will save you frustration later. Are you ready to make your smoker shine with less effort?
Cooling Down Safely
Never attempt to clean your smoker while it’s still hot. Hot surfaces can cause burns and make cleaning tools less effective. Allow your smoker to cool completely—this might take several hours or overnight depending on your model and recent use.
Tip: If you’re in a hurry, open the lid to help heat escape faster, but keep children and pets away during this time. Have you noticed how much easier cleaning gets once the smoker is just warm instead of blazing hot?
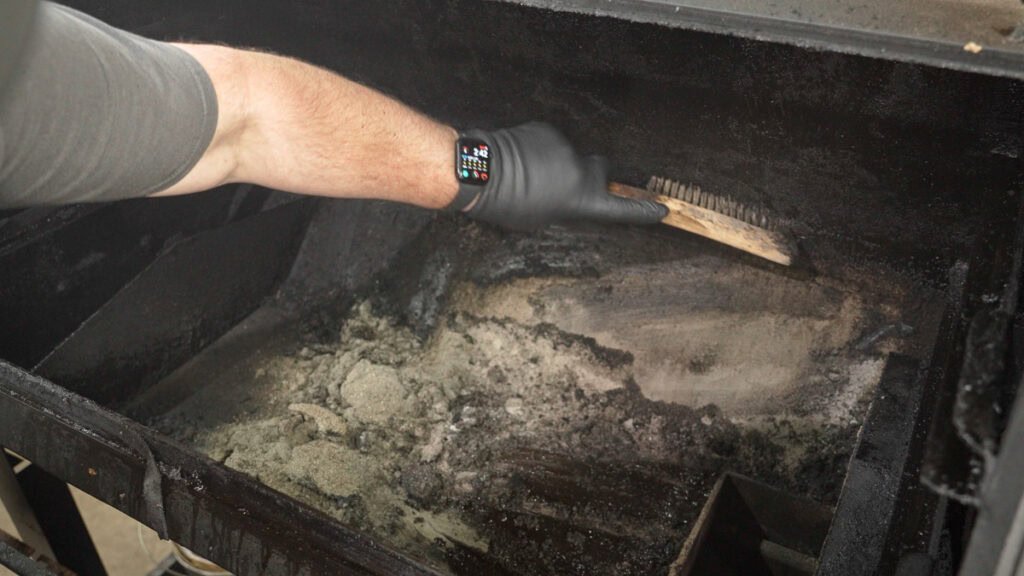
Removing Ash And Debris
Once the smoker is cool, the next step is clearing out leftover ash and debris. Use an ash shovel or scoop to carefully remove ashes from the firebox and bottom tray. This prevents buildup that can block air vents and affect your smoker’s performance.
Don’t forget to check inside the cooking chamber for any leftover bits of food or grease. Removing these early makes brushing more effective and prevents unpleasant smoke odors during your next cook.
Gathering Cleaning Supplies
Before you start scrubbing, gather all the supplies you’ll need in one spot. This often includes a stiff wire brush designed for grills, a bucket of warm soapy water, a scraper for tough spots, and clean rags or paper towels.
Some people swear by using a grill stone or pumice block for stubborn residue. What’s your go-to cleaning tool? Having everything ready keeps you focused and speeds up the process.
Step-by-step Cleaning Process
Cleaning your smoker with a brush takes more than just a quick sweep. It requires attention to every part where grease, ash, and residue build up. Keeping these areas spotless helps your smoker last longer and keeps your food tasting fresh.
Brushing Grates And Racks
Start by removing the grates and racks. Use a stiff wire brush to scrape off stuck-on food and grease. Pay special attention to corners and edges where residue tends to hide.
After brushing, wipe the grates with a damp cloth to remove loose debris. Have you noticed how a clean grate can improve the flavor of your smoked meats? It really makes a difference.
Cleaning The Interior Walls
Next, focus on the interior walls of the smoker. Brush gently to avoid scratching the surface but firm enough to remove soot and grease. The walls often collect a sticky film that can affect heat distribution.
Using a damp cloth, wipe down the walls after brushing. This step helps prevent build-up that can cause unpleasant smoke flavors. Do you check the walls after every use, or only when the smoke starts to smell off?
Scrubbing The Smoke Box
The smoke box traps a lot of grease and ash. Use a smaller brush to reach inside and scrub thoroughly. If you skip this, old ash can block airflow and reduce smoke quality.
Empty the ash tray and clean around the fire area as well. A clean smoke box means better smoke control and more consistent cooking results.
Handling The Chimney
Finally, the chimney needs your attention. A clogged chimney restricts airflow and creates excess creosote, which can lead to bitter flavors. Use a chimney brush to clear out soot and debris.
Check the chimney often, especially after long smoking sessions. Keeping it clean improves ventilation and helps your smoker perform at its best. When was the last time you cleaned your smoker’s chimney?

Credit: abell.co.uk
Post-cleaning Care
Cleaning a smoker with a brush removes ash and grease buildup easily. Regular brushing keeps your smoker working well and extends its life. Always brush while the smoker is cool for safety and best results.
After a thorough cleaning session with your brush, it’s crucial to give your smoker some post-cleaning care. This ensures it not only looks great but also functions efficiently during your next smoking session. Taking a few extra steps now can save you from potential issues later, keeping your smoker in prime condition for mouth-watering meals every time.Wiping And Rinsing
Once you’ve scrubbed away the grime, it’s time to wipe down the surfaces. Use a damp cloth to remove any remaining debris or cleaning solution. Make sure you rinse the cloth frequently to avoid spreading dirt back onto the smoker. This step will help prevent any lingering tastes from affecting your next culinary masterpiece.Drying Techniques
Moisture is the enemy when it comes to metal, so drying your smoker thoroughly is essential. Use a clean towel to pat down all surfaces, paying special attention to corners and crevices. If possible, let the smoker air dry for a bit in a well-ventilated area. A little patience here can prevent rust and extend your smoker’s lifespan.Reassembling The Smoker
After ensuring everything is dry, it’s time to reassemble your smoker. Take this opportunity to inspect each part for wear and tear. Reassemble the components carefully, making sure everything fits snugly. A well-put-together smoker ensures an even cooking experience, setting the stage for your next delicious meal. Have you ever noticed the difference in flavor when your smoker is clean and well-maintained? Taking these extra steps not only preserves your equipment but also enhances your cooking adventures.Maintaining Your Smoker
Maintaining your smoker ensures it works well and lasts longer. Regular care keeps the flavor pure and prevents damage. Cleaning with a brush is simple and helps remove grease and residue. This section explains how to keep your smoker in top shape.
Regular Cleaning Schedule
Set a cleaning routine for your smoker. Clean it after every few uses to avoid tough build-up. Use the brush to scrub the grates and walls. This prevents ash and grease from piling up. A clean smoker cooks food evenly and tastes better.
Preventing Rust And Build-up
Rust damages your smoker’s metal parts. After brushing, wipe the surfaces dry with a cloth. Apply a thin layer of cooking oil to protect the metal. Store your smoker in a dry place to avoid moisture. Remove leftover ashes and grease to stop build-up.
Storing Your Brush Properly
Keep your cleaning brush in good condition for longer use. Rinse it with water after each cleaning session. Let it dry completely to stop rust on the bristles. Store the brush in a dry, ventilated area. Avoid leaving it inside the smoker to prevent damage.

Credit: www.youtube.com
Frequently Asked Questions
How Often Should I Clean My Smoker With A Brush?
Cleaning your smoker with a brush after every 3-4 uses keeps it efficient. Regular cleaning prevents buildup and maintains flavor quality.
What Type Of Brush Is Best For Cleaning Smokers?
Use a stainless steel wire brush designed for smokers. It removes grease and residue without damaging the smoker’s surface.
Can I Clean My Smoker Brush With Water?
Yes, rinse your smoker brush with warm water after use. Dry it thoroughly to prevent rust and prolong its life.
Should I Clean The Smoker While It’s Hot Or Cold?
Clean your smoker when it’s cool to avoid burns. Cold cleaning helps remove hardened residue safely and effectively.
Conclusion
Cleaning your smoker with a brush keeps it ready for great meals. Regular brushing removes grease and food bits easily. A clean smoker lasts longer and cooks better. Use the right brush and clean after each use. This simple step saves time and effort later.
Enjoy smoky flavors without worrying about buildup. A little care goes a long way. Keep your smoker clean and enjoy delicious BBQ every time.
