

Are you ready to enjoy the perfect barbecue with your ceramic charcoal grill? The first step is putting together the grill stand correctly.
It might seem tricky at first, but with the right guidance, you can have it set up quickly and safely. You’ll find simple, step-by-step instructions that make assembling your ceramic charcoal grill stand easy and stress-free. Keep reading to get your grill ready for those amazing cookouts you’ve been dreaming of!
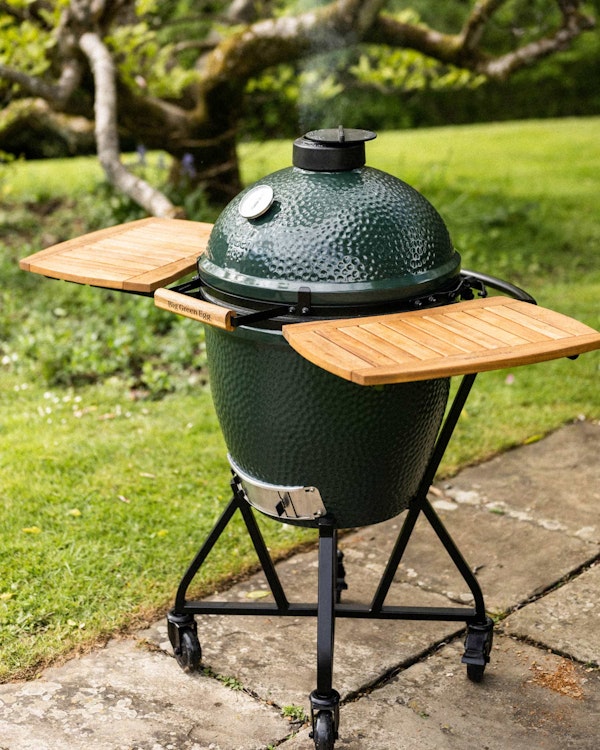
Credit: biggreenegg.co.uk
Gathering Tools And Parts
Before assembling your ceramic charcoal grill stand, gathering all necessary tools and parts is crucial. This preparation saves time and avoids frustration. Having everything ready ensures a smooth building process.
Essential Tools Needed
Gather a few basic tools for the assembly. Most parts fit together with simple hand tools.
- Phillips screwdriver for screws
- Adjustable wrench or socket wrench
- Rubber mallet for gentle tapping
- Measuring tape to check alignment
- Protective gloves for safety
These tools help you handle parts securely and avoid damage.
Identifying Grill Stand Components
Sort all parts on a clean surface. Check each piece against the instruction list.
- Metal legs or frame sections
- Cross braces for support
- Wheels or casters, if included
- Bolts, nuts, and washers
- Grill base or mounting plate
Confirm all parts are present before starting assembly. Identify the function of each component. This step prevents confusion and missing parts later.

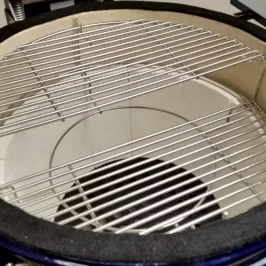
Credit: manuals.plus
Preparing The Workspace
Preparing your workspace is key to a smooth ceramic charcoal grill stand assembly. A clean, organized area helps you find parts quickly. It also prevents accidents and damage to the grill components. Take time to set up the right place before starting.
Choosing A Flat Surface
Select a flat surface to ensure stability during assembly. A level ground prevents the grill parts from tipping over. Concrete patios, wooden decks, or garage floors work well. Avoid soft or uneven surfaces like grass or gravel. This choice makes fitting pieces easier and safer.
Clearing The Area
Clear the area around the workspace. Remove any objects that might block your movements or cause tripping. Keep pets and children away to avoid distractions. Lay down a mat or cardboard to protect parts from scratches. Clean surroundings help you focus and speed up the process.
Assembling The Base Frame
Assembling the base frame is the foundation of your ceramic charcoal grill stand. Getting this part right ensures your grill stays stable and secure during every cookout. Pay close attention to how the pieces fit together—you’ll thank yourself later when your grill doesn’t wobble or feel shaky.
Aligning Frame Pieces
Start by laying out all the base frame pieces on a flat surface. Check the instructions for any distinguishing marks or holes that indicate how pieces connect. Align the frame parts so bolt holes line up perfectly; this makes the assembly smoother and prevents forcing parts together.
Take a moment to test fit the pieces without tightening anything. Does everything sit flush and level? If something feels off, adjust before moving forward. A small misalignment now can cause bigger problems once the grill is fully assembled.
Securing With Bolts And Screws
Once you have the frame pieces properly aligned, it’s time to secure them. Use the bolts and screws provided in your grill kit, ensuring you choose the correct size for each connection point. Tighten them evenly to avoid twisting the frame out of shape.
Don’t overtighten bolts on the first pass. Instead, snug them up lightly, then go back and fully tighten each one step-by-step. This approach helps maintain the frame’s shape and prevents stripped threads or cracked parts.
Have you ever struggled with a frame that felt unstable after assembly? Taking these careful steps to align and secure the base frame will save you from that frustration. Your grill stand will be sturdy, ready to support the heavy ceramic grill for many cookouts to come.
Credit: saffiregrills.com
Attaching The Legs
Attaching the legs to your ceramic charcoal grill stand is easy. Align each leg with the designated slots. Secure them using bolts and a wrench for a stable base.
Attaching the legs is a key step in setting up your ceramic charcoal grill stand. Ensuring the legs are correctly attached provides stability and safety. Follow these simple instructions for a successful assembly.Positioning The Legs
Place the grill stand on a flat surface. Align the legs with the designated corners. Make sure each leg is facing outward. This setup will provide the best support. Check if the pre-drilled holes on the legs match those on the grill stand.Tightening Fasteners
Use a wrench to tighten the fasteners. Ensure the screws are secure but not overly tight. Over-tightening can damage the stand. Double-check each leg for stability. Make adjustments if any leg feels loose. Testing the stability ensures the grill stands firm.Installing The Shelf
Installing the shelf on your ceramic charcoal grill stand adds extra space for tools and accessories. It helps keep your grilling area organized and handy. Follow simple steps to place and secure the shelf correctly.
Locating Shelf Brackets
Start by finding the shelf brackets included with your grill stand. These brackets support the shelf and hold it in place. Look for pre-drilled holes on the stand’s legs where brackets fit perfectly.
Match each bracket to these holes. Make sure both sides are at the same height for a level shelf. Hold a bracket against the stand to check the fit before attaching.
Fixing The Shelf In Place
Place the shelf onto the brackets carefully. Align the shelf edges with the brackets for a secure fit. Use screws provided in the kit to attach the shelf to the brackets.
Tighten the screws with a screwdriver until the shelf feels stable. Avoid over-tightening to prevent damage. Give the shelf a gentle shake to ensure it is firmly fixed and ready to use.
Mounting The Grill Body
Mounting the ceramic charcoal grill body onto its stand is a crucial step that demands both care and precision. This part of the assembly ensures your grill remains stable and safe during use. Handling the grill body properly helps avoid damage and sets the foundation for a perfect cooking experience.
Lifting And Positioning Grill
Start by preparing a clean, flat workspace around your stand to avoid any scratches or dents. The grill body can be heavy and awkward, so having a second person to help is a smart move. Lift the grill carefully using both hands, keeping it close to your body to maintain control and balance.
Position the grill body directly above the stand, aligning the bottom edges with the mounting points. Take your time to ensure it sits evenly. Have you ever tried placing a heavy object without proper alignment? It often leads to unnecessary strain or damage, so focus on smooth, steady movements.
Securing To Stand
Once the grill body is in place, securing it properly is key to safety. Use the bolts or screws provided with your grill kit, and tighten them firmly but avoid over-tightening which could crack the ceramic. Typically, there are mounting holes on the grill’s base that match the holes on the stand.
Check each fastener after tightening to confirm the grill body is stable and doesn’t wobble. You might find it helpful to slightly tighten screws in a diagonal pattern to evenly distribute pressure. Have you noticed how uneven tightening can cause stress points? Attention to these details will extend the life of your grill.
Final Checks And Adjustments
After assembling your ceramic charcoal grill stand, final checks and adjustments are essential. These steps ensure the stand is safe and ready for use. A stable stand prevents accidents and improves grilling performance. Loose parts can cause wobbling or damage. Taking time to review your work helps avoid future problems.
Ensuring Stability
Place the grill stand on a flat, even surface. Check if the stand rocks or tilts. Press gently on different sides to test firmness. Adjust the legs or base to make it steady. Use a level tool if available to confirm balance. Stability keeps the grill secure during cooking and prevents tipping.
Tightening Loose Parts
Inspect all screws, bolts, and nuts carefully. Use the correct tools to tighten each connection. Avoid over-tightening to prevent damage to ceramic or metal parts. Check hinges and handles for secure fitting. Loose parts can cause safety risks and reduce the grill’s lifespan. Tight connections ensure long-lasting durability and safe use.
Maintenance Tips For Longevity
Keeping your ceramic charcoal grill stand in great shape means more grilling seasons ahead. Proper maintenance not only preserves its look but also ensures it stays stable and safe to use. Let’s look at some practical ways to extend the life of your grill stand with regular care.
Cleaning The Stand
After each grilling session, take a few minutes to wipe down your stand. Use a soft cloth or sponge with warm, soapy water to remove grease and food drips. Avoid harsh chemicals that might damage the finish or weaken the materials.
Pay attention to joints and screws where grime can build up. If you notice rust spots starting, gently scrub them with a wire brush and apply a rust-resistant spray to stop it from spreading. Have you checked your grill stand’s underside lately? Dirt and debris often gather there unnoticed.
Protecting From Weather
Your ceramic grill stand faces the elements, so protecting it from weather is crucial. A waterproof cover is a simple, effective way to shield it from rain and snow. Make sure the cover fits snugly but allows some airflow to prevent moisture buildup underneath.
If your grill stand is on a porch or patio, consider moving it to a sheltered spot during extreme weather. Storing it indoors during winter months can prevent metal parts from corroding and ceramic components from cracking. Have you ever left your grill out during a storm? That’s a quick way to shorten its lifespan.
Frequently Asked Questions
How Do I Start Assembling A Ceramic Charcoal Grill Stand?
Begin by unpacking all parts and checking the instruction manual. Identify each component and lay them out. Start with attaching the legs to the base frame securely using provided bolts and tools for stability.
What Tools Are Needed For Grill Stand Assembly?
Typically, you need a wrench, screwdriver, and sometimes an Allen key. These tools help fasten bolts and screws tightly. Check your grill’s manual to confirm specific tools required for your model.
How Do I Ensure The Stand Is Stable?
Make sure all bolts and screws are tightened firmly. Assemble on a flat, even surface to avoid wobbling. Test stability by gently shaking the stand before placing the grill on it.
Can I Assemble The Grill Stand Alone?
Yes, most ceramic charcoal grill stands are designed for one-person assembly. However, having a second person can speed up the process and help align parts better.
Conclusion
Assembling your ceramic charcoal grill stand is simple with the right steps. Take your time and follow each instruction carefully. Double-check all parts fit securely for safety and stability. Once assembled, your grill stand will support enjoyable cooking sessions. Enjoy grilling delicious meals outdoors with confidence.
Regularly inspect the stand to keep it sturdy and safe. A well-built stand makes grilling easier and more fun. Now, you are ready to fire up your ceramic charcoal grill!
