
Are you ready to fire up your backyard cooking but feeling stuck with that new gas grill in its box? Assembling your gas grill might seem tricky at first, but with the right steps, you can have it ready to go faster than you think.
Imagine the smell of sizzling food and the joy of grilling your favorite meals—all starting with putting your grill together the right way. In this guide, you’ll find simple, clear instructions that make assembly easy and stress-free. Keep reading, and you’ll be flipping burgers on your own perfectly built gas grill before you know it!
Gather Required Tools
Before you dive into assembling your gas grill, gathering the right tools is essential. Having everything at hand saves time and frustration during the build process. It also ensures you don’t stop midway searching for a screwdriver or wrench.
Basic Hand Tools You’ll Need
Most gas grills require a few common hand tools. A Phillips head screwdriver and a flathead screwdriver are almost always needed.
- Adjustable wrench:Perfect for tightening bolts of various sizes.
- Pliers:Useful for gripping and bending metal parts.
- Allen wrenches:Often included with your grill, but having a set on hand helps.
Do you have a toolbox ready with these basics? If not, consider buying a small set before you begin.
Specialized Tools That Might Help
Some grill models ask for less common tools. A socket wrench set can speed up bolt tightening significantly.
In my first grill assembly, I struggled without a socket wrench and wasted time using a regular wrench. Investing in this tool made later projects smoother.
- Socket wrench set:Fits many bolt sizes and makes work faster.
- Wire cutters:Useful if you need to trim zip ties or packaging.
- Level:Ensures your grill stands evenly for safer cooking.
Checking Your Grill’s Instruction Manual
Every grill model is different, so check your instruction manual for specific tool recommendations. Sometimes, manufacturers include unique screws or parts that require special tools.
Have you skimmed your manual yet? It can save you from surprises and last-minute store runs.
Gathering the right tools before starting your gas grill assembly makes the process smoother and more enjoyable. What tools do you already have ready for your next project?
Unpack And Check Parts
Start assembling your gas grill by carefully unpacking all parts. This step sets the foundation for smooth assembly and safe use. Handle each piece gently to avoid damage.
Take time to check every component against the parts list. Missing or broken parts can cause problems later. Early detection saves time and frustration.
Prepare A Clean Workspace
Clear a large, flat area for unpacking and organizing. A clean space helps keep track of small parts. Lay down a soft cloth or cardboard to protect pieces.
Open The Box Carefully
Use a box cutter or scissors to open the packaging. Avoid cutting too deep to prevent scratching or cutting parts inside. Remove packing materials slowly and store them for later.
Identify And Sort Parts
Spread out all parts and group similar items together. Check the grill body, burners, grates, screws, and tools. Organize small parts in containers or bowls to avoid losing them.
Use The Parts List
Consult the instruction manual’s parts list. Tick off each item to confirm presence and condition. Note any missing or damaged parts before starting assembly.
Inspect Each Part For Damage
Look for dents, scratches, or cracks on all pieces. Make sure screws and bolts are not bent or stripped. Report damaged parts to the manufacturer promptly.
Assemble The Frame
Assembling the frame of your gas grill is where the structure starts to take shape. This part sets the foundation for everything else, so taking your time here pays off. Think of it as building the skeleton that supports all the grilling action to come.
Attach Legs And Wheels
Start by attaching the legs to the main body of your grill. Most grills come with pre-drilled holes and bolts that fit perfectly, so align everything carefully before tightening.
Wheels usually go on two of the legs to make moving your grill easier. Be sure to secure the wheels firmly—loose wheels can cause wobbling or make the grill unstable.
Have you noticed how much easier it is to move your grill around once the wheels are properly attached? It’s a small detail that makes a big difference during cookouts.
Secure Side Shelves
Side shelves add valuable workspace for your utensils, plates, and ingredients. Attaching them involves sliding the shelves into place and securing them with screws or bolts.
Make sure the shelves are level and firmly attached; wobbly shelves can be frustrating and unsafe when holding hot items.
Think about your grill setup—do you prefer more space for prep or for holding tools? Adjusting the shelves accordingly can enhance your grilling experience.

Credit: www.youtube.com
Install Burners And Heat Shields
Assemble the gas grill by installing burners and heat shields correctly. Position burners securely over the gas outlets. Place heat shields above the burners to distribute heat evenly.
Assembling your gas grill can feel like piecing together a culinary puzzle, but it’s an adventure worth undertaking. One of the critical steps in this journey is installing the burners and heat shields. This stage is vital for ensuring even heat distribution and maximizing the flavor of your grilled dishes. Let’s dive into the specifics to make sure you get this right, ensuring your grilling experience is smooth and rewarding.Gather Your Tools And Materials
Before you start, ensure you have all the necessary tools at hand. Typically, a screwdriver and adjustable wrench are essential. Check your grill’s manual for any additional items specific to your model.Identify The Burner Position
Locate where your burners are meant to sit. Most grills have designated slots or brackets for the burners. This is crucial for proper alignment and functionality.Secure The Burners In Place
Carefully place each burner into its designated slot. Ensure they are seated firmly to prevent any movement during grilling. Use screws or clips provided to secure them tightly.Attach The Heat Shields
Heat shields protect the burners and help in even heat distribution. Position them directly over the burners. Ensure there’s no gap between the shield and the burner to avoid uneven cooking.Check For Proper Alignment
After installation, check that everything is aligned correctly. Misalignment can lead to inefficient cooking or even damage your grill. A quick visual inspection can save you from future hassles.Test The Setup
Once everything is installed, conduct a test run. Light the grill and observe if the burners and shields function as expected. This step ensures your installation is successful and safe. Installing the burners and heat shields correctly can make a significant difference in your grilling experience. Have you considered the impact of a well-aligned burner on your grilling results? Taking these steps ensures your grill is ready to deliver mouthwatering meals with consistent heat every time.Connect The Gas Supply
Connecting the gas supply is a crucial step in assembling your gas grill. It ensures a safe and steady flow of fuel, allowing your grill to operate efficiently. Taking the time to do this correctly can save you from potential hazards and improve your cooking experience.
Attach Regulator And Hose
Start by securely attaching the regulator to the propane tank’s valve. The regulator controls the gas pressure, so it must fit tightly to avoid leaks.
Next, connect the hose from the regulator to the grill’s gas inlet. Make sure the hose is free from cracks or damage before attaching.
Tighten all connections by hand first, then use a wrench to ensure they are snug but not over-tightened. Over-tightening can damage the fittings and cause leaks.
Check For Gas Leaks
After connecting everything, it’s important to test for gas leaks. Mix a solution of equal parts water and dish soap in a spray bottle.
Spray the solution generously on all connection points, including the regulator, hose, and valves. Turn on the gas supply slowly—if you see bubbles forming, it means there’s a leak.
Never ignore bubbles or try to fix leaks by tightening alone. Instead, turn off the gas, disconnect, inspect the parts, and replace any faulty components.

Credit: www.youtube.com
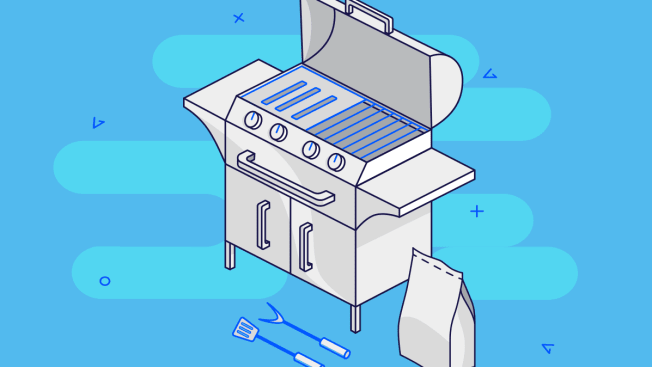
Mount Cooking Grates And Accessories
Mounting the cooking grates and accessories is a crucial part of assembling your gas grill. This step brings your grill closer to being ready for that first delicious barbecue. Proper placement ensures even cooking and easy access to all the features your grill offers.
Place Cooking Grates
Start by locating the cooking grates that usually come in cast iron or stainless steel. These grates should fit snugly into the grill’s frame without wobbling or gaps. If your grates have a porcelain coating, handle them gently to avoid chipping.
Slide each grate into its designated slot or support ledge inside the grill body. Check that the grates are level and stable before moving on. You want to avoid any shifting while cooking, which can cause uneven heat distribution.
Ever noticed flare-ups that ruin your food? Properly seated cooking grates help minimize that risk by ensuring consistent contact with the heat source below. Take your time here—it makes a big difference in your grilling experience.
Install Side Burner And Other Add-ons
Side burners and other add-ons like warming racks or rotisserie kits add versatility to your grill. These parts usually require attaching brackets or screws according to the manufacturer’s instructions. Make sure you have the right tools handy before starting this step.
Position the side burner so it aligns perfectly with its gas connection and mounting points. Tighten all screws securely but avoid overtightening to prevent stripping the threads. For accessories like warming racks, slide or clip them into place as specified.
Have you ever struggled with accessories that feel loose or unstable? Double-checking these connections ensures safety and performance when you’re cooking. These small details can turn a good grilling session into a great one.
Test The Grill
Testing the grill is an important part of assembly. It ensures everything works safely and correctly. This step helps you spot any issues before cooking. Always test the grill outside in an open space. Check for leaks, proper ignition, and flame control. Use this time to get familiar with how the grill operates.
Ignite Burners
Start by turning the gas supply on. Use the ignition button or a long lighter to light the burners. Light each burner one at a time. Watch for a steady flame without flickering or sputtering. If a burner does not ignite, turn it off and try again after a few seconds. Listen for any unusual sounds like hissing, which may indicate a gas leak. Always keep a safe distance during ignition.
Adjust Flame Settings
Once burners are lit, adjust the flame control knobs. Turn knobs slowly from low to high settings. Flames should be blue with yellow tips. Flames that are mostly yellow or orange may mean poor air mixture. Flames must not be too high to avoid flare-ups. Adjust each burner to match in size and heat. This helps cook food evenly and saves fuel.

Credit: www.youtube.com
Safety Tips And Maintenance
Safety and maintenance are key to enjoying your gas grill for years. Keeping your grill clean and stored properly prevents accidents and extends its life. Regular checks help spot problems early and keep cooking safe.
Regular Cleaning
Clean your grill after every use. Remove food residue to stop flare-ups and rust. Use a grill brush to scrub grates while warm. Empty the drip tray to prevent grease fires. Wash the exterior with mild soap and water. Check burner tubes for blockages and clear them gently.
Proper Storage
Store your grill in a dry, covered place. Use a grill cover to protect it from rain and dust. Disconnect the propane tank when not in use for long periods. Keep the tank upright and away from heat sources. Check hoses and connections regularly for leaks. Replace damaged parts immediately to avoid gas leaks.
Frequently Asked Questions
How Long Does It Take To Assemble A Gas Grill?
Assembling a gas grill usually takes between 30 minutes to 2 hours. The time depends on your experience and the grill’s complexity. Reading the manual carefully helps speed up the process and ensures correct assembly.
What Tools Are Needed To Assemble A Gas Grill?
Common tools include a screwdriver, adjustable wrench, and pliers. Some grills may require additional tools like hex keys. Always check the instruction manual for specific tool requirements before starting assembly.
How Do I Connect The Propane Tank Safely?
First, ensure the gas valve is off. Attach the regulator hose securely to the propane tank. Check for leaks using soapy water around connections. Never connect or disconnect the tank near open flames.
Can I Assemble A Gas Grill Alone?
Yes, many grills can be assembled solo, but having a helper is useful. Assistance helps with lifting heavy parts and holding components steady. Always prioritize safety and follow the manual instructions carefully.
Conclusion
Assembling your gas grill can be simple and quick. Follow the steps carefully and take your time. Check each part and tighten all screws securely. Test the grill for leaks before using it. Clean your grill after every use to keep it working well.
Enjoy cooking outdoors with your newly assembled gas grill. Practice safety and have fun grilling your favorite meals. You’re ready for great barbecues with friends and family.
