
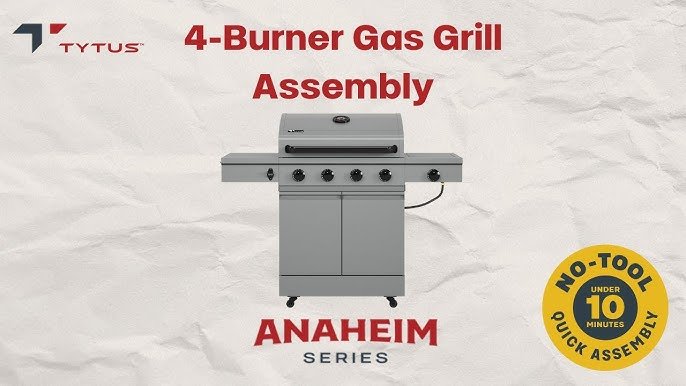
Ready to fire up your backyard with a brand-new 4-burner gas grill? Before you can enjoy those sizzling steaks and juicy burgers, you need to put it together—and that can feel tricky.
But don’t worry, you’re in the right place. This step-by-step guide will make assembling your grill simple and stress-free. Follow along, and you’ll have your grill ready to go in no time, impressing your family and friends with your cooking skills.
Let’s get started and turn your outdoor space into the ultimate grilling zone!

Credit: www.amazon.com
Gather Your Tools
Before you dive into assembling your 4-burner gas grill, gathering the right tools is key. Having everything ready saves time and prevents frustration during the build. Missing a single tool can stop your progress and leave you guessing what to do next.
Essential Tools For Assembly
Start by collecting these basic tools that almost every grill assembly requires:
- Adjustable wrench:Perfect for tightening bolts and fittings of various sizes.
- Screwdrivers:Both Phillips and flathead screwdrivers are often needed for screws on panels and parts.
- Allen wrenches:Many grills include hex bolts, so having a set of these is essential.
- Socket set:Useful for securing nuts and bolts firmly.
Do you already have these in your toolbox, or will you need to pick some up?
Additional Helpful Items
Beyond the basics, some extra items can make the process smoother and safer:
- Work gloves:Protect your hands from sharp edges and hot spots.
- Protective eyewear:Important if you’re working in tight spots or dealing with metal parts.
- Flashlight or good lighting:Ensures you can see screws and connections clearly.
- Measuring tape:Handy to confirm proper distances and alignment.
Have you ever struggled assembling something because of poor lighting or missing gloves? These small preparations make a big difference.
Organizing Your Workspace
Before starting, clear a large, flat surface to lay out all parts and tools. This organization prevents losing small screws and helps you follow the instruction steps easily.
Using small containers or trays for screws and bolts keeps everything in place. This simple habit saved me hours on a past project when I didn’t have to search for tiny pieces.
Are you ready to create a workspace that supports smooth assembly and avoids interruptions?
Check All Parts
Before you dive into assembling your 4-burner gas grill, it’s crucial to check all parts carefully. Missing or damaged components can turn a simple setup into a frustrating experience. Taking a few extra minutes to verify everything upfront will save you time and headaches later on.
Identify Each Part Against The Manual
Start by laying out all parts on a clean surface. Use the parts list from your manual as a checklist. Compare each item to ensure nothing is missing or extra. Sometimes small screws or washers can be easy to overlook.
When I assembled my first grill, I found a tiny spring missing that delayed the process. Checking parts beforehand could have saved me an extra trip to the hardware store. Don’t skip this step—your grill’s performance depends on it.
Inspect For Damage Or Defects
Look closely at each part for dents, cracks, or rust spots. Damaged parts can compromise safety and functionality. Pay special attention to gas lines and burners since any defect here is a potential hazard.
If something looks off, contact the seller immediately rather than trying to fix it yourself. A smooth assembly starts with parts that are in perfect condition. Have you ever tried to force a bent piece into place? It rarely ends well.
Organize Parts By Assembly Steps
Once you’ve confirmed all parts are present and intact, group them by the stages of assembly. This simple organization helps you work faster and reduces confusion. For example, keep burner components together, and separate screws and bolts by size.
This approach turned my assembly from chaotic to efficient. Instead of scrambling for the right bolt, I had everything ready at hand. How much time could you save by organizing before you start?
Verify Tools Required Are Available
Check your manual for the tools needed to assemble your grill. Common tools include screwdrivers, wrenches, and sometimes a drill. Make sure you have these tools ready before beginning.
In my experience, missing a necessary tool mid-assembly can stall progress and cause frustration. Have your toolbox prepared so you can focus on putting your grill together smoothly.
Attach The Frame
Attaching the frame is a crucial part of assembling your 4-burner gas grill. The frame holds the entire grill structure together and provides stability. Taking time to secure it properly ensures safety and durability during cooking.
The frame usually comes in several large pieces. Aligning them correctly makes the process easier. Use the instructions and check all parts before starting.
Prepare The Workspace And Tools
Clear a flat area to work on. Gather all tools like screwdrivers, wrenches, and screws. Having everything ready speeds up assembly and avoids frustration.
Position The Main Frame Pieces
Lay out the frame parts on the ground. Match holes and slots as shown in the manual. Make sure the frame is right side up before attaching.
Secure Frame Parts With Screws
- Insert screws into the aligned holes.
- Tighten screws partially to hold pieces in place.
- Double-check alignment before fully tightening.
- Use a wrench or screwdriver for a firm fit.
Attach Legs And Support Bars
Connect the legs to the frame using bolts. Attach support bars for extra strength. Ensure all bolts are tight to prevent wobbling.
Check Stability And Adjust
Once assembled, gently shake the frame. Tighten any loose bolts or screws. Confirm the frame stands firmly and evenly on the ground.

Credit: www.youtube.com
Install The Burners
Place each burner carefully into its slot, making sure it fits securely. Connect the burners to the gas valves tightly to avoid leaks. Check all connections before moving on to the next step.
Assembling a 4-burner gas grill can seem daunting, but with a clear guide, it’s a task you can tackle confidently. Installing the burners is a crucial step that ensures your grill operates efficiently and safely. It’s not just about placing metal tubes; it’s setting the stage for countless delicious meals. Whether you’re a seasoned grill master or a newbie, understanding the installation process can make all the difference in your grilling experience. So, let’s dive into the essential steps to install the burners correctly and get your grill fired up!Gather Your Tools And Parts
Before you start, make sure you have all the necessary tools and parts. You’ll typically need a screwdriver, a wrench, and the burner tubes. Check the grill’s manual to ensure you have everything needed. Having everything at hand will save you time and prevent unnecessary interruptions.Align The Burners Correctly
Position each burner in its designated slot. Ensure the burners’ ends fit securely into the gas valve openings. A secure fit is crucial to prevent gas leaks and ensure even heating.Secure The Burners
Use screws or clips provided to fasten the burners in place. This step prevents movement and ensures stability during operation. Double-check each burner to confirm they are firmly attached. A loose burner can lead to uneven cooking or even safety hazards.Connect The Ignition System
Attach the ignition wires to the burners if your grill model includes an ignition system. This connection is essential for easy and safe lighting. Test the ignition to ensure a spark is created. If it doesn’t spark, recheck the connections and adjust as necessary.Test For Gas Leaks
Before using the grill, conduct a leak test. Apply soapy water to the connections and check for bubbles when the gas is on. If you notice bubbles, tighten the connections and test again. Safety first—never skip this step.Final Check
Inspect each burner to ensure they’re aligned and secured. Turn on the gas and ignite the burners to verify they light evenly. Adjust if necessary to achieve consistent flames across all burners. By following these steps, you ensure a safe and enjoyable grilling experience. Now, are you ready to fire up your new 4-burner gas grill and start cooking?Connect The Gas Lines
Connecting the gas lines is a crucial part of assembling your 4-burner gas grill. It ensures a safe and efficient flow of gas, which directly affects your grilling experience. Taking the time to connect the lines properly helps avoid leaks and potential hazards.
Check The Gas Supply And Regulator
Start by inspecting your gas supply, whether it’s a propane tank or a natural gas line. Make sure the tank is turned off before you begin.
Next, locate the gas regulator. This device controls the pressure of the gas entering the grill and must be compatible with your grill model. A mismatched regulator can cause poor performance or safety risks.
Attach The Gas Hose Securely
Connect the hose from the regulator to the grill’s gas inlet. Hand-tighten the connection first to avoid cross-threading.
Use a wrench to snug the connection, but don’t overtighten. Over-tightening can damage the fittings and cause leaks.
Test For Gas Leaks Safely
After connecting, always check for leaks before lighting the grill. Mix a solution of dish soap and water, then apply it to the connections with a brush or spray bottle.
If bubbles appear, this indicates a gas leak. Turn off the gas immediately and tighten the connections or replace faulty parts.
Have you ever skipped this step and noticed a strong gas smell? It’s a sign that testing is not optional—it’s essential for your safety.
Attach The Cooking Grates
Attaching the cooking grates is a key step in assembling your 4-burner gas grill. These grates hold the food and distribute heat evenly. Proper placement ensures safe and efficient grilling.
Cooking grates usually come made of cast iron or stainless steel. They are heavy and sturdy. Handle them carefully to avoid damage or injury.
Prepare The Cooking Grates For Installation
- Clean the grates with warm soapy water to remove factory oils.
- Dry them completely to prevent rust.
- Check for any protective coatings and remove if needed.
Position The Grates On The Grill Frame
- Locate the support ledges inside the grill body.
- Align the grates so they fit snugly on these ledges.
- Ensure the grates do not wobble or shift when placed.
Secure The Cooking Grates
- Some grills have clips or brackets to hold grates in place.
- Attach these if your model includes them.
- Test stability by gently pressing on the grates.
Set Up The Control Panel
Setting up the control panel on your 4-burner gas grill is a crucial step that ensures safe and efficient operation. This part connects the burners to the gas source and lets you control the heat during cooking. Taking your time here will help you avoid leaks and make grilling a smooth experience.
Identify And Organize The Control Knobs
Start by laying out all the control knobs and related hardware. Each knob usually corresponds to a specific burner, so check the manual to match them correctly. Organizing these parts prevents confusion and speeds up the assembly.
Attach The Control Panel To The Grill Frame
Line up the control panel with the grill’s front frame, making sure the holes for the knobs are aligned. Use the screws provided to secure it firmly. A loose panel can cause problems with burner connections and gas flow.
Connect The Gas Lines To The Valves
Carefully attach the gas lines from the burners to the valves behind the control knobs. Tighten the fittings with a wrench but avoid over-tightening, which can damage threads. Check each connection for snugness to prevent gas leaks.
Install The Control Knobs
Push each knob onto its respective valve stem on the control panel. They should fit snugly and turn smoothly without wobbling. If a knob feels loose or sticks, it might be misaligned or need adjustment.
Test The Control Panel For Leaks
Before lighting the grill, apply a soapy water solution to all gas connections on the control panel. Turn the gas on slightly and watch for bubbles, which indicate leaks. If you see bubbles, tighten connections or replace faulty parts immediately.
Have you ever skipped a detailed check on your grill’s control panel only to face issues later? Ensuring each connection is secure can save you from frustrating and dangerous problems. How confident do you feel about handling gas connections after this?
Install The Side Shelves
Installing the side shelves on your 4-burner gas grill adds valuable workspace. These shelves hold utensils, plates, and condiments. Proper installation ensures stability and safety during cooking. Follow clear steps for a smooth assembly.
Prepare The Side Shelf Components
Start by unpacking all side shelf parts. Check for screws, brackets, and shelf panels. Lay them out on a clean surface. Confirm nothing is missing before assembly.
Attach The Mounting Brackets To The Grill Body
Locate the side panel of the grill where shelves will attach. Align the mounting brackets with pre-drilled holes. Use the provided screws and a screwdriver. Tighten screws firmly but avoid over-tightening.
Secure The Side Shelves Onto The Brackets
Lift the side shelf and place it on the mounted brackets. Make sure it fits snugly and aligns with the holes. Insert screws through the shelf into the brackets. Tighten all screws evenly to prevent wobbling.
Check The Stability Of The Installed Shelves
Gently press down on the shelves to test firmness. They should not move or shake. If loose, double-check screw tightness. Adjust as needed for a secure fit.
Test For Leaks
Testing for leaks is a vital safety step after assembling your 4-burner gas grill. Gas leaks can cause dangerous fires or explosions. Detecting leaks early protects you and your home.
This test is simple and uses common household items. It helps find leaks in gas connections and hoses. Never skip this step before using your grill.
Prepare A Soapy Water Solution
Mix water with liquid dish soap in a spray bottle or bowl. The soap bubbles show where gas escapes. Use enough soap to create bubbles easily.
Apply The Solution To Gas Connections
Turn off the gas supply before applying the solution. Spray or brush the soapy water on all gas connections and hose joints. Cover every joint and fitting carefully.
Turn On The Gas And Watch For Bubbles
Slowly open the gas valve. Look closely at the areas with soap solution. Small bubbles form if there is a leak. Do not light the grill during this test.
Fix Any Leaks Immediately
If bubbles appear, tighten the connections or replace damaged parts. Repeat the test until no bubbles form. Only use the grill once all leaks are fixed.
Perform Initial Burn-in
Run the grill on high heat for 15 minutes to burn off any leftover oils or residue. This process ensures safe and clean grilling before your first use. Watch for even flames and no unusual smells during the burn-in.
Performing an initial burn-in for your 4-burner gas grill is essential. This process ensures any residues from manufacturing burn off. It also helps maintain the grill’s longevity. Follow these easy steps to perform a successful burn-in.Inspect The Grill Components
Before starting, check all parts of the grill. Make sure everything is assembled correctly. Ensure all burners and knobs work properly.Connect The Gas Supply
Attach the gas tank securely to the grill. Check for any gas leaks using soapy water. Ensure all connections are tight and safe.Light The Burners
Turn all burners to high. Use the igniter to light each burner. Watch for a steady, blue flame. This indicates proper gas flow.Close The Lid
Once all burners are lit, close the grill lid. This helps build up heat inside the grill. It also ensures even burning of residues.Maintain High Heat
Keep the burners on high for 15 to 20 minutes. This burns off any oils and coatings. It’s a crucial step for safe cooking later.Let The Grill Cool
After the burn-in, turn off the burners. Allow the grill to cool down completely. This ensures safe handling post burn-in.Check For Any Issues
Once cool, inspect the grill again. Look for any unusual signs or smells. Address any issues before using the grill for cooking.
Credit: www.youtube.com
Frequently Asked Questions
How Long Does It Take To Assemble A 4-burner Gas Grill?
Assembly usually takes 1 to 2 hours, depending on your experience. Following the manual carefully speeds up the process.
What Tools Are Needed To Assemble A 4-burner Gas Grill?
Basic tools like screwdrivers, wrenches, and pliers are needed. Some grills may include a special tool in the package.
How Do I Connect The Gas Supply Safely?
Ensure the gas supply is off before connecting. Use a soap-water solution to check for leaks after attachment.
Can One Person Assemble A 4-burner Gas Grill?
Yes, one person can assemble it, but having help makes the process easier and faster.
Conclusion
Assembling a 4-burner gas grill can be simple and quick. Follow the steps carefully and take your time. Check all parts before starting to avoid problems. Use the right tools for better results. Soon, you will enjoy grilling your favorite meals outdoors.
Practice makes perfect, so don’t worry if it takes a little time. Your new grill will bring many fun cooking moments. Now, get ready to fire up and enjoy great food with family and friends.
