
If you want your gas grill to cook food perfectly and last longer, keeping your grill grates clean and well-seasoned is key. You might think cleaning grill grates is a hassle, but with the right steps, it can be quick and simple.
Imagine juicy steaks and crisp veggies with those perfect grill marks every time—clean grates make that happen. In this guide, you’ll discover easy ways to clean and season your gas grill grates so your next barbecue is a hit. Ready to make your grill shine and improve your cooking?
Let’s dive in!
Choosing The Right Grill Grates
Choosing the right grill grates affects your cooking and cleaning experience. Different materials offer unique benefits and challenges. Knowing these helps pick the best grates for your grill.
Porcelain-coated Grates
Porcelain-coated grates have a smooth surface that stops food from sticking. They are easy to clean with a brush or sponge. These grates resist rust but can chip if dropped or hit hard. They hold heat well but not as long as cast iron.
Stainless Steel Grates
Stainless steel grates resist rust and corrosion. They heat evenly and are strong for heavy use. These grates clean up easily with a wire brush. They do not retain heat as much as cast iron but offer quick temperature changes.
Cast Iron Grates
Cast iron grates keep heat for a long time, giving great sear marks. They need regular seasoning with oil to avoid rust. Cleaning requires more care to protect the seasoning layer. Cast iron grates offer superior heat retention but can be heavy.

Credit: americanmadegrills.com
Essential Tools For Cleaning
Cleaning and seasoning gas grill grates requires the right tools. These tools help remove grease, food bits, and rust. They also prepare the grill for seasoning. Using proper equipment makes the job safer and easier. Keep these essentials ready before you start.
Grill Brushes And Scrapers
Grill brushes remove stuck-on food and grease. Choose brushes with stiff bristles made of stainless steel or brass. Scrapers help get rid of tough grime. Use a scraper with a flat edge for hard spots. Together, they clean grates effectively and quickly.
Cleaning Solutions
Cleaning solutions dissolve grease and dirt from grates. Use a mix of warm water and mild dish soap. For deeper cleaning, try vinegar or baking soda. Avoid harsh chemicals that can damage the grill. These solutions keep grates clean without harming materials.
Protective Gear
Protective gear keeps you safe during cleaning. Wear heat-resistant gloves to avoid burns. Use safety glasses to shield your eyes from debris. Long sleeves help protect your arms. Proper gear makes cleaning safer and more comfortable.
Step-by-step Cleaning Process
Cleaning gas grill grates keeps your grill safe and tasty. Follow this step-by-step process for best results. Each step helps remove grease and food bits. Regular cleaning also extends your grill’s life. Let’s dive into the easy cleaning routine.
Preheating The Grill
Turn on your gas grill and close the lid. Heat the grill to a high temperature for 10-15 minutes. This burns off leftover food and grease. It also loosens stuck-on residue. Always preheat before cleaning for easier scraping.
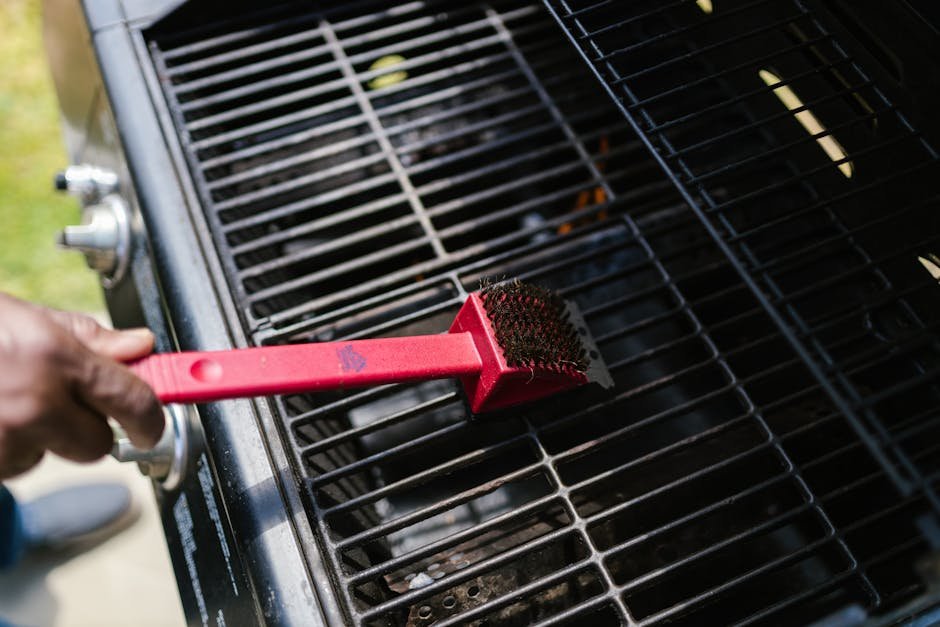
Scraping Off Residue
Use a grill brush or scraper to clean the hot grates. Scrape all sides to remove charred bits and debris. Be careful not to burn yourself on hot metal. Focus on areas with heavy buildup. This step prepares the grates for a deep clean.
Soaking And Washing Grates
Remove the grates from the grill once cooled. Soak them in warm, soapy water for 20-30 minutes. Use a sponge or scrubber to clean them thoroughly. Pay attention to corners and crevices. This removes grease and stuck food remains.
Rinsing And Drying
Rinse the grates with clean water to remove soap. Dry them completely with a cloth or let air dry. Moisture can cause rust on metal grates. Once dry, apply a light coat of cooking oil. This protects the grates and seasons them for next use.

Credit: www.reddit.com
Seasoning Grill Grates
Seasoning grill grates is essential for maintaining them in top condition. It creates a non-stick surface and prevents rust. Regular seasoning ensures better cooking results and prolongs grill life.
Choosing The Right Oil
Selecting the appropriate oil is crucial for effective seasoning. Choose oils with a high smoke point. Examples include canola, grapeseed, or vegetable oil. They withstand high heat without burning.
Applying Oil Correctly
Use a clean cloth or paper towel to apply oil. Coat the grates evenly, ensuring every part is covered. Avoid excessive oil to prevent flare-ups during grilling.
Heating For Seasoning
Preheat the grill to a high temperature. This helps the oil bond with the metal. Heat the grill for about 15 minutes. The oil should create a protective layer.
Repeating The Process
Seasoning should be repeated regularly. Aim to season the grates after every few grilling sessions. This maintains the non-stick surface and protects against rust.
Maintenance Tips For Longevity
Keeping your gas grill grates in top shape is key to enjoying great meals season after season. Proper maintenance not only ensures better cooking results but also extends the life of your grill. Let’s dive into practical tips that help you protect your investment and keep those grates performing like new.
Regular Cleaning Schedule
Cleaning your grill grates regularly prevents food buildup and grease that can cause flare-ups. After each use, while the grates are still warm, use a stiff wire brush to scrape off any residue. A quick clean like this saves you time and effort when doing a deeper clean later.
Once a month, give your grates a thorough wash with warm soapy water and a sponge or cloth. Rinse well and dry completely before putting them back. This routine keeps grime from turning into stubborn carbon deposits.
Avoiding Rust And Corrosion
Rust can ruin your grill grates quickly, especially if they’re made of cast iron or steel. After cleaning, apply a thin layer of cooking oil to your grates to create a protective barrier. This simple step blocks moisture and keeps rust at bay.
Also, inspect your grates regularly for any signs of rust spots or peeling. If you catch rust early, you can scrub it off gently with a steel wool pad and re-season the grates with oil. Waiting too long might mean you need to replace them altogether.
Storage Recommendations
Where you store your grill impacts how long your grates last. If possible, keep your grill covered with a weatherproof grill cover when not in use. This shields the grates from rain, snow, and dust that accelerate wear and tear.
During the off-season, consider removing the grates and storing them in a dry place indoors. This extra care can prevent corrosion and make your grill ready to go when grilling season returns. Have you ever found rusty grates after a winter outside? Avoid that frustration with proper storage!

Credit: www.reddit.com
Troubleshooting Common Issues
Cleaning and seasoning your gas grill grates can sometimes bring unexpected challenges. These common issues can affect your grill’s performance and the taste of your food. Understanding how to troubleshoot them helps you maintain a smooth grilling experience and avoid frustration.
Stubborn Rust Spots
Rust on grill grates often appears when moisture lingers too long. Even after cleaning, some spots might stay stubborn. To tackle rust, try scrubbing with a steel wool pad or a wire brush dipped in a mixture of baking soda and water.
If rust persists, apply a thin layer of vegetable oil and heat the grill for 15 minutes. This helps create a protective coating. Have you noticed rust forming faster in certain weather? Storing your grill covered and in a dry place can prevent rust buildup.
Uneven Heating
Uneven heating can ruin your grilling plans by cooking food inconsistently. Check if your burners are clogged with grease or debris, which blocks the gas flow. Clean them carefully using a brush or compressed air to restore even flames.
Sometimes, the grill grates themselves might be warped or not seated correctly. Try repositioning or replacing damaged grates to fix hot and cold spots. Ever felt frustrated by one side cooking faster? Regular maintenance and inspection can save you from that headache.
Flare-ups And Food Sticking
Flare-ups often happen when fat drips onto hot burners, causing sudden flames. To reduce flare-ups, trim excess fat from meat and keep a spray bottle of water nearby for quick control. Seasoning the grates properly also helps create a non-stick surface.
Sticky food usually means the grates aren’t hot enough or not oiled well. Preheat your grill for at least 10 minutes and brush the grates with high-smoke point oil before placing food. Have you tried flipping too soon? Let your food sear properly before turning to avoid sticking.
Frequently Asked Questions
How Often Should I Clean Gas Grill Grates?
Clean gas grill grates after every use to prevent buildup. Deep clean them monthly to remove stubborn residue and rust. Regular cleaning ensures better grilling results and prolongs grill life.
What Is The Best Way To Season Gas Grill Grates?
Heat the grill, then apply a thin layer of high-smoke point oil. Let the oil bake on the grates for 15 minutes. This prevents rust and creates a non-stick surface for cooking.
Can I Use Soap To Clean Gas Grill Grates?
Avoid soap as it can leave residue and affect flavor. Instead, use a grill brush or scraper for debris. For tough spots, warm water and a mild detergent can be used sparingly.
Why Is Seasoning Gas Grill Grates Important?
Seasoning protects grates from rust and corrosion. It also creates a natural non-stick surface, improving food release and flavor. Regular seasoning extends the grill’s lifespan and enhances cooking performance.
Conclusion
Cleaning and seasoning gas grill grates keeps them in good shape. It helps food cook evenly and stops sticking. Regular care also stops rust and damage. Use simple tools and safe products for cleaning. Seasoning adds a protective layer to the grates.
This makes grilling easier and tastier. Keep your grill ready for your next cookout. A clean grill means better flavor and longer use. Take a few minutes after cooking to clean and season. Your grill will thank you with every meal.
