
Are you ready to transform your backyard into a mouthwatering barbecue haven? Learning how to assemble an offset smoker is the first step to unlocking rich, smoky flavors that will impress your family and friends.
This guide breaks down the process into simple, clear steps so you can set up your smoker with confidence—even if you’re new to outdoor cooking. By the end, you’ll have everything you need to start smoking like a pro and create unforgettable meals right at home.
Keep reading, and let’s get your offset smoker ready to fire up!
Credit: www.homedepot.com
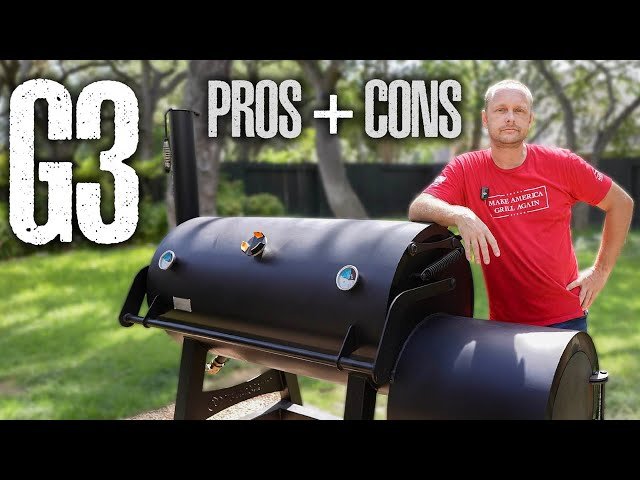
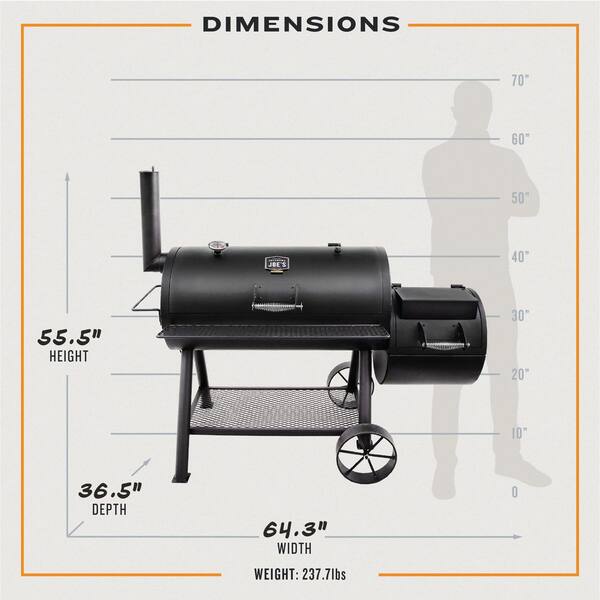
Choosing The Right Offset Smoker
Choosing the right offset smoker sets the stage for great backyard BBQs. It affects cooking style, flavor, and ease of use. Understanding different types and key features helps pick the best fit for your needs.
Types Of Offset Smokers
Offset smokers come in several styles. Each suits different cooking preferences and backyard sizes.
- Traditional Offset Smokers:Classic design with a firebox attached to the side. Offers authentic smoky flavor.
- Barrel Smokers:Shaped like a barrel. Compact and often more affordable.
- Reverse Flow Smokers:Has a baffle to direct heat under food. Provides even cooking.
- Vertical Offset Smokers:Taller and slimmer. Saves space and adds style.
Key Features To Look For
Focus on features that improve performance and convenience.
- Build Quality:Thick steel ensures better heat retention and durability.
- Size and Cooking Area:Choose one that fits your backyard and cooking volume.
- Airflow Control:Adjustable vents help regulate temperature.
- Firebox Size:Larger fireboxes maintain heat longer and add fuel flexibility.
- Wheels and Mobility:Wheels make moving the smoker easier.
- Temperature Gauge:A built-in gauge helps monitor cooking heat.

Credit: www.oklahomajoes.com
Preparing Your Workspace
Preparing your workspace is a crucial first step when assembling an offset smoker for your backyard. A well-organized area not only speeds up the process but also keeps you safe and reduces frustration. Taking time to set up properly ensures you can focus on the fun part—building your smoker and getting ready to grill.
Gathering Tools And Materials
Before you start, make sure all the necessary tools and materials are within reach. This includes wrenches, screwdrivers, gloves, and the smoker parts themselves. Having everything on hand prevents constant trips back and forth, which can break your concentration and slow down progress.
- Basic tools:adjustable wrench, socket set, hammer
- Safety gear:gloves, safety glasses
- Smoker parts:firebox, cooking chamber, chimney components, bolts, and screws
- Additional items:lubricant spray for bolts, measuring tape
Think about the size and weight of your smoker parts. Do you have a helper ready to assist with the heavier pieces? Planning ahead here can save you from awkward lifting and potential injury.
Setting Up A Safe Area
Your workspace should be clean, well-lit, and free from clutter. This prevents accidents and makes it easier to find what you need quickly. Outdoor assembly on a flat surface, like a driveway or patio, works best.
Clear away any obstacles, and consider placing a tarp or cardboard underneath to catch small parts that might drop. Avoid windy days to prevent dust or debris from interfering with your work.
- Choose a spot with plenty of space to move around.
- Keep children and pets away during assembly.
- Have a first aid kit nearby just in case.
Are you ready to commit to a safe and organized setup? It might seem like extra effort now, but your future self will thank you when the smoker goes together smoothly and safely.
Unboxing And Inventory Check
Unboxing and Inventory Check Begin by carefully unboxing your offset smoker parts. Ensure all components are present and undamaged.
Unboxing your offset smoker is an exciting first step. It sets the stage for a perfect backyard BBQ experience. A thorough inventory check ensures a smooth assembly process. Let’s dive into the essential steps to get started.Identifying All Parts
Open the box carefully to avoid damaging the contents. Spread everything out on a flat surface. You should see the main chamber, firebox, and chimney. Other parts include grates, legs, and handles. Refer to the manual for a complete parts list. Double-check each item against the list. This ensures you have everything necessary before starting the assembly.Checking For Missing Components
Missing components can delay your assembly. Carefully compare your items with the parts list. Look for small items like screws, nuts, and bolts. These are easy to overlook but crucial for assembly. Contact the manufacturer if anything is missing. Always have spare tools handy to speed up the process.
Credit: www.youtube.com
Assembling The Main Body
Assembling the main body of your offset smoker is a crucial part of the setup process. This step lays the foundation for a sturdy and efficient smoker that can deliver delicious backyard barbecue. Taking your time here ensures everything fits perfectly and functions smoothly.
Attaching The Cooking Chamber
The cooking chamber is the heart of your smoker, where all the magic happens. Start by lining up the chamber with the main frame, making sure the door hinges and handles face the correct direction for easy access.
Use bolts and washers provided in your kit to secure the chamber firmly. Tighten them evenly to avoid any gaps that could let smoke escape.
Don’t rush this part—think about the airflow inside the chamber. Proper sealing here affects temperature control and smoke retention, which are key for perfect results.
Securing The Firebox
The firebox connects directly to the cooking chamber and acts as your heat source. Position it carefully so the openings align well for optimal smoke flow.
Attach it using the bolts supplied, ensuring the joints are tight but not overly forced. You want a solid connection that still allows for some expansion as it heats up.
Have you noticed how a loose firebox can cause inconsistent heat? Securing it properly prevents heat leaks and makes your smoker more efficient.
Installing Grates And Racks
Installing grates and racks is a key part of assembling an offset smoker. These components hold your food and help with even cooking. Correct placement ensures good heat flow and smoke circulation. Proper installation also makes cleaning easier and boosts your smoker’s performance.
Positioning Cooking Grates
Place the cooking grates inside the main chamber carefully. They should sit evenly without wobbling. Most offset smokers have ledges or hooks to hold grates in place. Make sure the grates fit snugly but can slide out for cleaning.
Check the distance between the grates and firebox. This gap controls cooking temperature. Adjust the grates if possible to suit the type of food you cook. Thicker cuts need lower heat, so position grates higher. Thinner foods cook well closer to the fire.
Adding Additional Shelves
Additional shelves or racks increase your cooking space. They are useful for slow cooking or warming food. Install shelves using the provided slots or brackets inside the smoker.
- Ensure shelves are level and stable.
- Use heat-resistant materials to avoid damage.
- Keep shelves clear from direct flames to prevent burning.
Extra racks help organize different foods at once. They also allow better air movement around your food. Place racks so smoke can flow freely between them for even flavor.
Attaching Handles And Accessories
Attaching handles and accessories to your offset smoker is where your project starts to feel like a real backyard centerpiece. These small details make your smoker easier to use and enhance your cooking experience. Let’s break down how to properly mount handles and install thermometers and vents for optimal performance.
Mounting Handles
Handles give you control and safety when moving or opening your smoker. Choose sturdy materials like heat-resistant wood or metal with insulation to avoid burns. Make sure you align the handles where you naturally grip the smoker’s doors or lids.
Use strong bolts or screws designed for outdoor use to secure the handles firmly. Don’t overtighten, or you risk stripping the threads or damaging the smoker’s surface. Test each handle by gently pulling and twisting to check for stability before moving on.
Installing Thermometers And Vents
Thermometers are your eyes inside the smoker. Position the thermometer on the main cooking chamber door at eye level to monitor heat without opening the smoker. If your smoker didn’t come with pre-drilled holes, carefully drill one using the correct bit size for your thermometer’s stem.
Vents control airflow, which directly affects temperature and smoke flow. Install intake vents near the firebox and exhaust vents near the top of the cooking chamber. This setup helps maintain a steady air path, keeping your fire burning clean and your meat flavorful.
Remember to test the vent movement after installation. Smooth operation lets you fine-tune the temperature effortlessly during long cooks. Have you checked if your vents open and close without sticking before lighting the smoker?
Final Adjustments And Safety Checks
After assembling your offset smoker, focus on final adjustments and safety checks. These steps ensure the smoker works well and stays safe during use. Proper tightening and stable setup prevent accidents and improve cooking results.
Tightening Bolts
Check every bolt and nut on the smoker. Use a wrench to tighten them firmly. Loose bolts can cause parts to shift or fall during cooking. Tighten bolts evenly to avoid bending metal parts. Recheck all bolts after tightening to confirm they are secure.
Ensuring Stable Setup
Place the smoker on a flat, solid surface. Uneven ground can make it tip or wobble. Use a level to check stability. Add shims or bricks under the legs if needed. Make sure the smoker does not rock or move easily. A stable setup keeps the smoker safe and steady during use.
Seasoning Your Offset Smoker
Seasoning your offset smoker is a crucial step before you start cooking. It protects the metal from rust and builds a natural non-stick coating inside the smoker. This process also removes any factory oils or residues that could affect the flavor of your food.
Proper seasoning ensures your smoker performs well and lasts longer. It creates a better smoke flow and improves heat retention. Taking time to season your smoker means better tasting BBQ every time.
Cleaning Before Use
Start by removing any dust, grease, or debris inside the smoker. Use warm water and mild soap to wash the cooking chamber and firebox. Avoid harsh chemicals that can leave harmful residues.
Rinse thoroughly and dry all parts completely. Check for loose bolts or parts and tighten them. This step prepares your smoker for a safe and effective burn-in.
Initial Burn-in Process
Light a small fire using hardwood chunks or charcoal. Keep the temperature between 225°F and 250°F (107°C to 121°C). Let the fire burn for 2 to 3 hours to cure the metal.
During this time, smoke will build up and coat the interior surfaces. This forms the protective seasoning layer. Avoid opening the smoker too often to keep the heat steady.
After the burn-in, let the smoker cool naturally. Repeat the burn-in process once more for best results. Your offset smoker will now be ready for delicious backyard BBQ sessions.
Tips For Efficient Smoking
Efficient smoking depends on control and choice. Keeping steady heat and selecting the right wood shapes the flavor and texture of your food. These tips help you get the best from your offset smoker in your backyard.
Managing Temperature
Keep the firebox clean for better airflow. Use a chimney damper to adjust smoke flow. Check the temperature gauge often to maintain steady heat. Avoid opening the smoker door too much; it lets heat escape. Add small amounts of fuel regularly to keep the fire steady. Use water pans inside to help control heat and add moisture.
Choosing The Right Wood
Pick wood that matches your cooking style and meat type. Fruitwoods like apple and cherry add sweet, mild smoke. Hardwoods such as oak and hickory give a stronger, smoky flavor. Avoid softwoods like pine; they produce bad-tasting smoke. Use wood chunks or logs for slow, even burning. Soaking wood is optional but can create more smoke and moisture.
Frequently Asked Questions
What Tools Are Needed To Assemble An Offset Smoker?
You need basic tools like a wrench, screwdriver, and pliers. A rubber mallet helps fit parts without damage. Having a drill can speed up assembly if holes need adjustment. Always check the smoker’s manual for any special tools.
How Long Does It Take To Assemble An Offset Smoker?
Assembly usually takes 1 to 3 hours depending on experience. Reading instructions carefully before starting saves time. Organizing parts and tools beforehand helps streamline the process. Complex models might take longer, so allow extra time if needed.
How Do I Ensure Proper Airflow In My Offset Smoker?
Proper airflow is controlled by adjusting the intake and exhaust vents. Open vents increase airflow and temperature. Close them slightly to reduce heat and maintain smoke. Good airflow prevents smoke buildup and ensures even cooking.
Can I Assemble The Smoker Alone Or Need Help?
You can assemble most offset smokers alone with patience. Some heavy parts might require a second person for safety. Having help speeds up the process and reduces mistakes. Always prioritize safety when handling large components.
Conclusion
Assembling an offset smoker can seem tricky at first. Take it step by step and follow the instructions closely. Use the right tools and check all parts carefully. Once done, your smoker will be ready for great backyard cooking. Enjoy the process and the tasty results.
Practice makes perfect, so don’t rush. Soon, smoking meat will feel easy and fun. Your backyard will become a favorite spot for friends and family. Keep your smoker clean and maintained for long use. Happy smoking!
